Mortar Matching in Brooklyn & Manhattan: Neighborhood Cues That Influence the ‘Perfect’ Match
📌 Key Takeaways
A seamless repointing job starts with reading your building's specific context, not mixing a generic formula.
- Context Trumps Color Chips: Brick age, street exposure, and weathering patterns define what "matches"—not a pre-mixed bag labeled "historic."
- Test Panels Are Your Proof: Small on-wall trials validate mix, texture, and joint finish in real conditions before full-scale work begins, eliminating costly rework.
- Distance and Light Reveal Truth: Review test panels from arm's length, sidewalk, and across the street in both morning and afternoon light to catch how shadow and angle shift appearance.
- Patience Prevents Mistakes: Fresh mortar darkens with moisture; final judgment requires waiting for carbonation and proper curing to see the true color and texture.
- Documentation Builds Confidence: Labeled photos and written notes create an approval record that streamlines landmark reviews and protects your decision history.
Prepared approval = seamless façade and landmark confidence.
Historic townhouse and rowhouse owners in Brooklyn and Manhattan will find a focused strategy here, preparing them for the detailed neighborhood cue guidance that follows.
In NYC, a 'perfect' mortar match is proven on the wall, not on paper. Read neighborhood cues—brick era, patina, and joint profile—then approve a daylight test panel before full repointing.
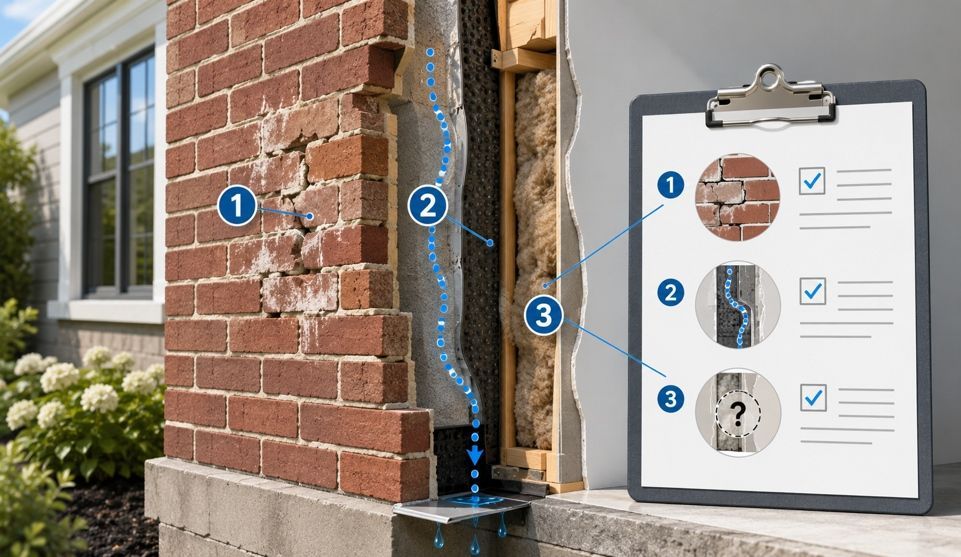
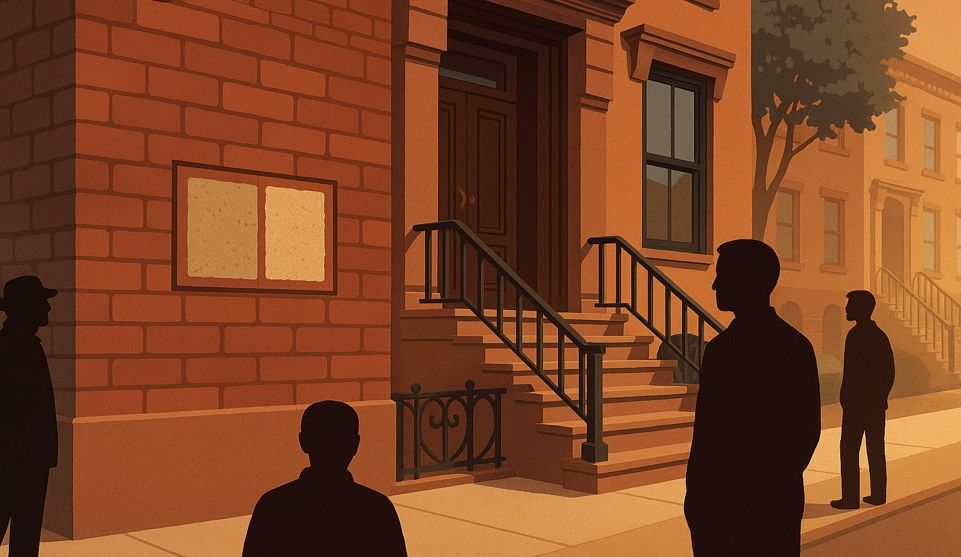
Walk down a typical Brooklyn or Manhattan block lined with pre-war rowhouses. At first glance, the brick façades look uniform—rows of warm terra-cotta or aged red that define the neighborhood's character. Look closer, though. That brownstone in Park Slope shows soft salmon tones where earlier repairs were made with the wrong mix. Two doors down, a landlocked townhouse displays joints that read nearly black against the brick, creating a patchwork effect visible from across the street.
You're facing the same decision now. Your historic home needs repointing to stop water intrusion, but the fear of ending up with visible mismatched mortar keeps you awake at night. You want the work done right—sealed against the weather, compliant with landmark requirements, and visually seamless when viewed from the sidewalk.
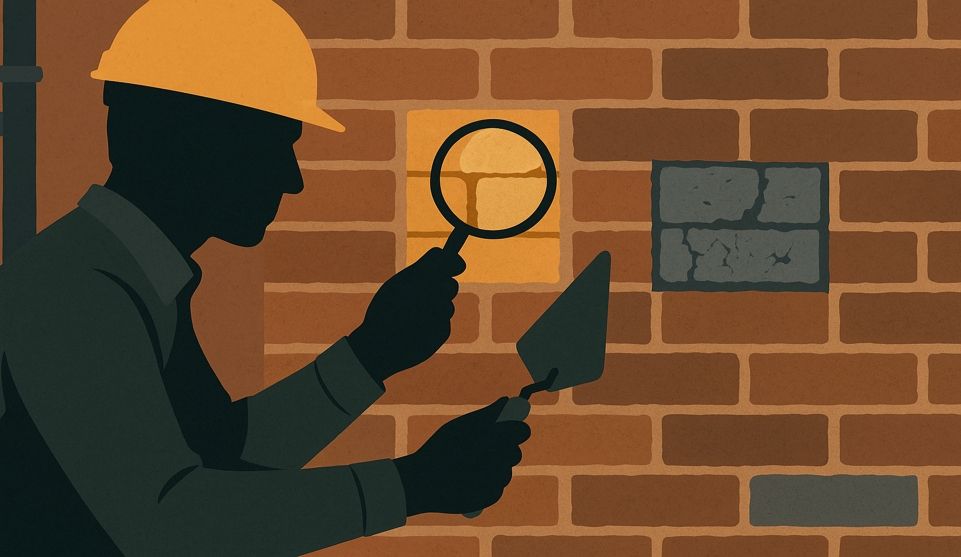
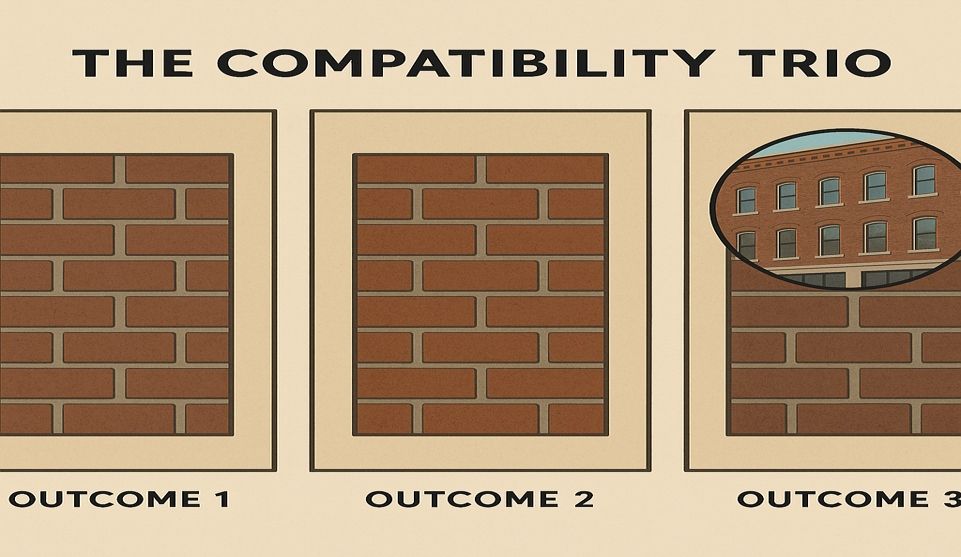
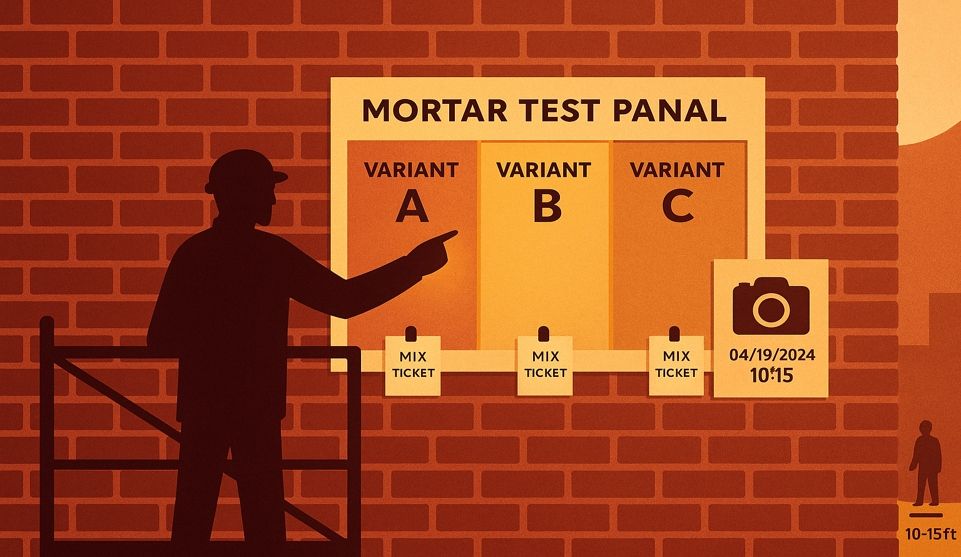
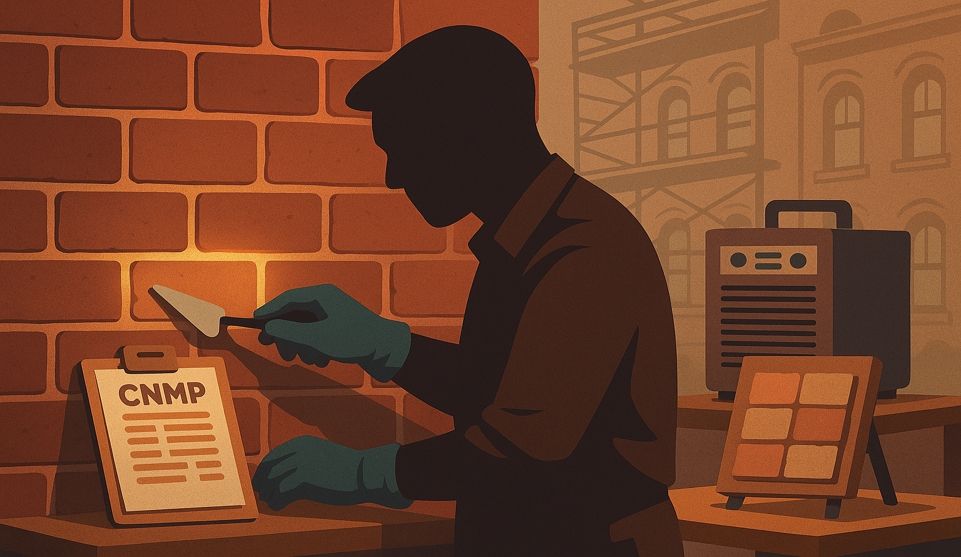
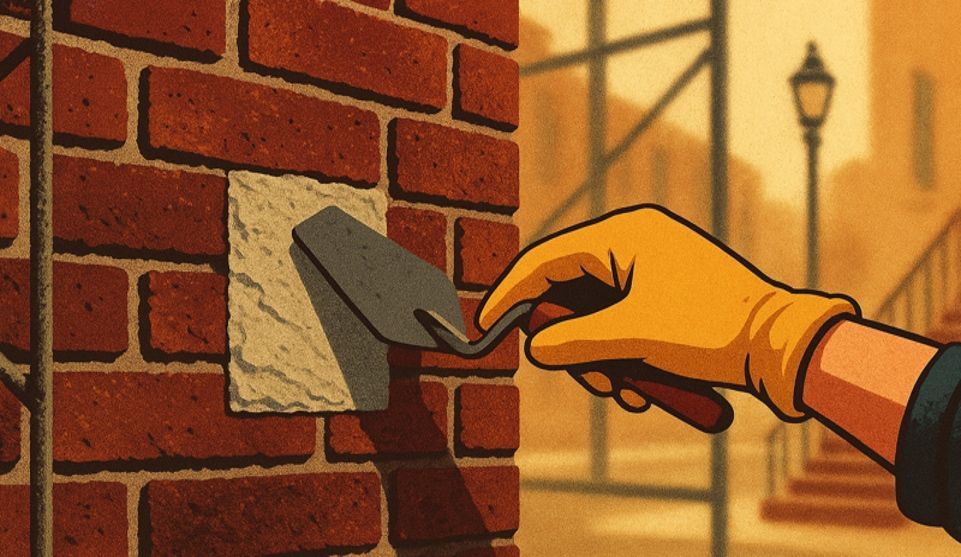
Here's what changes the outcome: a seamless repointing job doesn't start with a bag of mortar; it starts with reading your building's context. A 'perfect' match isn't just about selecting a color chip. It's about reading the specific cues your building and its street provide, then proving the match on the wall through small test panels before committing to full-scale work. Test panels confirm mix, texture, color, and joint finish before full work begins. Think of it as the paint-swatch moment for masonry—a low-risk way to get approval confidence before the crew arrives.
After approving a small on-wall match in daylight from sidewalk distance, the finished façade reads as one, not patchwork. That's the transformation: from approval anxiety to calm confidence, with documented results you can defend to your landmarks board or simply admire from your stoop. Begin with a limited sample area, review it in daylight at multiple distances, document your decision, and sign off before the full scope begins.
Why 'Neighborhood Cues' Matter for Mortar Matching
Generic mortar formulas treat all historic brick the same. A pre-measured bag might promise "historic lime" or "period-appropriate," but it can't account for whether your building was fired in 1885 or 1925, whether your block faces south into full sun or north into constant shade, or how decades of soot and weathering have shifted the brick's apparent color.
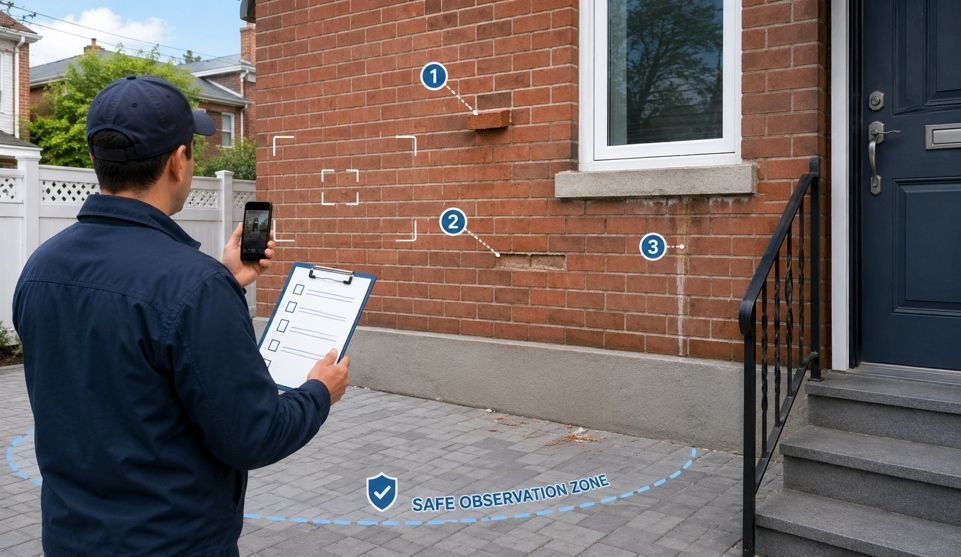
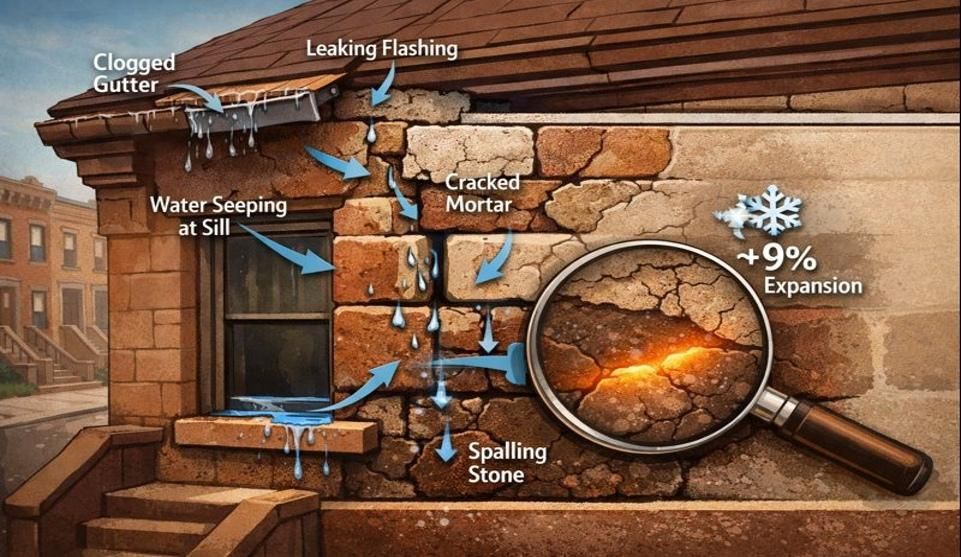
The street context sets expectations. Stand on the sidewalk. What do the neighboring façades tell you about typical joint color and texture on your block? Different streets show different characteristics based on the local clay sources and firing methods used when those neighborhoods were first built. Some blocks feature brick with cooler undertones that have been further shifted by shade and weathering. Others display warmer tones that emerge from different clay beds and sun exposure. These patterns aren't random—they reflect the materials and environmental conditions specific to each street.
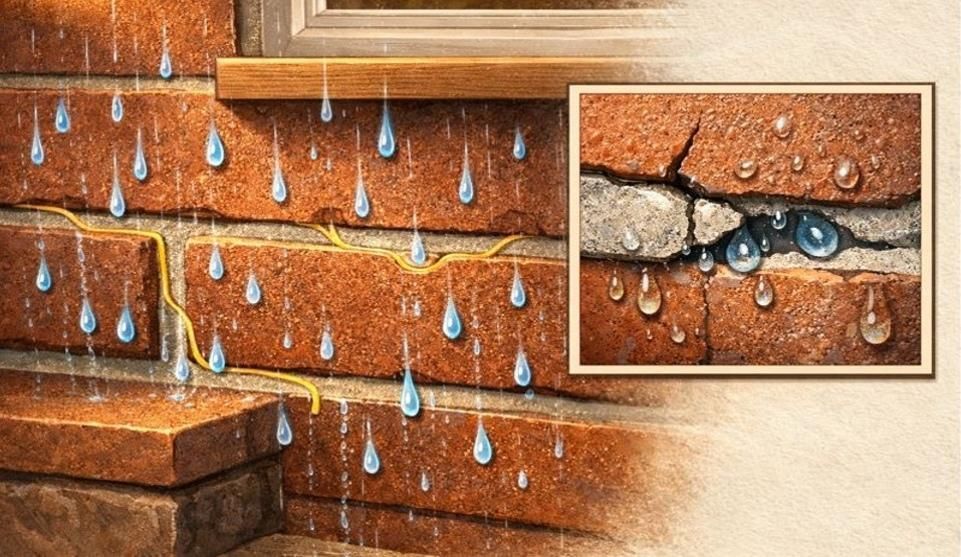
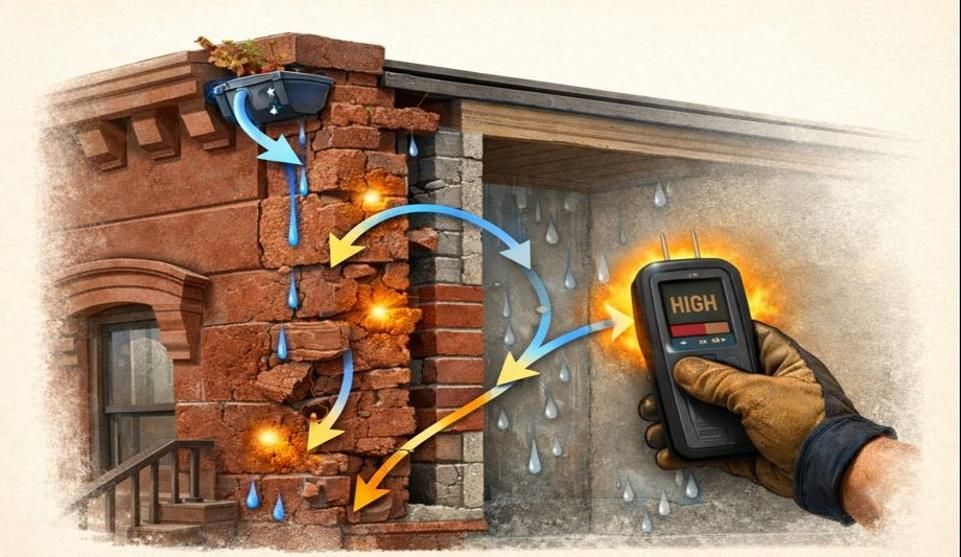
Compatibility beats generic strength ratings every time. An over-hard mortar that's technically "stronger" can trap moisture behind the brick and cause spalling—the very problem you're trying to prevent. Compatible mortar preserves historic brick by allowing the masonry system to breathe and flex as temperatures change. This is why landmark commissions and preservation specialists emphasize mortar matching as a technical and visual exercise, not just a cosmetic one.
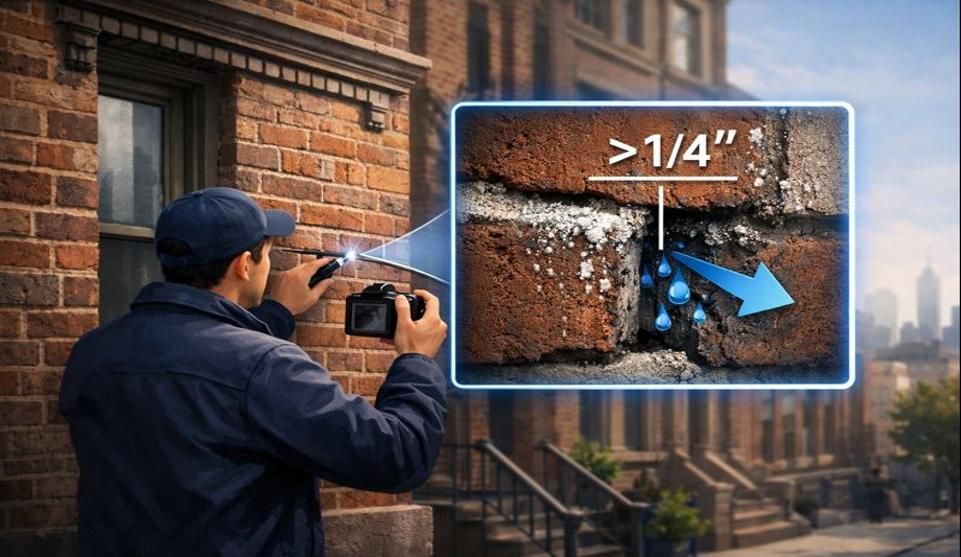
Test panels reduce the risk of expensive rework. A small trial area—often just a few square feet—lets you evaluate the match in real-world conditions before scaffolding goes up and a crew begins removing hundreds of feet of old joints. On-wall trials reduce rework and give you a decision point where you still have full control.
The Cue Set: What to Read Before You Approve
Brick Age & Firing: Baseline Tone and Inclusions
Brick age and firing directly affect the baseline tone you're trying to match. Earlier bricks, particularly those made before 1900, often show more variation within a single façade—ranging from deep red to salmon to purple-brown—because kilns were wood-fired and temperatures weren't as precisely controlled. You'll notice flecks of darker clinker or lighter undertones within individual bricks.
Later bricks, especially those from the 1920s forward, tend toward more uniform color because coal and gas firing allowed tighter temperature control. If your building falls into this era, the match typically requires less tonal range but demands greater precision in hitting that narrow color band.
Noting these characteristics helps you communicate with your contractor. When you say "my brick shows a lot of variation," you're signaling that the mortar mix might benefit from slightly varied batches or aggregate choices that won't look jarring against the brick's natural range.
Patina & Environment: Soot, Salt, and Sun Exposure
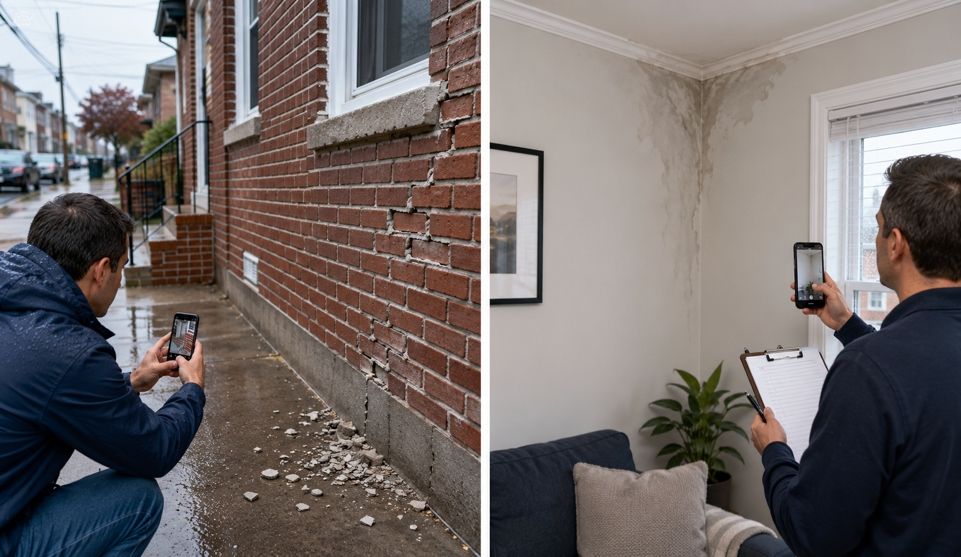
Patina and environment shift the perception of what "matches." A building facing a heavily trafficked avenue in Manhattan or near the BQE in Brooklyn accumulates decades of soot and exhaust residue. The brick may have started as bright red but now reads charcoal-gray in shadowed areas. Matching to the original color would create an obvious contrast; matching to the weathered appearance maintains visual continuity.
Salt exposure matters, too. Properties near the water—whether along the East River, Prospect Park Lake, or closer to the coast in Queens and Nassau County—can show efflorescence or salt staining that lightens the brick's appearance. Sun exposure creates its own gradients: south-facing façades bleach and fade over time, while north-facing walls retain deeper, cooler tones.
Before approving a test panel, walk around your building at different times of day. Note where shadows fall, where water has historically run down the wall, and where pollutants or salt have left their mark. These factors shape how the new mortar will read once it cures and weathers in.
Joint Profile: How Finish Changes Shadow and Perceived Color
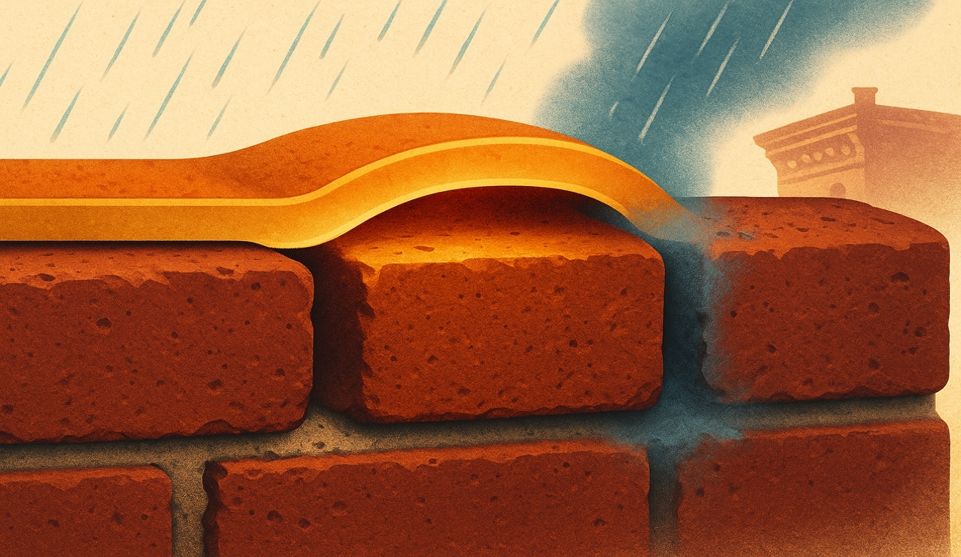
Joint finish shapes appearance as much as color does. The same mortar mix can look dramatically different depending on whether it's tooled flush, slightly recessed (weathered joint), or finished with a concave profile.
A concave joint creates a shadow line that makes the mortar read darker from street level, even if the actual color is relatively light. This profile is common in many NYC rowhouse districts and often provides the best weather protection by shedding water away from the brick face. A flush joint, by contrast, catches more light and can make the mortar appear lighter and more prominent. A weathered (slightly recessed) joint minimizes the visual presence of the mortar, letting the brick dominate.
When you review test panels, pay attention to this effect. Ask your contractor to show you the same mix with different joint finishes if you're uncertain. The profile you choose will influence whether the repair reads as subtle or stands out, regardless of how closely the color matches.
Texture & Aggregate: Matching Sand Size and Binder Character
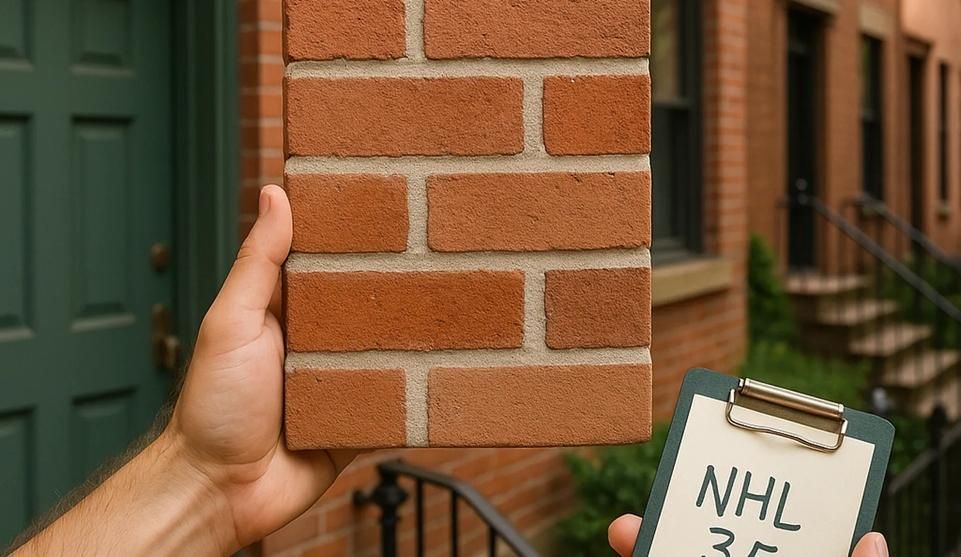
Texture and aggregate size round out the match. Historic lime mortars often used local sand with a specific grain size and color. Some sands were coarser and included small pebbles, creating a rough texture. Others were finer, producing a smoother, almost buttery finish.
The binder character—whether the mix is predominantly lime, a lime-cement blend, or includes natural hydraulic lime—also affects how the surface looks once tooled. Pure lime mortars tend to have a softer, more matte finish. Blends with some cement can appear slightly denser and shinier.
When evaluating a test panel, look closely at the surface. Does the texture match the surrounding original mortar, or does it feel too smooth or too coarse? Run your hand gently over both the test area and an undisturbed section. The tactile quality should be similar. Matching sand size and binder character ensures the repair integrates physically and visually with the existing masonry.
How to Review NYC Test Panels in Daylight
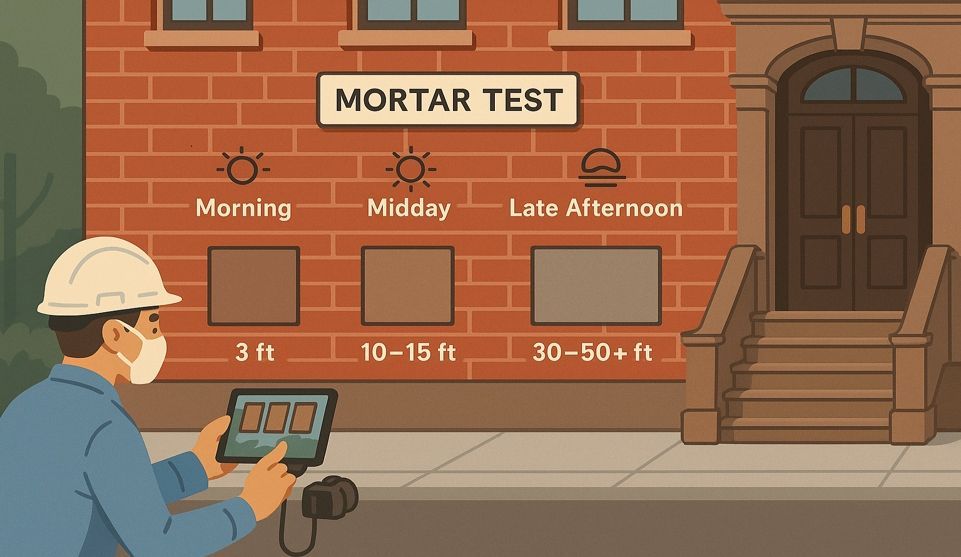
Multi-Distance Checks: Arm's Length, Sidewalk, Across the Street
Reviewing test panels requires looking from multiple distances because mortar reads differently at each one. Start at arm's length. This close view reveals texture, aggregate size, and fine color variations. You're checking that the mortar's surface character aligns with the historic joints nearby.
Step back to the sidewalk, roughly 10 to 15 feet away. This is the distance most people experience your building daily—neighbors walking by, delivery drivers, guests arriving. At this range, the joint profile and overall tone become more important than fine texture. Does the test panel blend seamlessly, or does it jump out as noticeably lighter or darker?
Finally, cross the street and look back. From 40 or 50 feet, individual joints disappear into the overall read of the façade. This distance test confirms whether the repair will maintain the building's unified appearance or create a distracting patch. If the panel passes all three distance checks, it's a strong candidate for approval.
Angles & Timing: AM Versus PM Light to See True Texture and Tone
Angles and timing change how mortar color and texture appear. Morning light tends to be cooler and more diffuse, especially on east-facing walls. This softer illumination can make colors appear more muted and can hide textural differences. Afternoon and evening light is warmer and often more direct, especially on south and west exposures. Warmer light can amplify red and orange tones in both brick and mortar, and the lower angle creates sharper shadows that emphasize joint profile and surface texture.
Review your test panel in both AM and PM light if possible. Mortar that looks perfect at 9:00 AM might appear too light or too pink at 5:00 PM when the sun hits it directly. Ideally, approve the panel under the lighting conditions that occur most frequently for that elevation. A north-facing façade might never see strong afternoon sun, so morning or overcast review is more relevant. A south-facing wall bakes in full sun most of the day, so midday or late-afternoon evaluation is critical.
Checking at different angles also matters. View the test panel straight-on, then from an oblique angle as you'd see it walking down the block. Oblique views emphasize texture and reveal whether the joint finish catches light differently than the surrounding historic mortar.
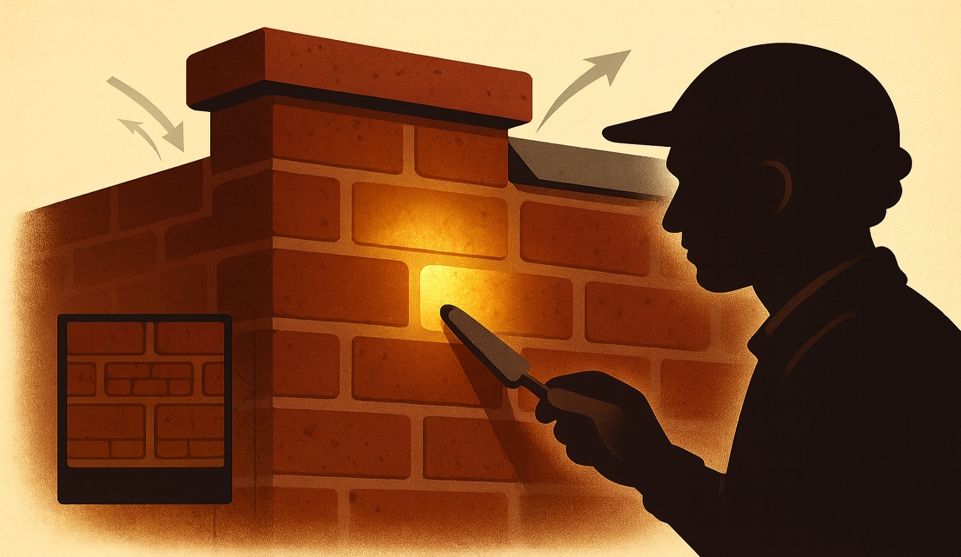
The Curing Window: Why Patience Matters
Don't rush your final judgment. Freshly applied mortar looks wetter and often darker than it will after proper curing. As moisture evaporates and the lime binder begins to carbonate—a chemical process that can take days or even weeks depending on weather—the color lightens and the texture stabilizes. An early assessment might lead you to reject a panel that would have been perfect once fully cured, or approve one that shifts too much as it dries.
Ask your contractor how long the test panel needs before you make a final call. In cool, humid conditions, allow more time. In hot, dry weather, the surface may cure faster but still benefit from a few days of observation. This patience prevents costly mistakes and ensures the approved mix will deliver the appearance you expect across the entire façade.
Photo Documentation: Labeling and Keeping Decision History
Photo documentation creates a decision history you can reference later and share with contractors, architects, or landmark reviewers. When you photograph a test panel, label each image clearly: note the date, time of day, weather conditions (sunny, overcast, after rain), and the distance from which you took the shot.
Include close-ups that show texture and aggregate, mid-range shots from the sidewalk, and wide shots from across the street. Capture the test panel alongside an area of original, undisturbed mortar for direct comparison. If you're reviewing multiple test panels with different mixes or finishes, label each one distinctly so you can track which sample corresponds to which formula.
These photos become your approval record. If a question arises later—"Why did we choose this mix over that one?"—you have visual evidence of how each option performed under real-world conditions. For properties in NYC landmark districts, this documentation can streamline the review process and demonstrate that you followed a methodical, preservation-conscious approach.
Landmark Confidence: Aligning with LPC Expectations
In landmarked neighborhoods across Brooklyn, Manhattan, the Bronx, and other boroughs, small on-wall trials are typically a required step in the approved work scope. The NYC Landmarks Preservation Commission expects property owners to prove that the proposed mortar is compatible—not just in theory, but as installed on the building.
Recording color, texture, and joint finish in your test panel documentation provides the evidence the LPC needs to evaluate your proposal. Include written notes alongside photos: describe the mortar formula (lime-to-sand ratio, aggregate source, any pigments), note the joint profile you selected, and explain how the test panel aligns with the building's original character and the neighborhood context.
Clear approve-or-iterate choices speed scheduling. If your first test panel doesn't quite hit the mark, document why and request a second trial with adjusted parameters—perhaps a slightly coarser sand, a different joint finish, or a minor color tweak. Most contractors experienced in historic masonry work expect some iteration and build time for it into the project timeline. The goal isn't perfection on the first try; it's a methodical process that arrives at the right match through evidence and adjustment.
Your Next Step: From Sample to Seamless Repointing
Neighborhood Cue Checklist:
- Brick era and firing characteristics noted
- Patina and environmental factors considered
- Joint profile selected for optimal street-level appearance
- Texture and aggregate size matched to original mortar
- Daylight multi-distance review completed
- Photos labeled with conditions; approval decision recorded
Start with a limited test area on an inconspicuous section of your façade—perhaps near a side elevation or a section that's less visible from the street. This keeps the stakes low while you refine the match. Confirm the match in context by reviewing it at multiple distances, in different lighting, and with input from anyone else involved in the decision (co-owners, architects, landmark consultants).
Once you approve the test panel, the contractor can proceed with confidence, knowing the mix, texture, and joint finish have been validated. Then protect the result with sensible maintenance: inspect joints annually for new cracks, address water management issues promptly, and avoid applying sealants or coatings that can trap moisture and undo all the careful compatibility work.
If you're ready to move from uncertainty to a documented, landmark-ready mortar match, schedule your free on-site inspection or call us now at (718) 849-8999.
Frequently Asked Questions
What is mortar matching for historic brick?
Aligning color, texture, and joint finish—proven on-wall via test panels—so repaired areas read as one with the original masonry.
Why can an over-hard mortar harm historic brick?
Too-strong mixes can trap moisture and cause spalling. Compatibility matters more than generic strength ratings.
How should I review a test panel?
In daylight from multiple distances and angles. Compare against surrounding brick and joints. Document settings and sign off before full work.
What does 'joint profile' change?
It controls shadow and the way color reads from the street. Profile choice can alter appearance as much as color.
Do I need LPC approval?
In landmarked districts, follow LPC guidance and use documented test panels to streamline review and approvals.
Disclaimer: This article provides general educational guidance for NYC historic masonry. For landmarked properties, consult LPC requirements and approve on-wall test panels before full work.
Our Editorial Process: This article follows City Suburb's 'mortar-first' editorial charter. Draft created from homeowner guidance and on-site practices; reviewed for compliance tone and clarity before publication.