Historic Brick Pointing in Brooklyn Heights & Park Slope: A Homeowner’s First Assessment Guide
📌 Key Takeaways:
Historic brownstone owners face a critical choice: use compatible mortar that protects the brick, or risk permanent damage with modern cement-heavy mixes that trap moisture and cause spalling.
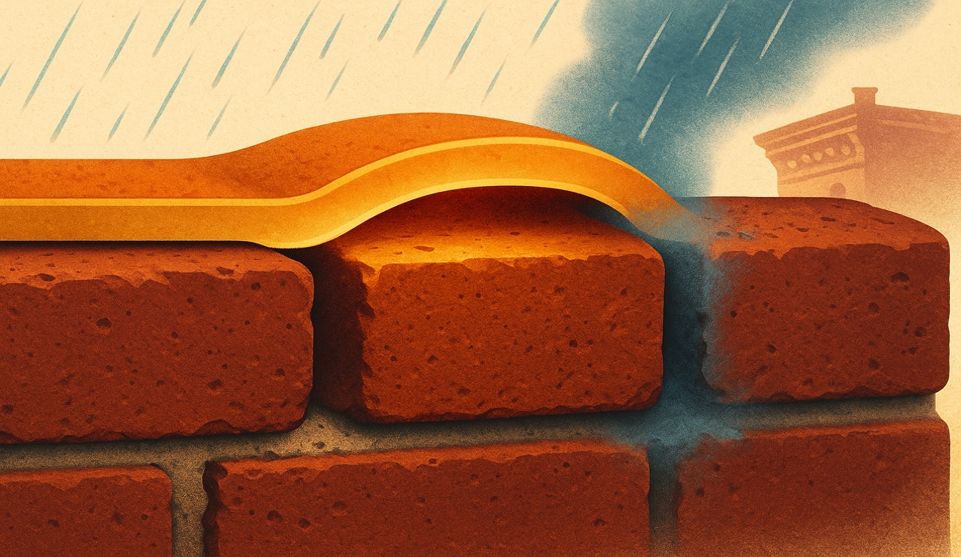
- Mortar Should Sacrifice Itself, Not the Brick: Lime-rich mortars remain softer and more permeable than historic brick, allowing joints to absorb stress and moisture damage while preserving irreplaceable masonry units for future generations.
- Test Panels Prevent Expensive Regret: Mock up two to three square feet of repointing in discrete locations, then review under varied light and weather conditions at multiple distances before committing to full-scale work—color and texture shifts during curing can't be judged from samples alone.
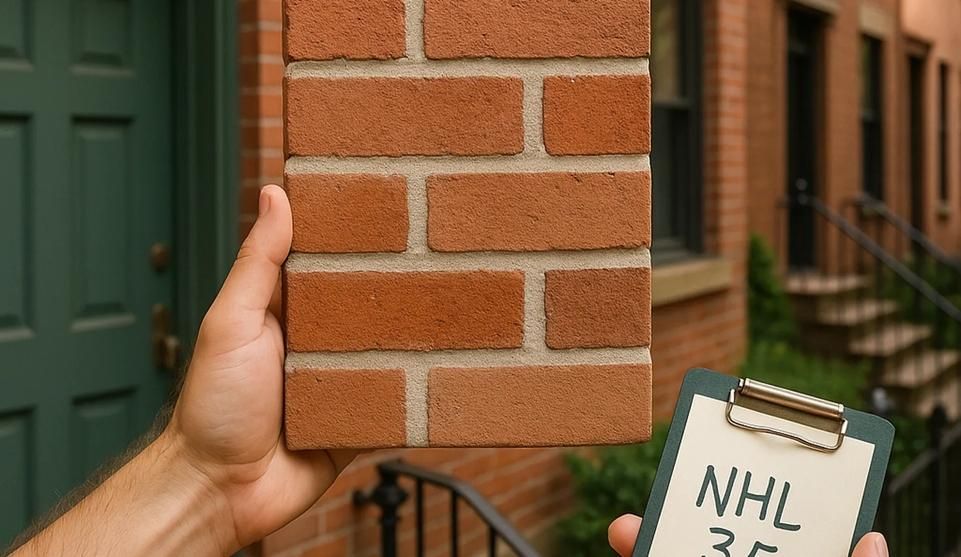
- Natural Hydraulic Lime Bridges Old and New: NHL 2 and 3.5 grades offer balanced strength and breathability for pre-war brick, setting through both hydration and carbonation while maintaining the vapor permeability that soft 19th-century masonry requires to dry properly.
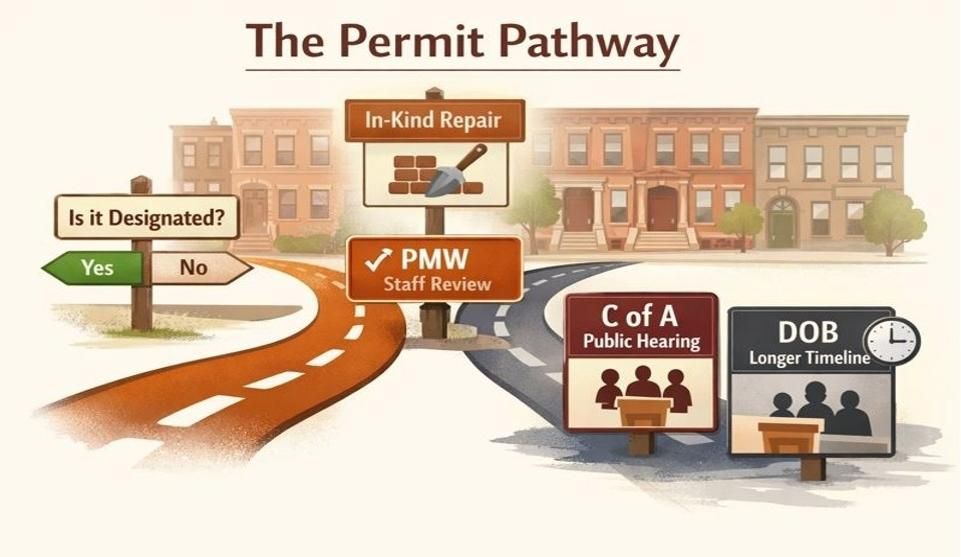
- Landmark Districts Demand Documentation: NYC LPC permits typically require test panel approvals for visible masonry work in historic districts, making the documented trial-and-approve sequence a regulatory necessity, not just best practice.
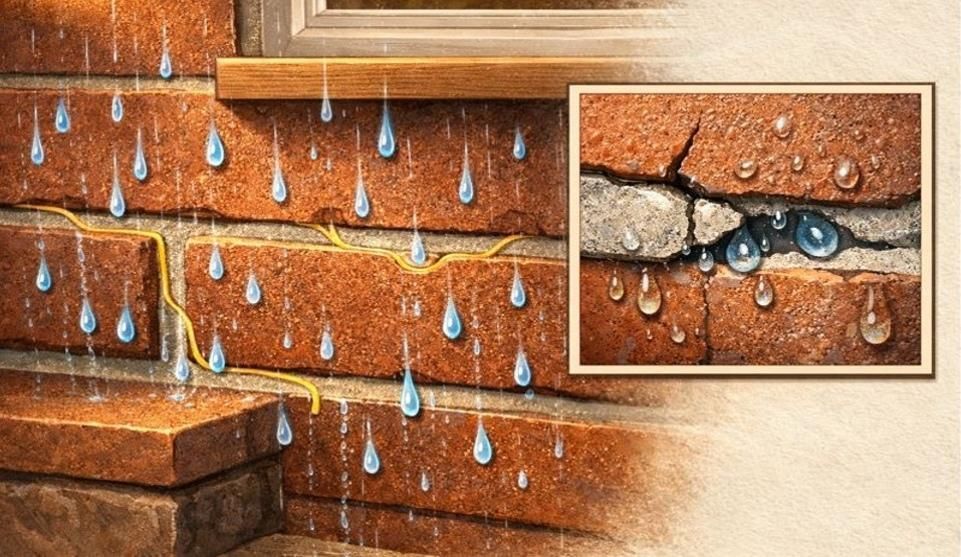
- Salt Deposits Signal Active Moisture Problems: White mineral residue at lintels, sills, and parapets indicates water is already penetrating and evaporating through the wall—a sign that joint failure has progressed beyond surface deterioration.
Compatible mortar preserves; incompatible mortar destroys. Test first, scale second.
For owners of pre-war and landmarked brownstones in Brooklyn's historic districts who need to stop water damage without scarring their façades, these principles guide stewardship over shortcuts.
Disclaimer: This article is educational and not a permit, code, or LPC approval. Field conditions vary; decisions must be confirmed by a qualified contractor and, where applicable, NYC LPC. Safety note: cutting/raking mortar can generate dust; follow OSHA/NYC requirements and use containment.
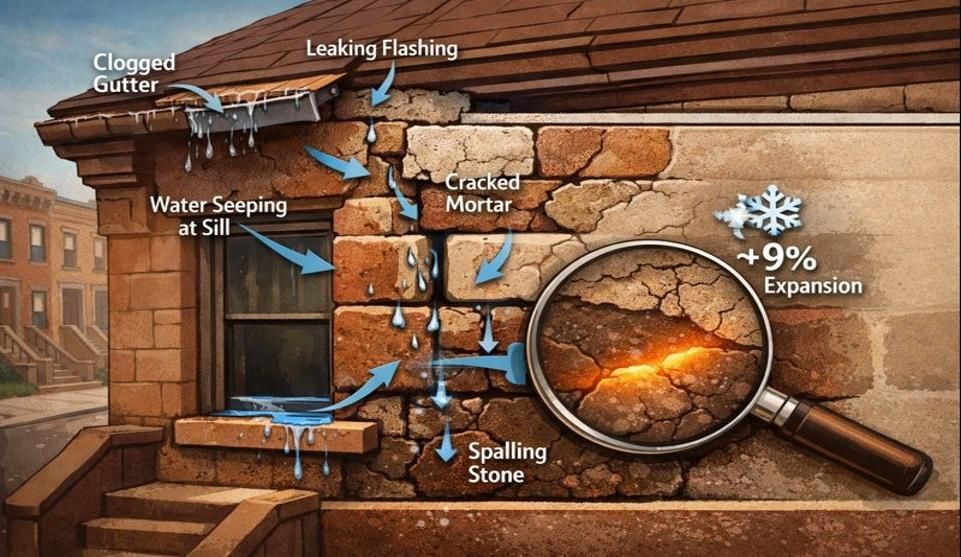
Brick repointing restores mortar joints to seal out moisture and protect historic masonry. When you stand on a Brooklyn Heights sidewalk and notice powdery residue at the base of your brownstone, or spot a widening gap where the mortar once held firm, you're witnessing deterioration that demands attention. Left unchecked, those open joints become highways for water intrusion, threatening the structural integrity and appearance of brick that has stood for over a century.
For owners of pre-war and landmarked properties in neighborhoods like Park Slope and Brooklyn Heights, repointing isn't just maintenance—it's stewardship. The right approach preserves neighborhood character while preventing costly damage. The wrong approach can scar a façade for generations. Think of historic brick pointing as re-stitching a favorite coat: the goal is to restore function and appearance without changing the original character of the garment.
This guide shows you how to read your brick from the sidewalk, understand what "compatible mortar" actually means, and use test panels to validate your choices before committing to a full scope. By the end, you'll have a framework for moving from uncertainty to an approval-ready plan.
Read Your Brick Like a Pro (From the Sidewalk)
Start with what you can see from street level. Walk the perimeter of your building during daylight hours and look for telltale signs. Deterioration rarely announces itself uniformly—it concentrates in predictable zones where water exposure is highest or where previous repairs created vulnerabilities.
The Mortar-First Mindset: Stop Leaks Without Scarring the Façade
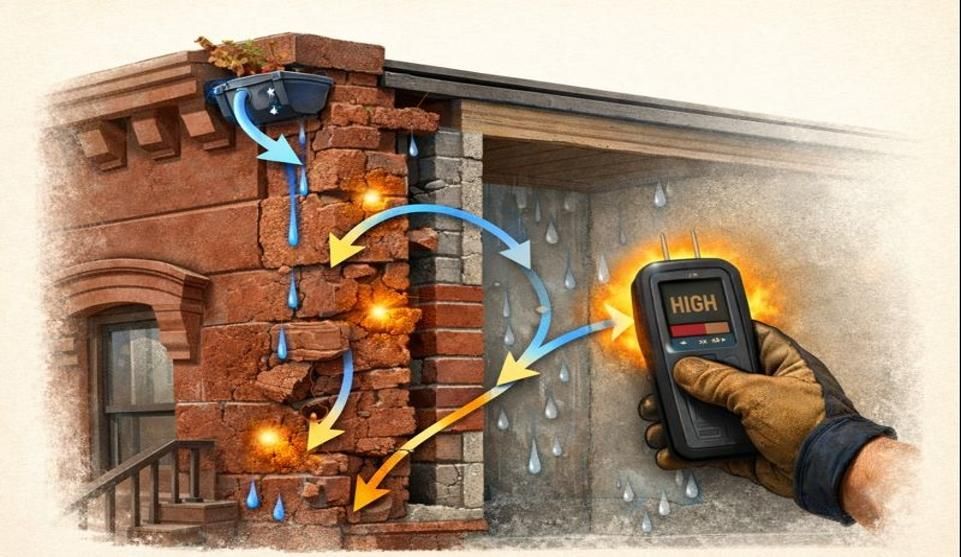
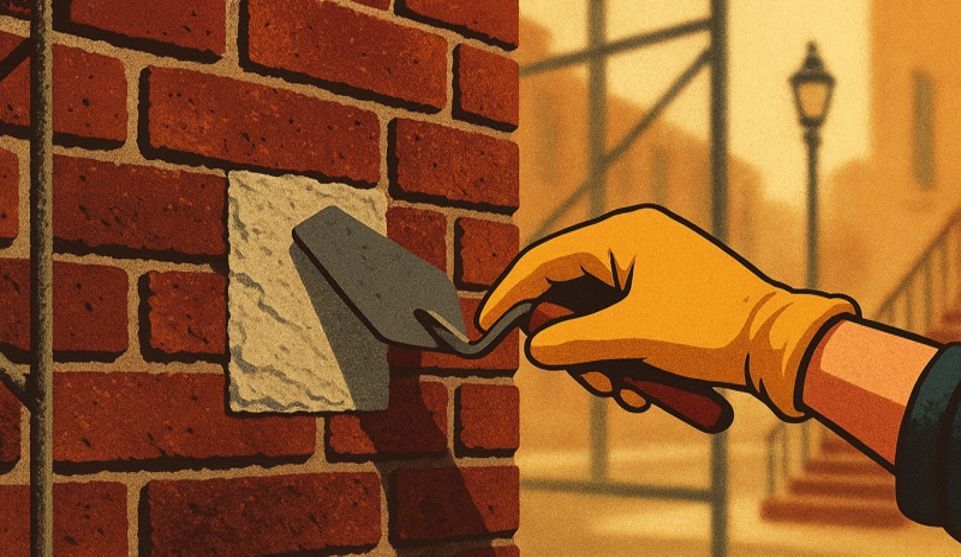
Historic brick repointing prevents water intrusion by sealing compromised joints before moisture penetrates the wall assembly. The mortar is your first line of defense. When joints erode, water enters freely, freeze-thaw cycles accelerate damage, and interior plaster begins to show staining or efflorescence.
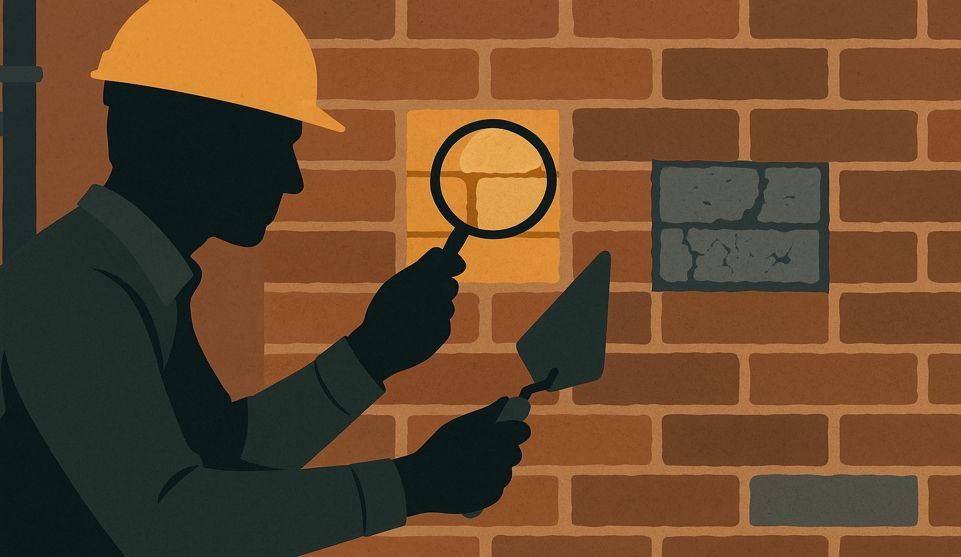
A mortar-first problem-solving approach means diagnosing joint condition before brick condition. Use compatible mixes, validate your choice with small on-wall trials in discrete test panels, and select joint profiles that fit the façade's original character. This sequence—diagnose, trial with test panels, approve, execute, protect—prevents the costly mistake of using generic "strong" mortar that ultimately damages softer historic brick.
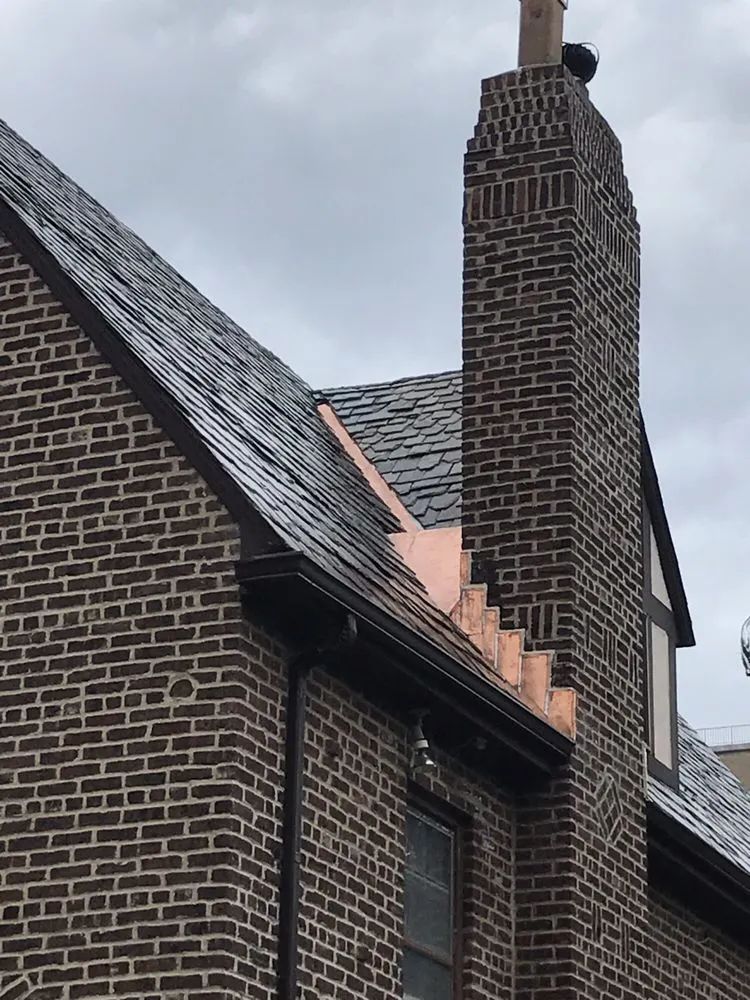
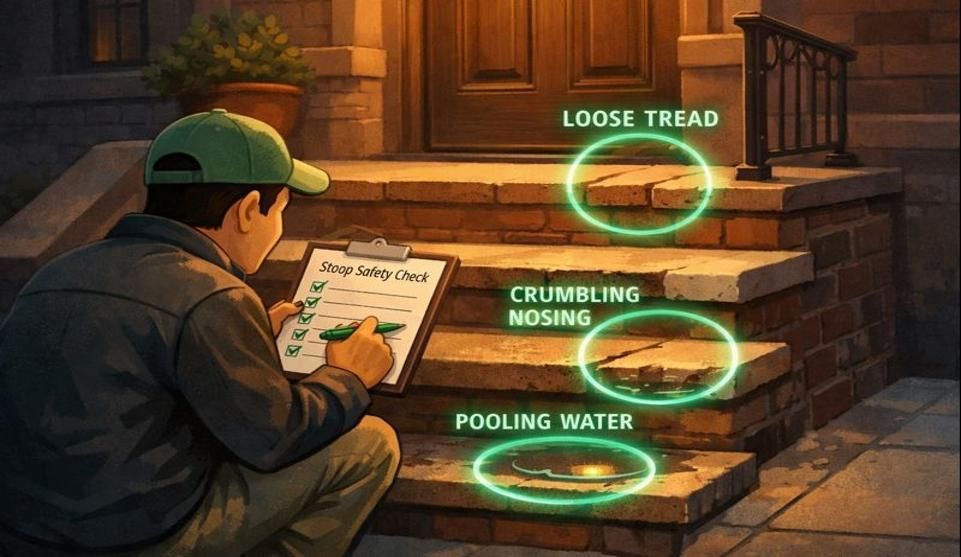
Where Deterioration Shows Up First (Lintels, Sills, Parapets)
Concentrate your inspection on three critical areas. Window lintels bear significant load and are exposed to runoff; look for rust stains, spalling brick, or mortar that has turned to powder. Sills shed water but are prone to settlement cracks that open joints below them. Check for white salt deposits—a sign that moisture is evaporating through the masonry and leaving mineral residue behind. Parapets sit fully exposed at the roofline, taking the brunt of weather from all directions.
Mismatched patches in these zones often signal previous emergency repairs done without compatibility testing. If you see bright white Portland cement joints next to original lime-based mortar, that's a red flag. The hard modern patch can trap moisture against adjacent soft brick, causing the brick itself to deteriorate while the patch remains intact—exactly the opposite of what historic masonry needs.
For comprehensive masonry services that address these vulnerable areas, working with contractors experienced in historic buildings ensures proper assessment from the start.
What 'Compatible Mortar' Really Means for Brooklyn Brownstone Brick
Compatibility isn't about matching color or achieving maximum strength. It's about creating a mortar that protects the brick by being slightly weaker and more permeable than the masonry units themselves. According to the National Park Service's detailed guidance on repointing historic masonry, compatible mortar preserves historic brick while sealing out moisture, allowing the mortar joint to act as a sacrificial element that can be replaced without damaging the surrounding brick.
Hard vs. Soft: Why Strength Ratings Mislead
Generic strength ratings—often expressed as compressive strength in PSI—tell only part of the story. A mortar rated at 2,500 PSI sounds robust, but if your brick is softer than that, the differential causes problems. When water freezes inside the wall, the harder mortar forces the expansion stress into the brick face, leading to spalling and surface loss.
Pre-war brownstone brick in Brooklyn was typically fired at lower temperatures than modern brick, resulting in a more porous, softer unit. The original lime mortars were intentionally softer still, creating a system where any stress or moisture damage appeared first in the replaceable joint, not in the irreplaceable brick. For projects requiring this level of precision, natural hydraulic lime mortars—particularly NHL 2 or NHL 3.5 grades—offer a middle ground, setting through both hydration and carbonation while maintaining vapor permeability. Modern Portland cement-heavy mixes reverse this protective relationship, turning the mortar into armor that destroys what it's meant to protect.
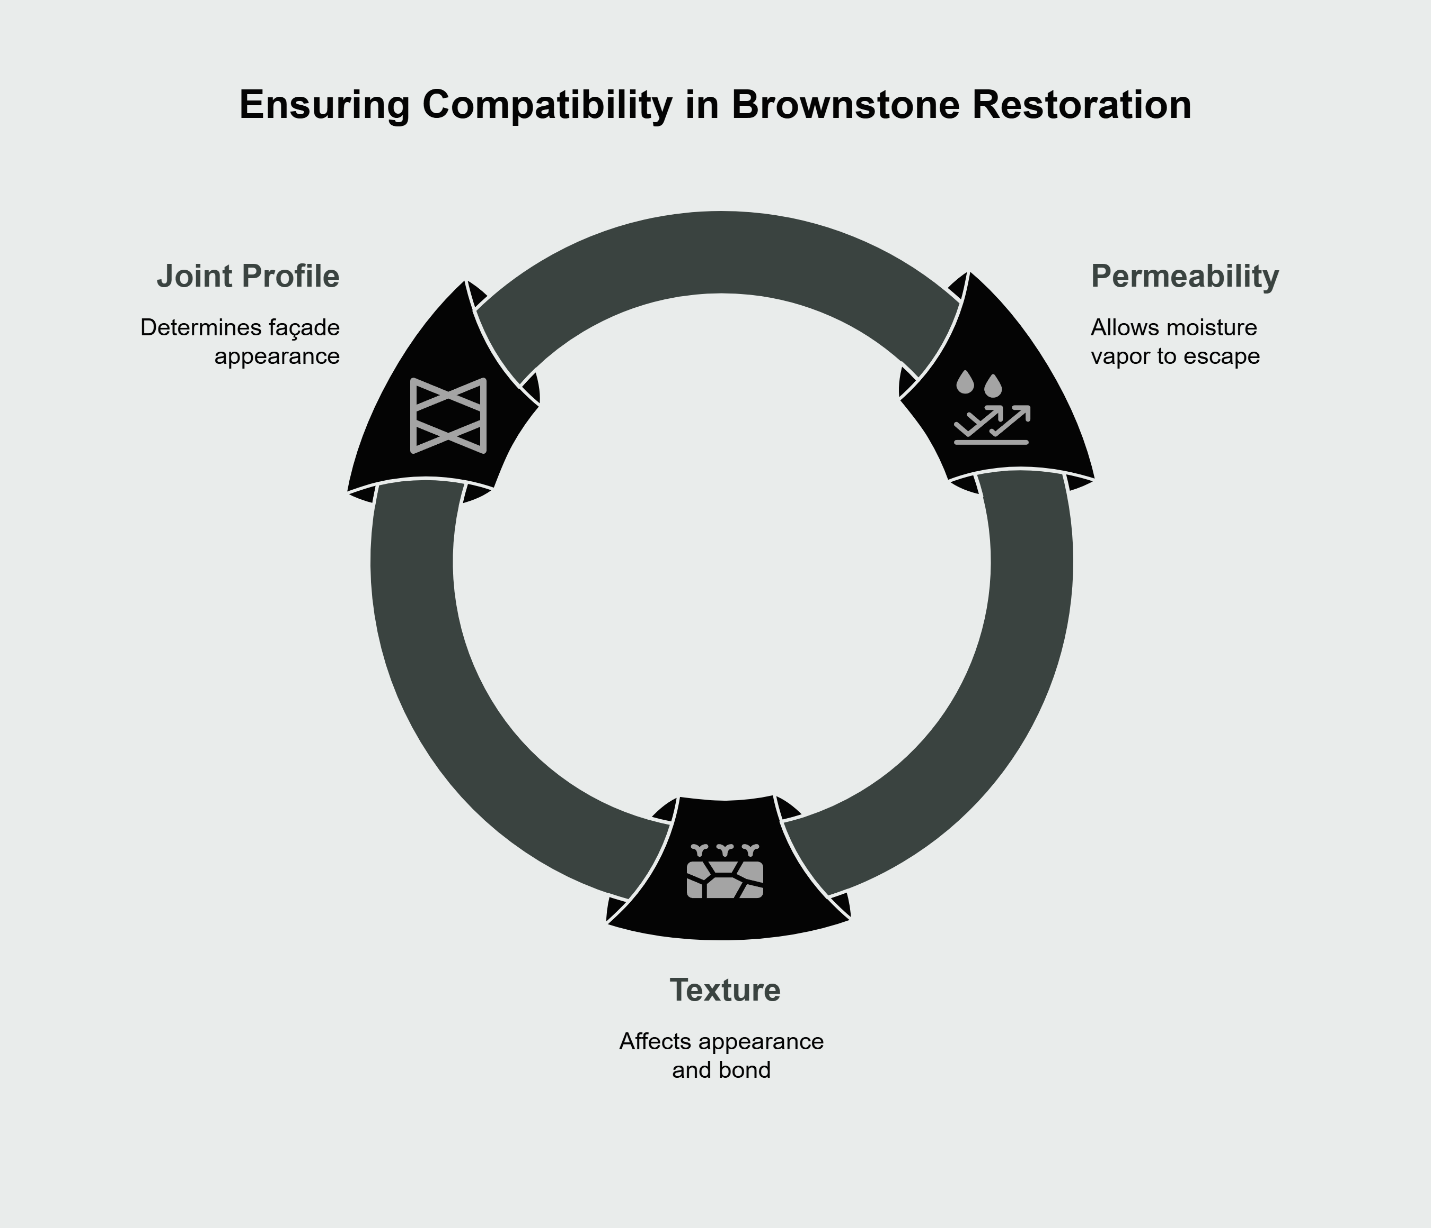
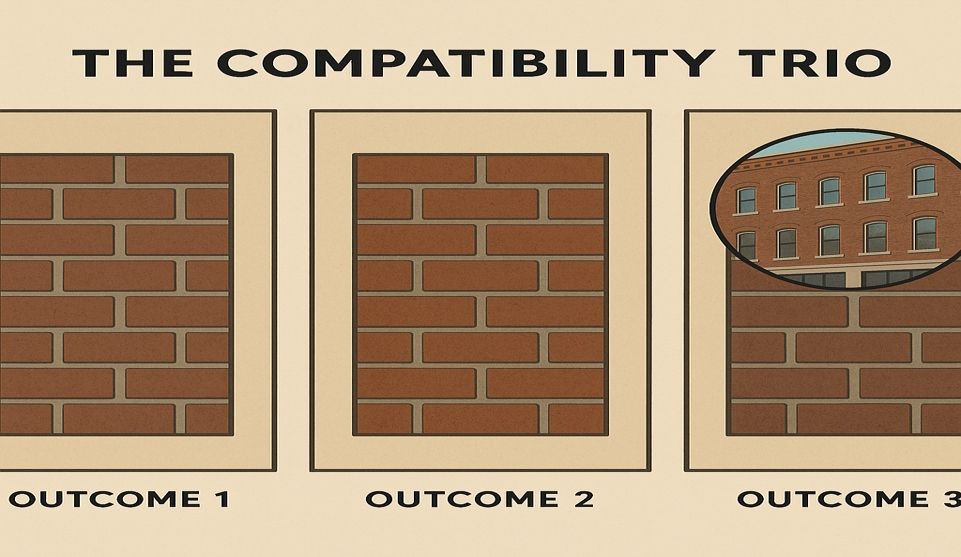
Permeability + Texture + Joint Profile (the Compatibility Triangle)
Three factors define true compatibility. Permeability allows moisture vapor to escape rather than becoming trapped behind a hard, impermeable crust. Texture affects both appearance and bond—too smooth and the mortar doesn't key properly into the brick; too rough and it creates ledges that hold water. Joint profile determines how the façade reads from the street: a concave joint creates shadow lines that emphasize individual bricks, while a flush joint presents a more unified plane.
A fourth consideration matters for landmark work: reversibility. Future stewards should be able to remove and replace the mortar you install today without damaging the brick, just as you're now addressing joints installed a century ago. Lime-rich mortars inherently support this principle because they remain workable and removable over time.
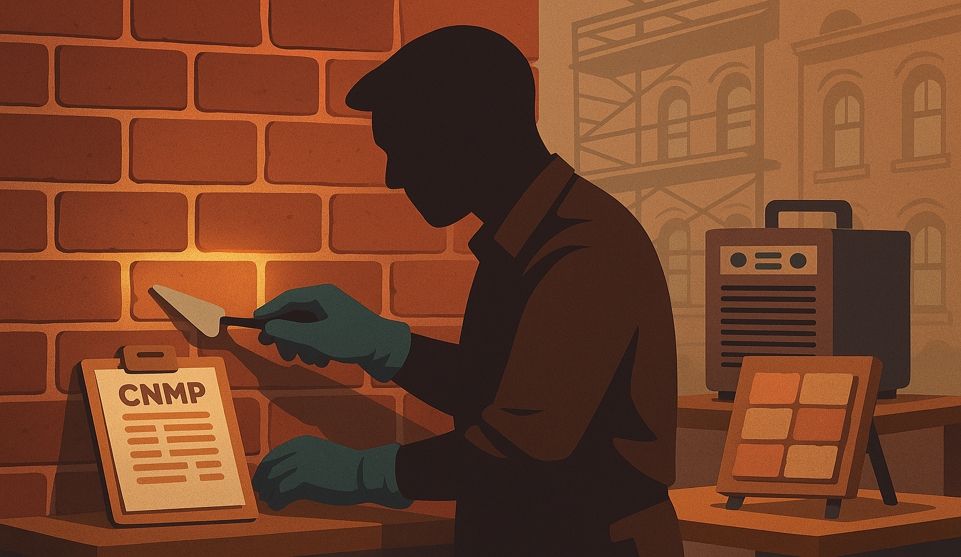
These elements form what can be visualized as a Compatibility Triangle. Get one wrong and the repair fails visually or functionally, even if the chemistry is correct on paper. Technical testing procedures, such as those outlined by the U.S. General Services Administration for historic masonry, can validate compatibility before full-scale application. This is why test panels matter—they let you evaluate all three dimensions under real-world conditions before committing to the full scope. The NYC Landmarks Preservation Commission emphasizes that daylight review at multiple distances increases approval confidence and helps identify mismatches that aren't apparent in small samples.
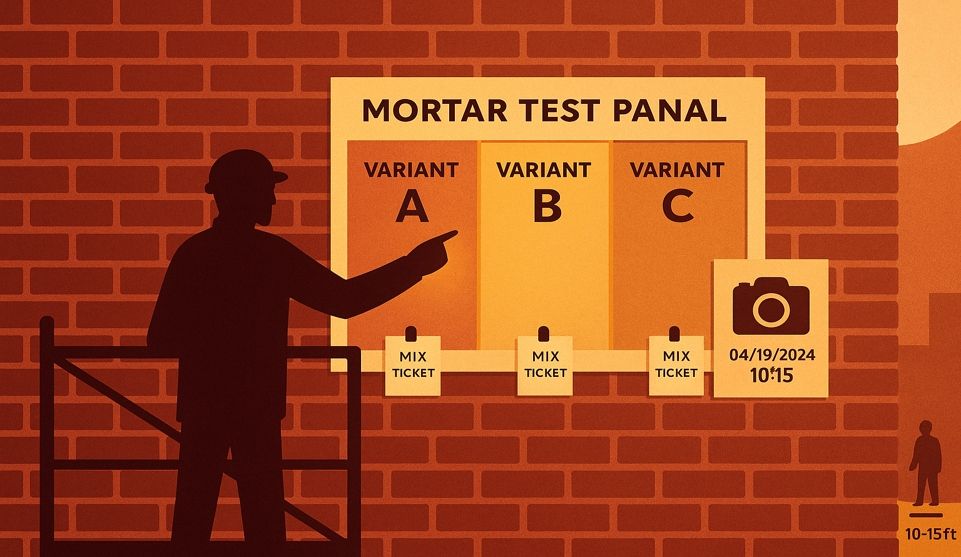
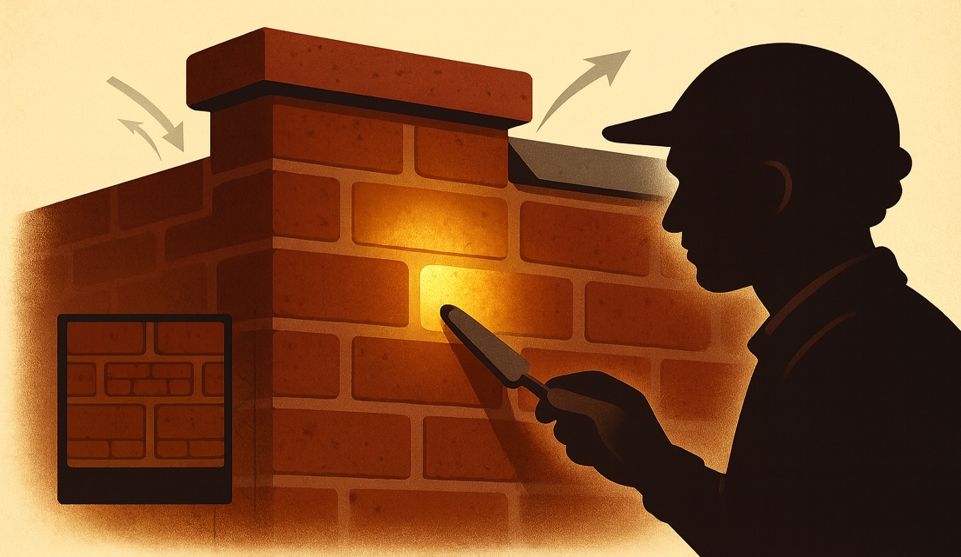
Test Panels: Your Paint-Swatch Moment for Masonry
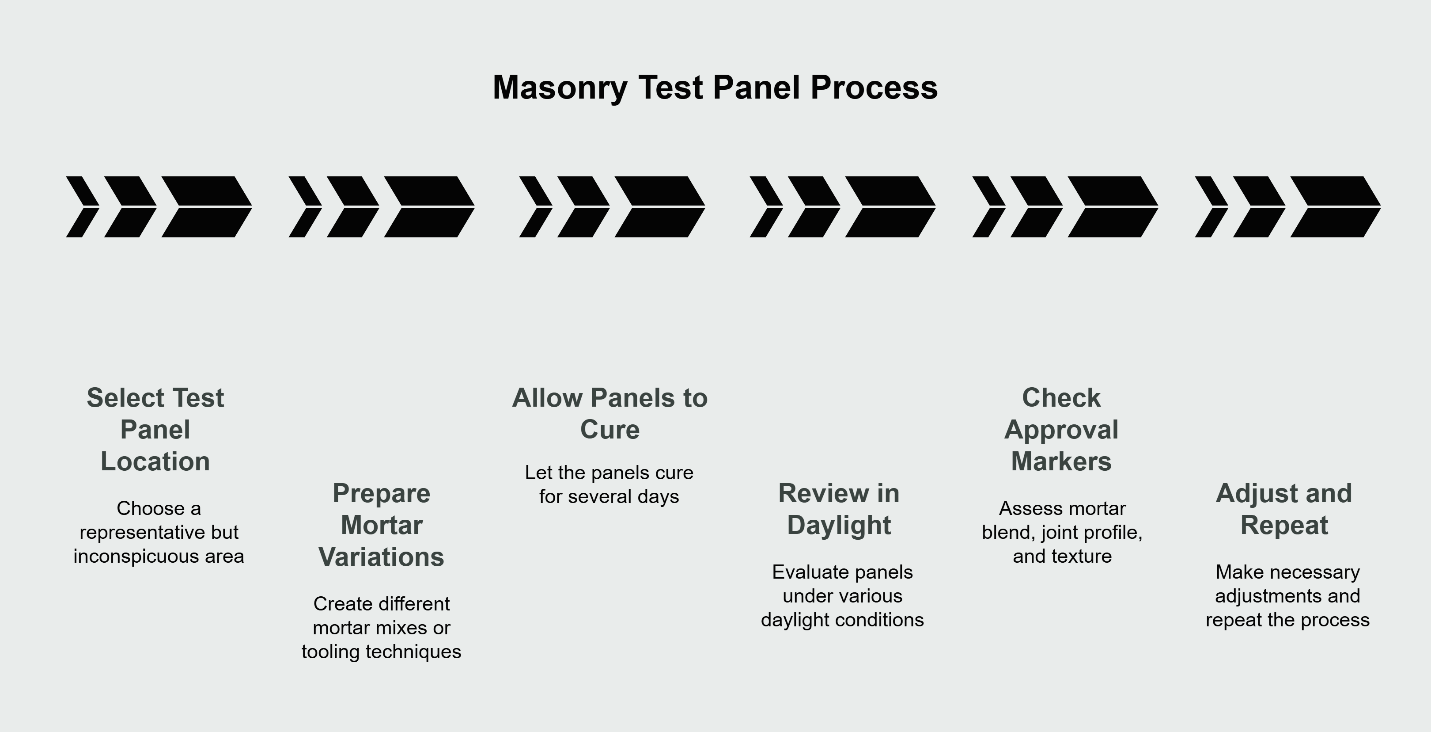
A test panel is a small section of repointed masonry—typically two to three square feet—installed on an inconspicuous area of your façade. It functions as a real-world sample, allowing you to evaluate mortar color, texture, tooling, and joint profile before scaling to the entire building. Just as you wouldn't paint your living room based on a one-inch color chip, you shouldn't repoint your brownstone without an on-wall trial.
The process follows a clear sequence. First, select a location that's representative of the overall façade but not highly visible from the street—a side elevation or a section above eye level works well. Your contractor should prepare at least two variations using different mortar mixes or tooling techniques. Allow the panels to cure for several days, as mortar color shifts significantly during the curing process.
How to Approve in Daylight: Distance, Angles, and Context Shots
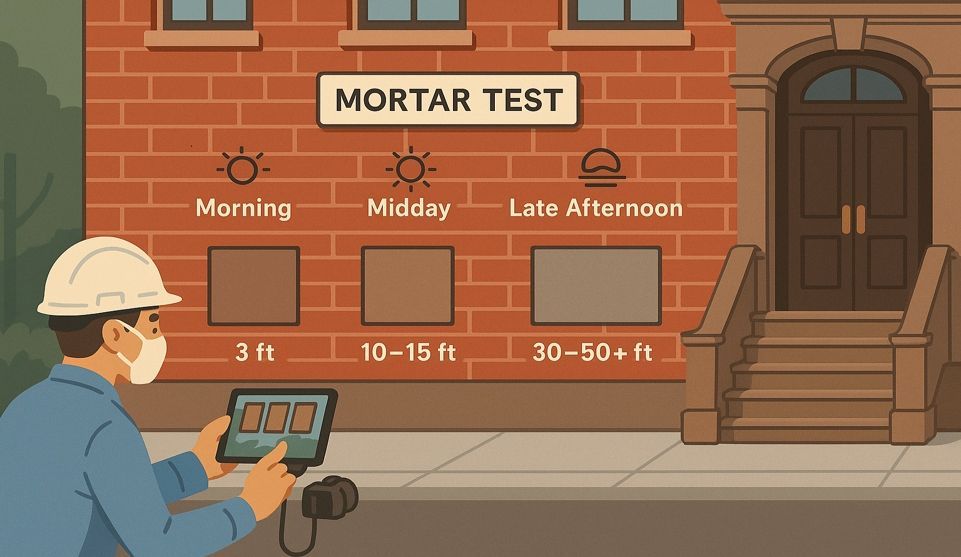
Daylight review at multiple distances increases approval confidence by revealing how the repair will read under actual viewing conditions. Stand at three critical distances: first at 10 to 15 feet, where individual joint lines become clearly visible; then at 25 to 30 feet, where the façade reads as a unified composition; and finally from across the street, where the building takes its place within the streetscape context.
Weather conditions matter more than most homeowners expect. View the test panels under overcast skies, which provide even illumination, and again in direct sunlight, which creates strong shadows that either mask or exaggerate texture differences. Take context shots that show the test panel adjacent to original, unrepaired sections. This side-by-side comparison is your most reliable tool for catching mismatches.
Look specifically for these approval markers: Does the new mortar blend seamlessly with surviving original joints? Does the joint profile create appropriate shadow lines? Is the texture consistent with the historic character, avoiding both the overly smooth "peanut butter" look and the excessively rough "oatmeal" texture? If the answer to any of these is no, adjust and repeat before proceeding.
For buildings requiring brick pointing work, this validation step prevents the regret of discovering a poor match only after hundreds of square feet have been repointed.
Dust, Noise & Access: A Neighbor-Friendly Repointing Plan
Repointing generates dust, requires scaffolding or swing staging, and produces intermittent noise from cutting and raking tools. In densely built Brooklyn neighborhoods where buildings share party walls and sidewalks see constant foot traffic, minimizing disruption requires deliberate planning. Dust control reduces disruption for both your household and your neighbors, while proper containment and cleanup demonstrate respect for the shared streetscape.
Containment, Hand Raking, and Cleanup Sequences
Modern dust-control systems use HEPA-filtered vacuums connected directly to grinders and raking tools, capturing particulate at the source. For landmark projects or sensitive locations, hand raking—using chisels and specialized masonry tools rather than power equipment—further reduces dust and vibration. While slower, hand raking offers superior control in areas where adjacent brick is fragile or where mortar depth varies significantly.
Scaffolding design affects neighbor impact. Enclosed or semi-enclosed scaffolds with debris netting contain falling material and reduce dust migration. Sidewalk bridges maintain pedestrian access while protecting passersby. Schedule deliveries and material hoists during mid-morning hours rather than early morning to minimize residential disturbance.
The cleanup sequence runs daily, not just at project completion. Sweep scaffolding platforms at the end of each work session, vacuum rather than blow dust off surfaces, and wet-mop adjacent sidewalks to prevent tracked mortar residue from spreading down the block. If your property shares a courtyard or airshaft with neighbors, notify them before work begins and provide a point of contact for concerns.
Proper execution means repointing in manageable lifts—horizontal sections that cure before the next layer is applied—and protecting fresh work from rain and direct sun during the critical curing period. Since repointing often uncovers related issues—damaged lintels, deteriorated flashing, or compromised chimney crowns—having a contractor who can address these discoveries without requiring separate mobilizations keeps the project efficient and reduces the total disruption window.
Your Offline Next Step: Photo Estimate → On-Wall Trial → Landmark-Ready
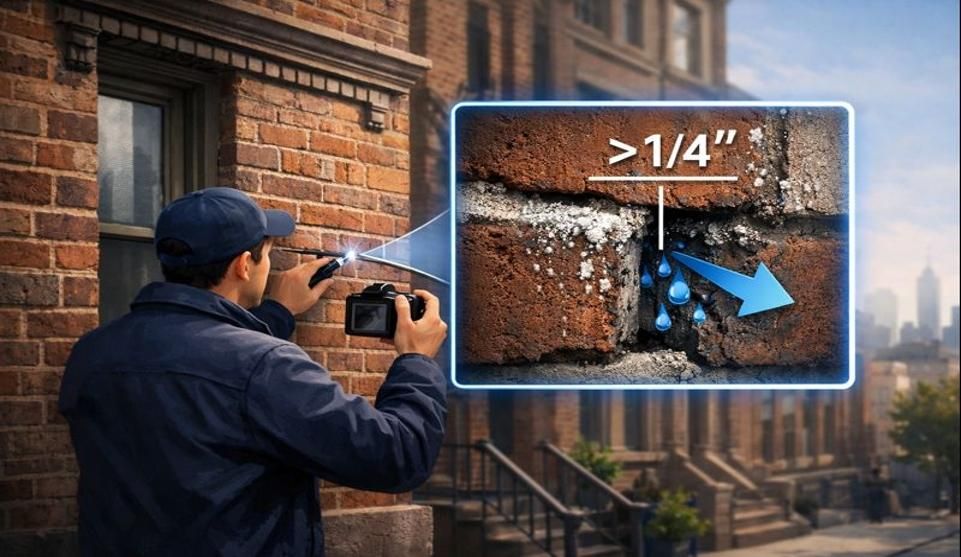
The path from concern to completed repointing follows a deliberate progression designed to reduce risk at each stage. Text photos of the affected areas for a same-day curbside triage. Clear images of joints at lintels, sills, and parapets allow an experienced contractor to provide initial guidance on scope, probable causes, and whether immediate action is required to prevent further damage.
From there, schedule an on-site consultation to review conditions in detail and discuss mortar compatibility, joint profiles, and test panel placement. The contractor should explain how your building's brick characteristics—firing temperature, porosity, existing mortar composition—inform mix design. This conversation establishes a shared understanding before any work begins.
The on-wall test panel serves as your final validation. Once approved, the same mix, technique, and craftspeople scale to the full scope, giving you confidence that the finished result will match what you approved in miniature. For projects within NYC Landmarks Preservation Commission jurisdiction, this documented test-and-approve sequence supports your permit application and demonstrates due diligence in material selection.
Like re-stitching that favorite coat, the goal is restoration that's invisible from the street but evident in function—joints that shed water, brick that breathes, and a façade that will serve the next generation of stewards as well as it served the last.
Call (718) 849-8999 to discuss your project, or visit our contact page to request a photo estimate. We serve Brooklyn Heights, Park Slope, and surrounding historic neighborhoods throughout Brooklyn, with hours from 7:00 AM to 8:00 PM, seven days a week. View examples of our completed projects in our gallery.
For additional guidance on evaluating your property's exterior condition, explore our resources on roof repair, which often intersects with masonry concerns at parapets and flashing details.
City Suburb, Inc.
9708 101st Ave, Ozone Park, NY 11416
View on Google Maps
BBB Accredited Business, A+ Rating:
View Profile


Protecting Tenants and Pedestrians: A Framework for Scaffolding and Site Safety During Facade Repair