Before the Makeover: How Proper Brick Pointing Secures a Historic Facade’s Future
📌 Key Takeaways
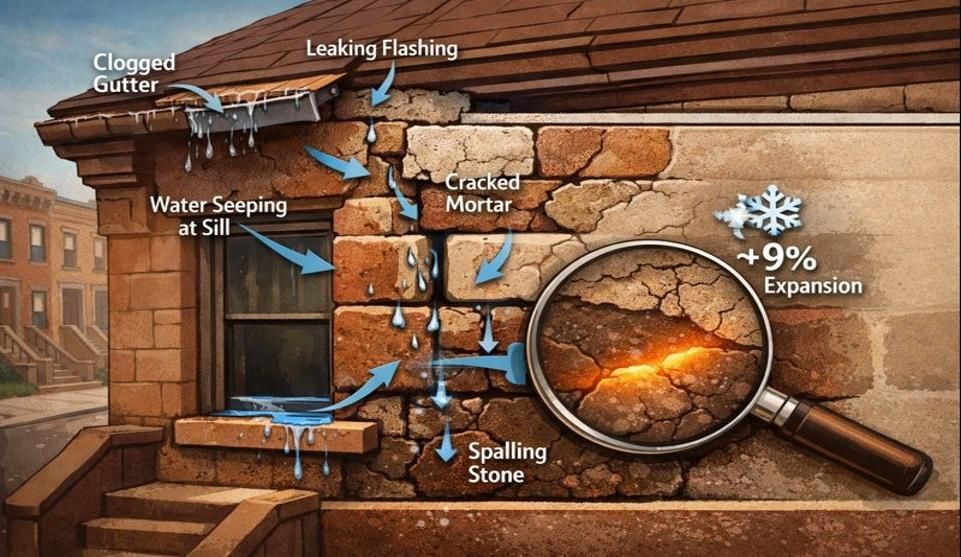
Mortar joints are the weather seal—when they fail, every cosmetic upgrade you apply on top will fail faster, trapping moisture and accelerating brick damage.
- Sequence Determines Longevity: Repoint deteriorated mortar joints before applying any coatings, paint, or waterproofing to prevent moisture entrapment that causes spalling, efflorescence, and premature coating failure.
- Hard Mortar Destroys Soft Brick: Portland cement mortars used on pre-war masonry force water through the softer brick faces instead of the joints, causing progressive spalling that requires expensive brick replacement rather than simple joint repair.
- Test Panels Prevent Expensive Rework: Executing small test sections before full-scale work reveals color shifts, tooling issues, and performance problems when corrections cost hundreds rather than thousands of dollars.
- The 2.5× Depth Rule Matters: Proper repointing removes deteriorated mortar to a depth of two to two-and-a-half times the joint width—shallow patches lack the mechanical bond and depth needed for decades of durability.
- Parapet Failures Drive Façade Damage: Water infiltration typically starts at compromised coping and parapet walls, not the main façade, so addressing top-down moisture sources first protects your entire repointing investment.
Mortar first, cosmetics second—this sequence protects both your brick and your budget.
For historic property owners across New York City's five boroughs managing pre-war buildings and brownstones, these principles determine whether your façade restoration lasts five years or fifty.
You're ready to refresh your facade—new paint, sealers, maybe even new coping. But if the mortar is failing, every shiny upgrade will fail faster. Start with the joints, or risk redoing the whole job.
If the Joints Fail, Everything Follows: The Case for Mortar-First
Picture a Brooklyn brownstone owner preparing for spring. The facade looks tired, so the plan is straightforward: pressure-wash the brick, apply a fresh waterproof coating, and finish with a new coat of paint on the trim. Three weeks after the work wraps up, dark patches appear on the interior wall adjacent to the street facade. Within two months, the new coating starts bubbling near the parapet.
What went wrong? The mortar joints were crumbling before the coating went on. Water found its way through the compromised joints, then hit the new waterproof barrier from behind. With nowhere to escape, moisture traveled laterally through the wall assembly, staining plaster inside and lifting the coating outside. The property owner paid twice—once for the coating, once for emergency repointing—and still faced interior repairs.
This scenario plays out across Queens, Manhattan, the Bronx, and Long Island with predictable regularity. The sequence matters more than the products you choose. On historic brick facades, brick pointing establishes the primary weather seal between masonry units. When those joints fail, every subsequent layer you apply will perform poorly or fail prematurely, regardless of quality.
The correct approach begins with the mortar. Assess the joints, execute test panels to verify your mortar mix, complete the repointing work, allow adequate cure time, and only then consider coatings, paint, or additional waterproofing measures. This disciplined sequence prevents moisture entrapment, eliminates rework, and extends the service life of every component in your facade system.
Brick Pointing 101 (Historic Edition)
What Pointing Is (and Isn't)
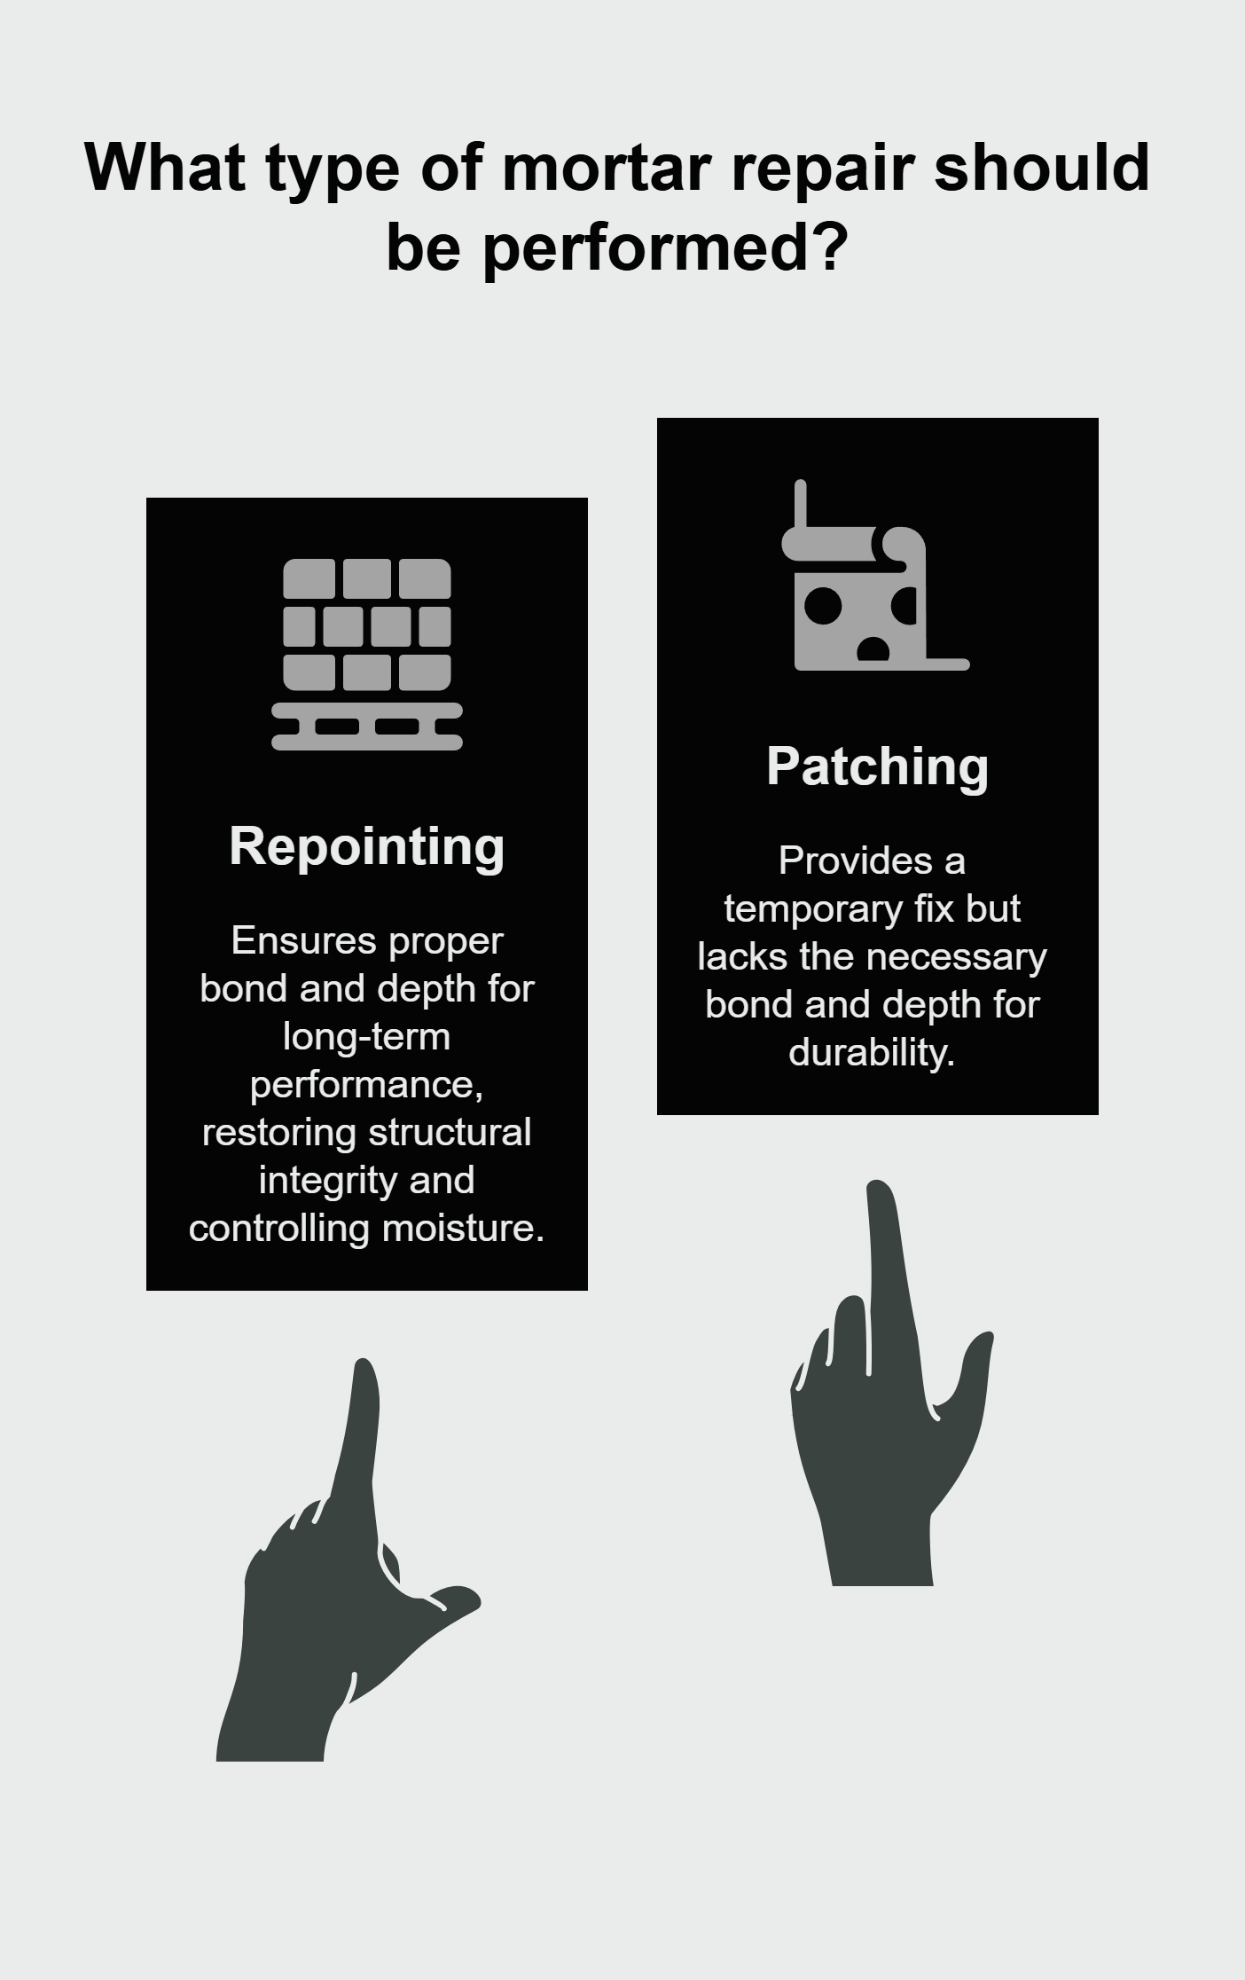
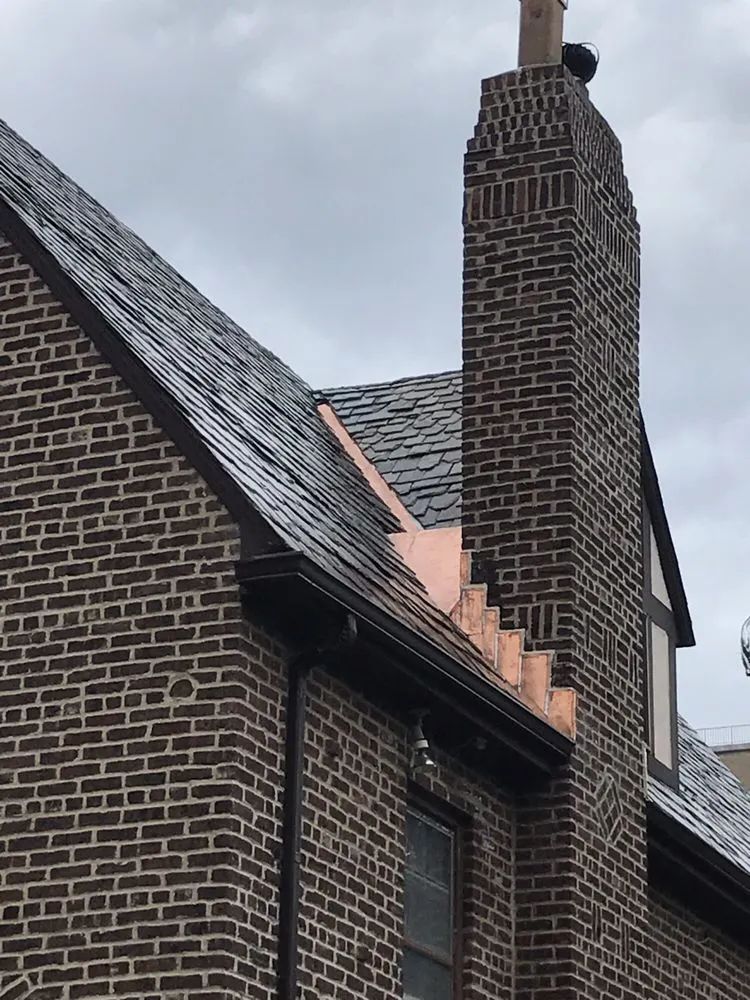
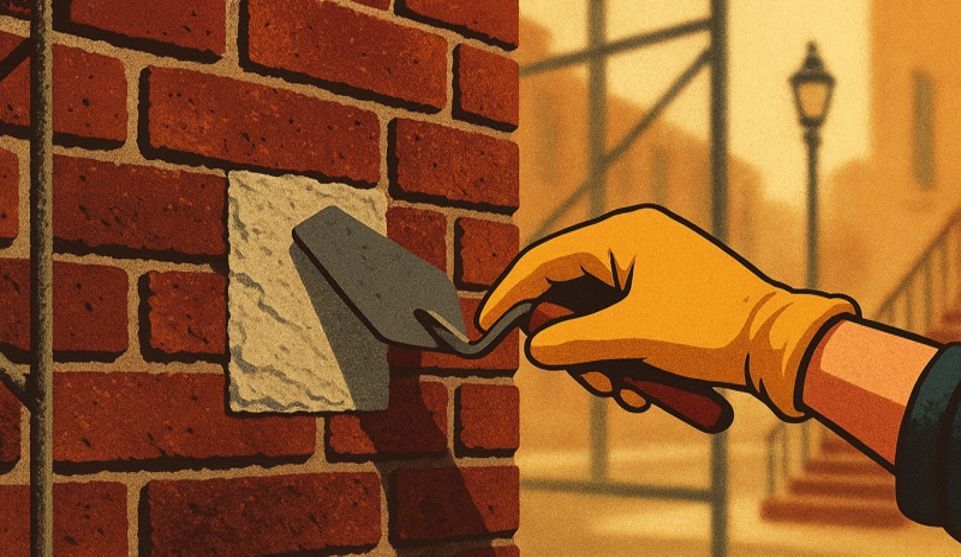
Brick pointing refers to the process of removing deteriorated mortar from the joints between masonry units and replacing it with fresh material matched to the original in composition, color, and mechanical properties. The mortar joint serves as the primary weather seal and the sacrificial element in a masonry wall—it should be softer than the brick so that when deterioration occurs, the joint fails first and can be repaired without replacing the more expensive masonry units.
Pointing is not patching. A true repointing project removes mortar to a consistent depth—typically two to two-and-a-half times the joint width, depending on conditions—before installing new material. This ensures proper bond and adequate depth for long-term performance. Surface applications or shallow repairs may look acceptable initially, but they lack the mechanical bond and depth required for durability. Proper repointing restores structural integrity to the wall, controls moisture infiltration, and maintains vapor permeability so the assembly can dry when it does get wet.
Why Historic Bricks Act Differently
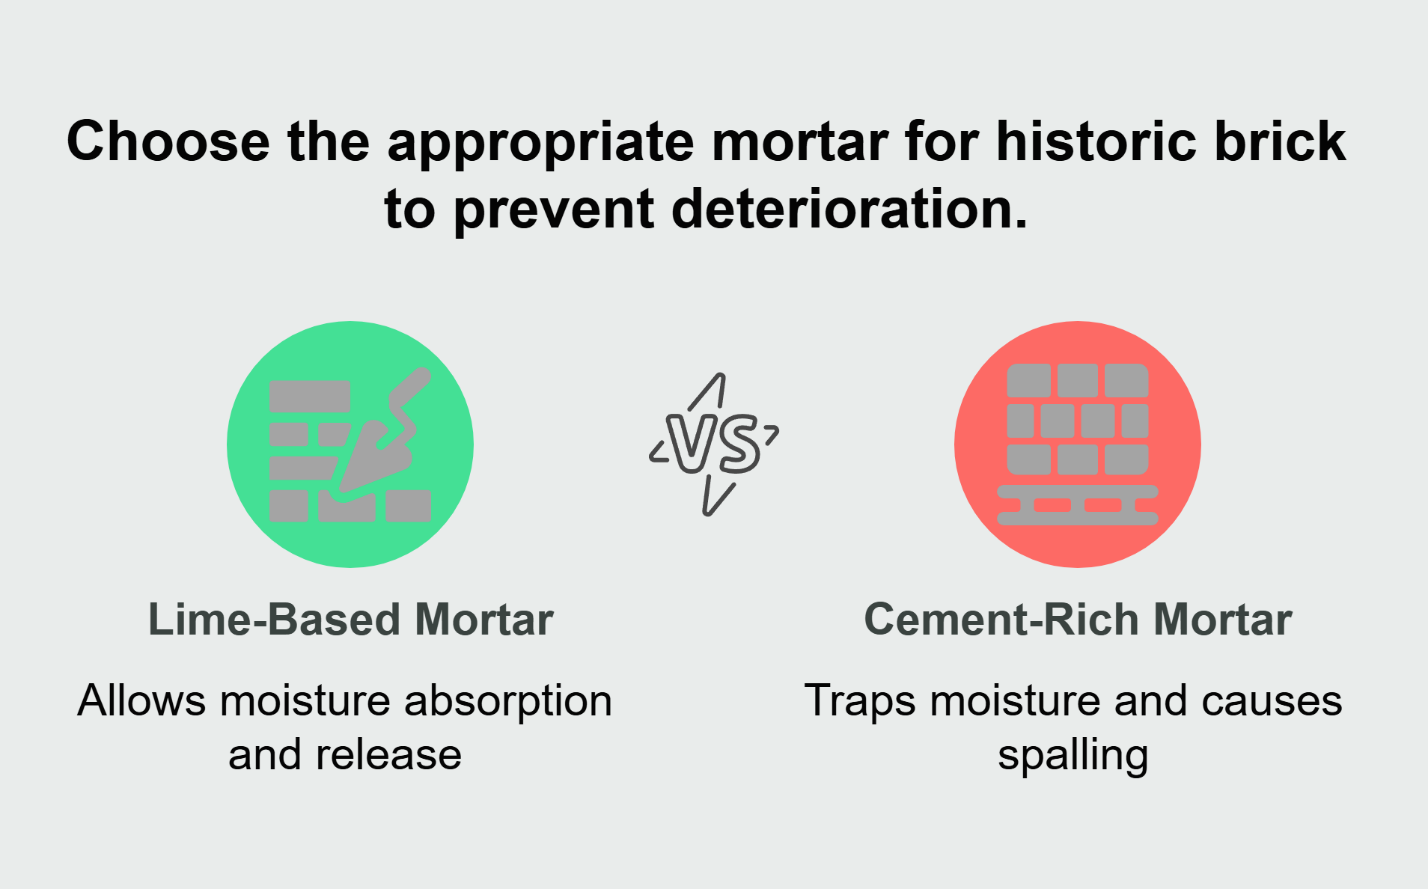
Pre-war masonry in New York City was typically fired at lower temperatures than modern brick, resulting in a softer, more porous unit with higher clay content. These characteristics made historic brick well-suited to lime-based mortars, which are similarly soft and vapor-permeable. The system worked because both components could absorb and release moisture in response to seasonal changes and weather events.
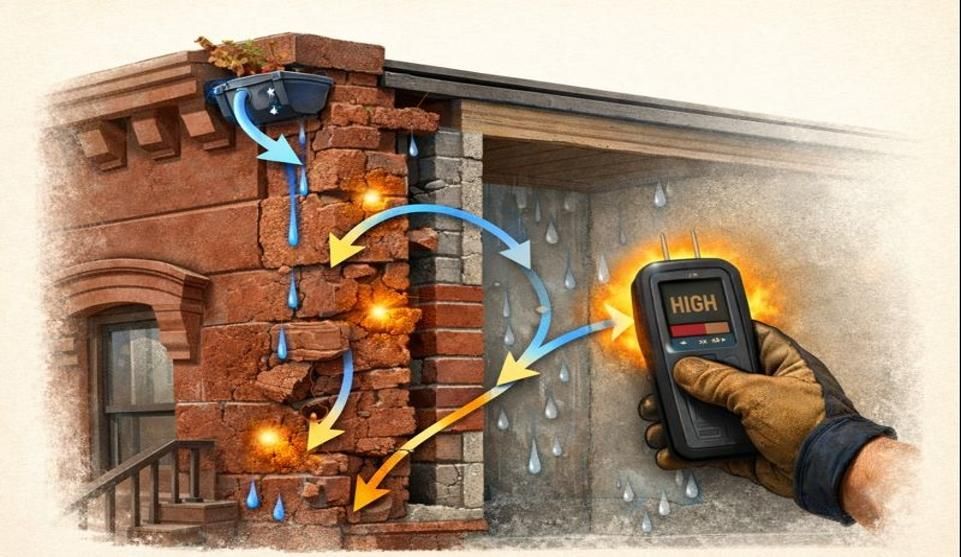
When hard, cement-rich mortar is introduced into this softer assembly, the mechanical mismatch creates problems. Water that penetrates the wall cannot escape through the harder joint, so it migrates through the brick face instead. Repeated freeze-thaw cycles cause the brick surface to spall—flaking, crumbling, or detaching entirely. Once spalling begins, it accelerates. The exposed interior of the brick absorbs even more water, and the deterioration spreads to adjacent units.
This pattern is visible throughout older neighborhoods. A masonry contractor in Brooklyn, NY will often encounter entire sections where previous repairs used Portland cement mortar, and every brick surrounding those joints now shows signs of surface loss. The joints remain intact while the more valuable brick deteriorates—exactly the opposite of what a well-designed system should do.
Mortar Matching: Color, Aggregate, Hardness
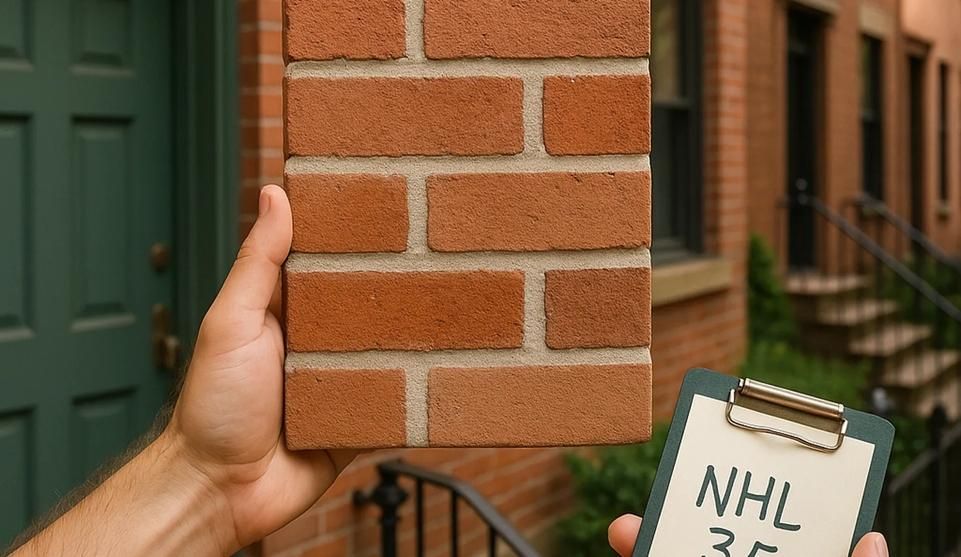
Matching mortar to the original involves three distinct considerations. First, color matching ensures visual continuity across the facade. This requires examining the original mortar in a clean, slightly damp state (not when it's covered in soot or efflorescence) and replicating the tone using natural sands and pigments. Sending a mortar sample to a laboratory for analysis can provide precise ratios of sand color, gradation, and lime-to-cement content.
Second, aggregate selection affects both appearance and performance. Historic mortars often used local sand with a specific color and particle size distribution. Replicating the aggregate profile ensures that the new mortar will weather similarly to the original and maintain a consistent texture across the facade. A mortar with fine, uniform aggregate will look markedly different from one using coarse, varied sand, even if the color is technically correct.
Third, compressive strength and hardness must remain lower than the masonry units. For soft historic brick, this typically means a lime-rich mix with minimal or no Portland cement. For buildings constructed before 1930, mortars conforming to ASTM C1713—the standard specification for historic repair mortars—provide a framework for achieving compatible strength and permeability. The National Park Service's Preservation Brief 2 provides detailed guidance on matching mortar to historic masonry, emphasizing that softer mixes such as Type O or custom lime putty mortar are often appropriate for older buildings. Testing compressive strength is straightforward—the mortar should be noticeably softer than the brick when both are tested with a simple scratch or penetration test.
When these three elements align, the result is a repointed facade that looks consistent, performs as intended, and directs deterioration away from the brick and into the replaceable joint.
The Right Sequence for a Lasting Facade
Assessment & Moisture Mapping
Before any repointing begins, a thorough assessment identifies the extent and cause of joint failure. This involves documenting open joints, mapping areas of efflorescence (the white, powdery deposit that indicates water movement through masonry), and checking for interior staining that suggests active leaks. On buildings with parapets, special attention goes to coping conditions and through-wall flashing, as failures in these details often drive the majority of water infiltration.
Moisture mapping can be as simple as a visual survey on a rainy day or as detailed as infrared thermography after a weather event. The goal is to understand where water enters the assembly and how it travels once inside. A masonry contractor in Manhattan, NY working on a landmarked property will frequently find that the primary water source is not failed joints on the main facade, but rather compromised coping or through-wall flashing at the parapet—problems that will persist even after full repointing if not addressed first.
This assessment informs the scope of work. If the parapet is the main culprit, prioritize parapet wall reconstruction and repair before repointing the facade below. If widespread joint failure extends across multiple floors, plan for full facade repointing rather than isolated repairs that will leave visible patchwork.
Test Panels and Approvals
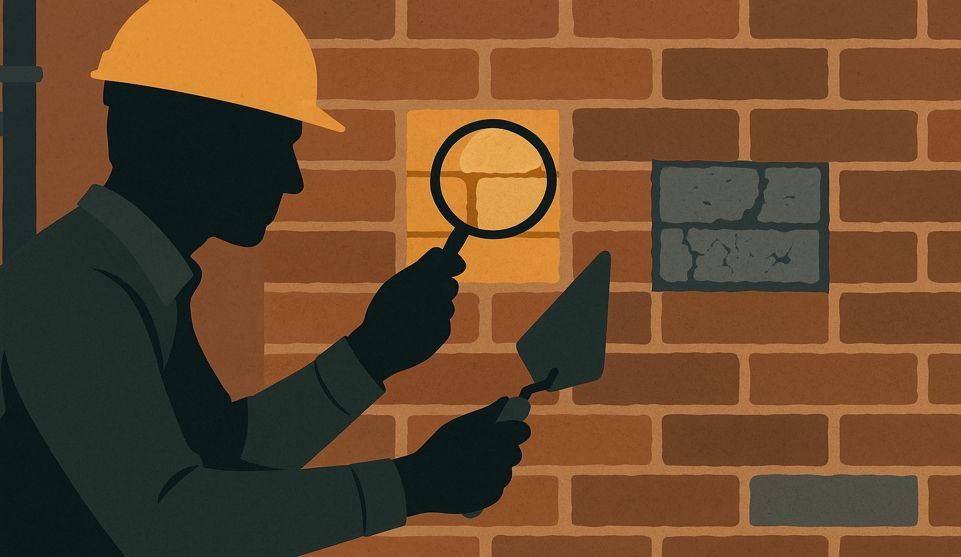
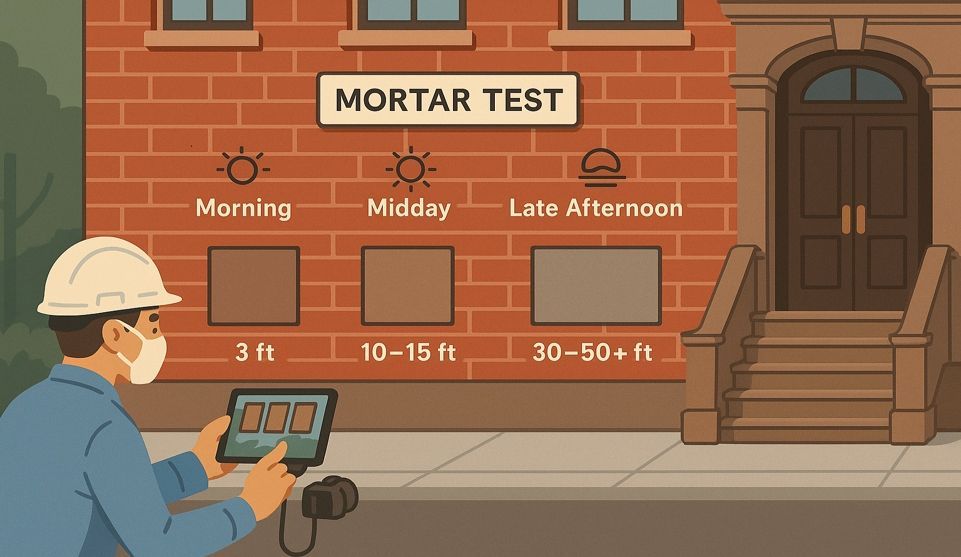
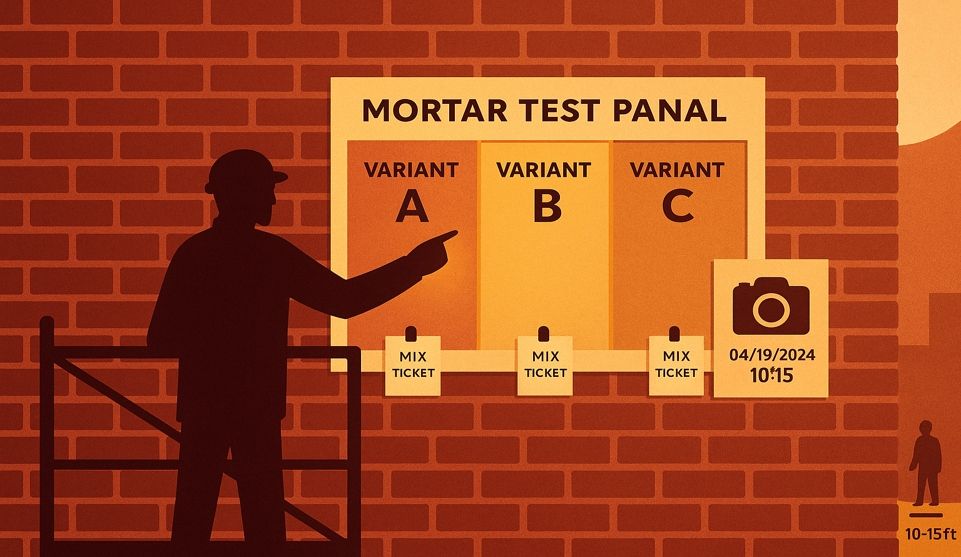
Test panels reduce risk and set expectations before production-scale work begins. A test panel is a small section of the facade where the proposed mortar mix, joint tooling, and cleaning methods are applied and allowed to cure. Once cured, the test panel is evaluated for color match, joint profile, and overall appearance under various lighting conditions and weather states.
For properties within historic districts or subject to landmark regulations, test panels are often required by the NYC Landmarks Preservation Commission before a permit is issued. The commission reviews the test panel to ensure the proposed mortar is appropriate for the building's age and style, and that the repointing technique will not harm the historic fabric. Even when not legally required, test panels serve as a valuable communication tool between contractor and property owner, aligning visual expectations before the crew mobilizes to the full facade.
Test panels also reveal practical issues early. A mortar mix that looks perfect in a bucket may dry several shades lighter than expected. A joint tooling technique that works well in moderate weather may prove difficult to execute consistently in summer heat. Discovering these issues on a twenty-square-foot test area is far less expensive than discovering them halfway through a full building repoint.
Full Repointing
With the test panel approved and the scope confirmed, full repointing proceeds methodically. Deteriorated mortar is removed to the required depth—typically two to two-and-a-half times the joint width—using hand tools such as chisels or grinders with dust control to avoid damaging the brick arrises (edges). The joint is cleaned of dust and debris, then pre-wetted to control suction so the brick does not draw moisture from the fresh mortar too quickly.
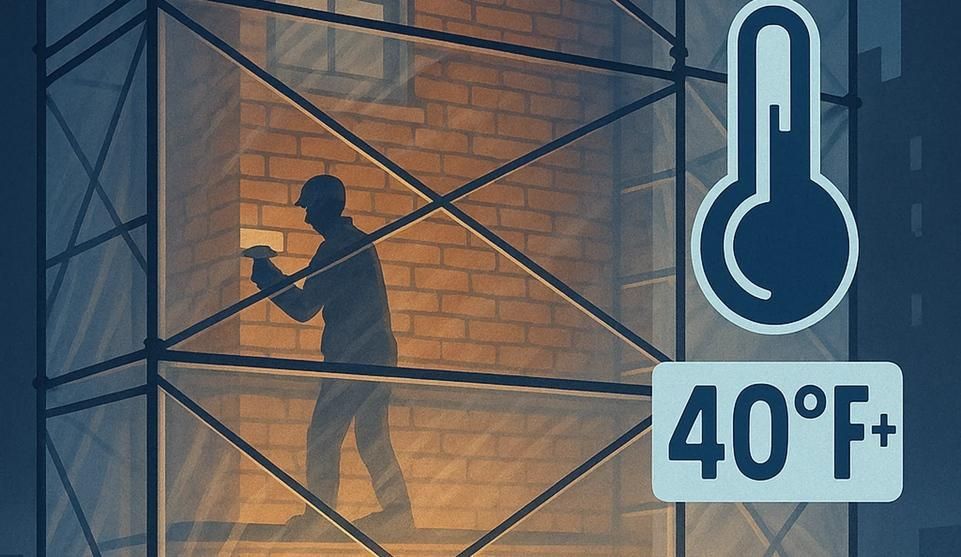
Fresh mortar is applied in layers, compacting each layer to eliminate voids and ensure a strong bond to the brick. The final joint is tooled to match the original profile—whether flush, slightly recessed, or weathered—and finished with a texture that sheds water while maintaining vapor permeability. Proper curing is non-negotiable. Lime-rich mortars require protection from rapid drying (using damp burlap or misting) and should cure for at least two weeks before any coatings or sealers are considered.
During repointing, other masonry repairs are typically addressed simultaneously. Cracked or spalled bricks may be replaced, loose lintels secured, and failed coping units reset or replaced. This integrated approach ensures the facade functions as a complete weather barrier once work is finished.
Only Then: Coatings, Paint, Waterproofing
After repointing is complete and the mortar has cured adequately, the facade is ready for supplementary treatments. A breathable masonry sealer can reduce water absorption while still allowing vapor to escape—a critical balance on older buildings. Paint or coatings on trim, lintels, or other non-masonry elements proceed without concern that they will trap moisture behind compromised joints.
The timing here is precise. Applying waterproof coatings before joints are sound creates a moisture trap. Water will still enter through the failed joints, but it cannot exit through the now-sealed face of the wall. This condition accelerates deterioration, promotes efflorescence, causes interior damage, and often voids manufacturer warranties on the coating products. Guidance from preservation organizations and coating manufacturers, including the National Park Service's Preservation Brief 1 on water-repellent treatments, consistently emphasizes that substrate preparation—including sound, cured mortar joints—is the first requirement for successful coating performance.
Avoid These Costly Mistakes
Cement-Hard Mortar on Soft Brick
The most destructive error in historic repointing is using mortar that is harder than the brick it surrounds. Portland cement mortars, including standard Type N or Type S mixes, are appropriate for modern brick but far too hard for pre-war masonry. When the mortar is harder than the brick, the assembly cannot function as designed. Instead of the joint eroding slowly over decades (and being replaceable at modest cost), the brick face erodes rapidly, requiring full unit replacement—a far more expensive and invasive repair.
This mismatch also changes how water moves through the wall. Vapor-impermeable cement mortar prevents the wall from drying, trapping moisture inside the assembly. The result is accelerated freeze-thaw damage, interior efflorescence, and progressive spalling that can compromise entire sections of facade within a few years. Correcting this mistake requires removing the inappropriate mortar and repointing again with a softer, lime-based mix—work that could have been avoided by choosing the correct material initially.
Skipping Test Panels
Proceeding directly to full-scale repointing without executing and evaluating test panels introduces uncertainty that often leads to expensive course corrections. Mortar color shifts as it cures and weathers, meaning that a mix which looks perfect when wet may dry to an unacceptable shade. Discovering this mismatch after half the building has been repointed leaves the owner with a difficult choice: accept a visibly inconsistent result or remove and replace the work already completed.
Test panels also expose issues with joint tooling, mortar consistency, and application technique. A crew that performs well in controlled conditions may struggle with production efficiency or quality once working at height on scaffolding. The test panel phase allows for adjustments to mix proportions, tooling methods, and crew coordination before these issues affect the full project. For landmarked properties, skipping the test panel means risking permit denial after work begins—a scenario that can halt construction and require costly remediation.
Coating Before Repointing
Applying waterproof coatings, paint, or sealers to a facade with compromised mortar joints traps moisture inside the wall assembly. Water will continue to enter through the failed joints, but the newly applied coating prevents it from exiting through the brick face. This creates internal moisture accumulation that leads to efflorescence, spalling, coating failure, and interior damage. The coating itself may bubble, peel, or discolor as trapped moisture seeks an escape route.
This mistake is particularly common when property owners prioritize cosmetic improvements over structural repairs. A painted facade looks refreshed immediately, while repointing is labor-intensive and less visually dramatic. However, paint or coating applied over failing mortar delivers only a short-term improvement. Within months or a single winter freeze-thaw cycle, the underlying joint failure manifests as visible damage that penetrates the new coating. At that point, the owner must pay for both coating removal and the repointing work that should have been completed first.
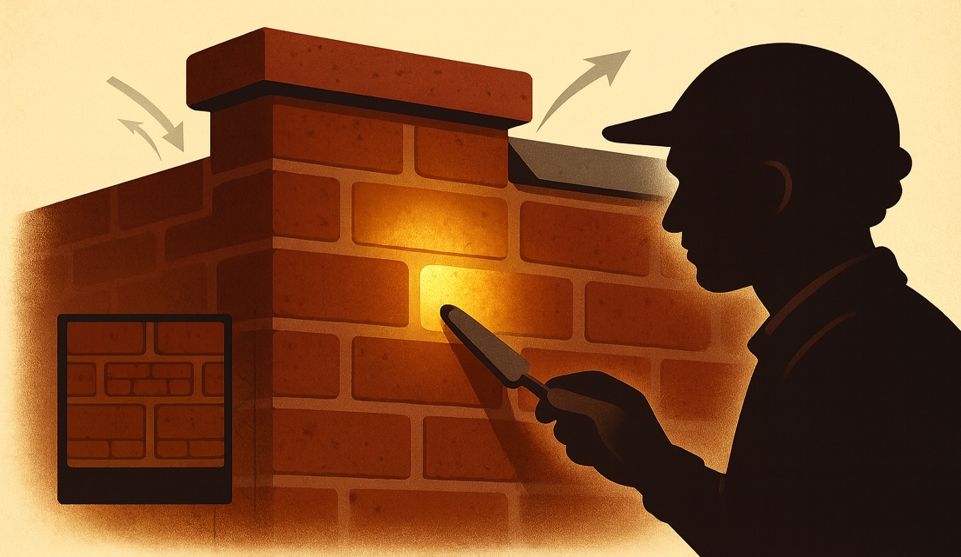
Ignoring Parapet and Coping
Parapets and their coping (the protective cap that covers the top of the parapet wall) are among the most vulnerable components of a masonry facade, yet they are frequently overlooked until catastrophic failure occurs. Coping stones crack due to freeze-thaw cycles, mortar joints in parapet walls deteriorate from constant exposure to weather, and through-wall flashing fails or was never properly installed. When these elements fail, water enters the wall from the top and travels downward, causing damage throughout the facade below.
A common pattern in older buildings is to repoint the main facade while deferring parapet and coping repairs due to the additional cost or complexity of working at the roofline. This approach provides limited benefit because the primary water source remains active. Moisture continues to infiltrate from above, undermining the durability of the new mortar joints and leading to premature re-deterioration. Addressing parapets first—or simultaneously with facade repointing—ensures that the entire envelope is protected and that repair investments deliver maximum service life.
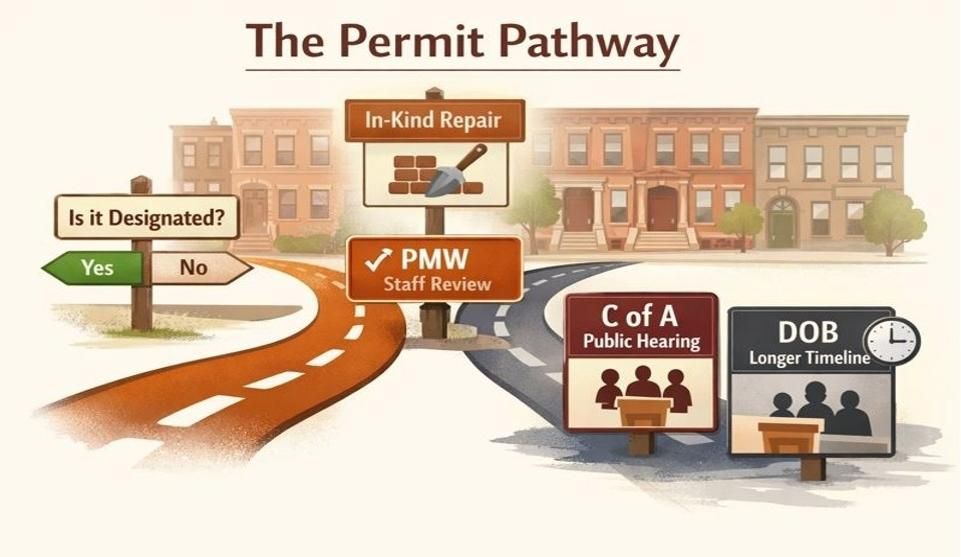
NYC Considerations for Landmarked Properties (Quick Guide)
Buildings located within historic districts or individually designated as landmarks are subject to review by the NYC Landmarks Preservation Commission before exterior work can proceed. This review ensures that proposed repairs maintain the historic character of the building and comply with preservation standards.
For repointing projects, LPC review typically requires submission of a permit application that includes existing conditions documentation (photographs, mortar analysis), proposed scope of work (drawings, specifications), and evidence that the proposed mortar is appropriate for the building (test panel photographs, mix design documentation). The commission evaluates whether the new mortar matches the original in color, texture, and composition, and whether the repointing technique will preserve the historic joint profile and tooling.
Permit timelines vary based on the complexity of the project and the commission's review queue. Straightforward repointing on a non-prominent facade may receive approval relatively quickly, while work on a highly visible street-facing elevation or a building of particular historic significance may require additional review. Engaging a masonry contractor in Long Island, NY or other boroughs with experience navigating LPC procedures can streamline the approval process and reduce the likelihood of delays or permit denials.
For property owners of larger buildings, coordination with the city's Façade Inspection & Safety Program (FISP)—formerly Local Law 11—can align repointing work with mandated inspection cycles. This strategic timing protects budgets and prevents duplicative scaffold mobilizations.
This information is general guidance only and does not constitute legal or regulatory advice. Property owners should consult directly with the Landmarks Preservation Commission and qualified professionals to determine specific requirements for their building.
On-Site Checklists You Can Use Today
Five-Minute Facade Triage
Walk the perimeter of your building with a notepad and document the following conditions. This quick assessment reveals whether professional evaluation is warranted and helps prioritize which areas require immediate attention.
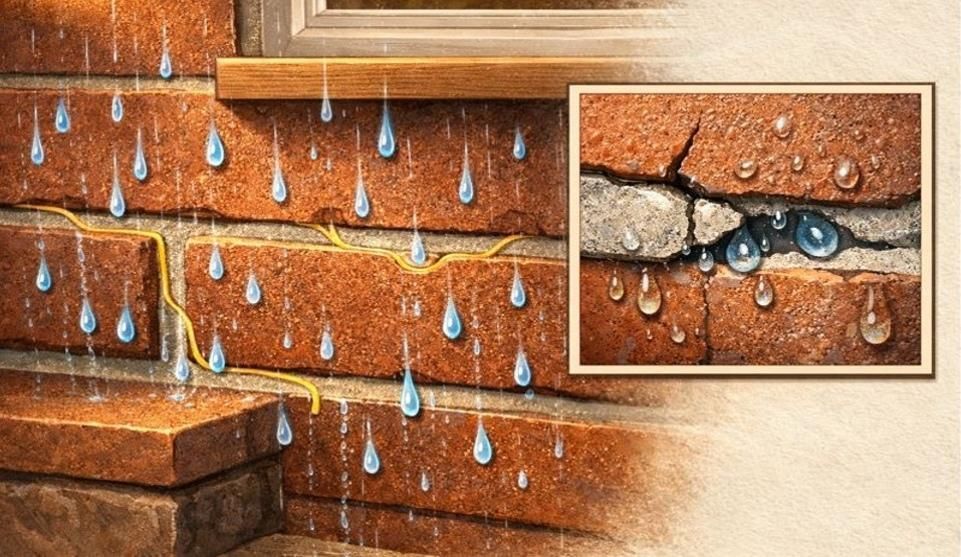
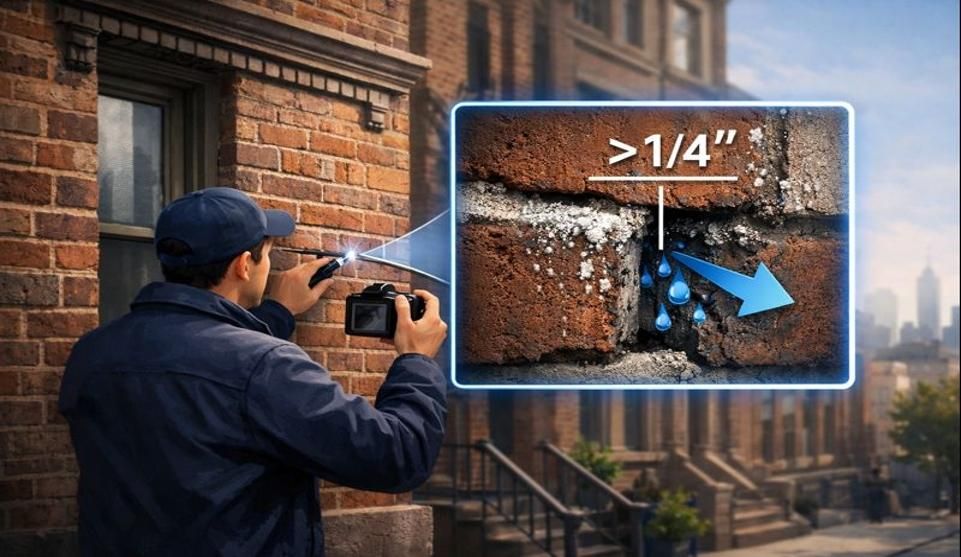
Open or Powdery Joints: Run your finger along mortar joints at accessible locations. If the mortar crumbles easily, falls out in chunks, or has eroded back from the face of the brick, the joints are failing and require repointing. Pay particular attention to areas near downspouts, below windowsills, and at parapet walls where water exposure is highest.
Interior Staining Near Exterior Walls: Check interior spaces adjacent to the facade for water stains, efflorescence (white, powdery deposits), or peeling paint. These signs indicate active water infiltration, often through failed mortar joints or compromised flashing. Document the location of interior damage and correlate it with exterior conditions to identify likely entry points.
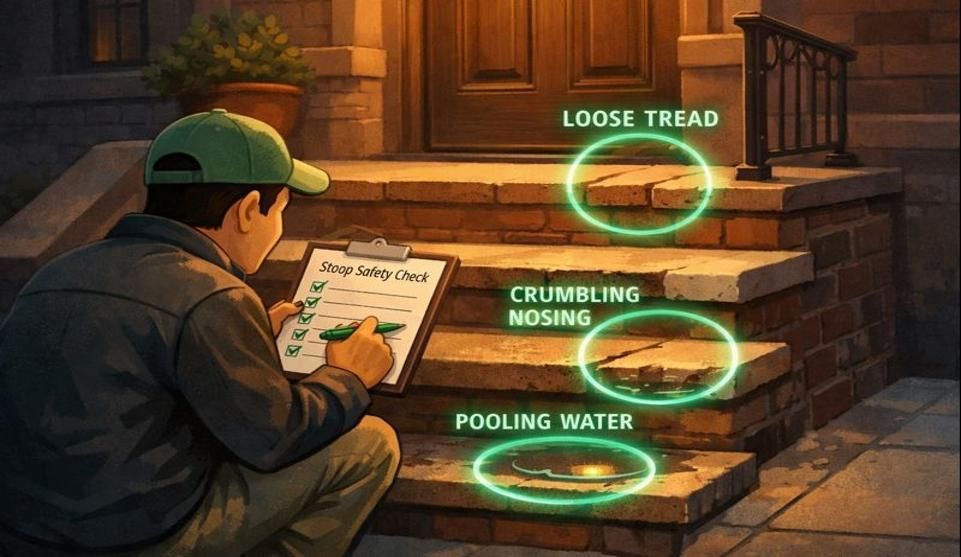
Coping Cracks at Parapet: Inspect the stone or precast concrete cap atop the parapet wall. Look for cracks, displaced units, or open joints in the coping itself. Coping failure is one of the most common sources of water infiltration in masonry buildings, and it often goes unnoticed until significant interior damage occurs.
Efflorescence Trails: White, chalky deposits streaking down the brick face indicate water movement through the wall. The water dissolves salts within the masonry, then deposits them on the surface as it evaporates. Efflorescence is a symptom, not the problem itself—the underlying issue is usually failed joints, compromised flashing, or inadequate drainage. The Brick Industry Association's technical notes provide detailed guidance on efflorescence causes and prevention strategies.
Previous Patchwork Mismatch: Note areas where previous repointing work used mortar that differs significantly in color, texture, or hardness from the original. Mismatched mortar indicates shortcuts or inappropriate materials, and these areas are likely to fail faster than the surrounding original joints. They may also signal that the building has been repointed multiple times, suggesting chronic moisture problems that have not been adequately addressed.
Contractor Vetting (Historic Masonry)
When selecting a contractor for repointing work on an older building, the following checklist helps distinguish firms with genuine preservation expertise from those equipped primarily for modern commercial masonry.
Mortar Analysis Included: Ask whether the firm conducts or arranges for laboratory analysis of existing mortar to determine the correct replacement mix. Contractors experienced in historic work routinely use mortar analysis to match binder ratios, aggregate type, and coloring materials. Firms that rely solely on visual matching or pre-mixed products may lack the expertise required for proper historic repointing.
Test Panel Policy: Confirm that the contractor executes test panels as a standard part of their process, not as an optional upgrade. Experienced preservation masons understand that test panels reduce risk, satisfy regulatory requirements, and establish clear expectations. Reluctance to perform test panels or efforts to bypass this step are warning signs.
Experience with Landmarked Properties: Request references from previous projects on buildings subject to LPC review or located within historic districts. Navigating the landmark approval process requires familiarity with commission procedures, documentation standards, and preservation principles. Contractors who primarily work on modern buildings may lack this experience, leading to delays, permit denials, or work that does not meet regulatory standards.
Written Sequencing Plan: Obtain a detailed scope of work that specifies the order in which repairs will be executed—for example, parapet and coping repairs before facade repointing, or repointing before any coating application. A clear sequence demonstrates that the contractor understands how moisture moves through masonry assemblies and has planned the work to prevent failures. Vague or incomplete scopes suggest insufficient project planning.
Reference Projects of Similar Age: Ask to see completed work on buildings constructed during the same era and using similar materials. Repointing a 1920s brick apartment building in Queens requires different techniques and materials than repointing a 1980s townhouse. Contractors with relevant experience can speak specifically about challenges they encountered and how they addressed them, providing confidence that they understand the nuances of your building type.
How City Suburb Executes Mortar-First Restorations
At City Suburb, repointing projects begin with a comprehensive site evaluation. Our team documents existing conditions, maps moisture patterns, and identifies all contributing factors—failed joints, compromised coping, inadequate flashing—so the scope of work addresses root causes, not just visible symptoms. We arrange laboratory analysis of existing mortar when appropriate and use those results to formulate a replacement mix that matches the original in composition, appearance, and mechanical properties.
Before production work begins, we execute test panels at the building. These panels allow property owners and, when required, the Landmarks Preservation Commission to evaluate the proposed mortar and approve the technique before full-scale repointing begins. We adjust mix proportions, joint tooling, or cleaning methods based on test panel feedback, ensuring the final result meets expectations.
Our work follows the correct sequence. Parapet and coping repairs are completed first to eliminate top-down water infiltration. Repointing proceeds in manageable sections with proper mortar curing and protection. Only after the mortar has cured and the facade envelope is sound do we proceed with coatings, sealers, or other supplementary treatments. This disciplined approach eliminates rework, extends service life, and delivers the durable, authentic results that historic buildings deserve.
City Suburb serves property owners across Queens, Brooklyn, the Bronx, Manhattan, and Long Island with masonry and exterior restoration services. We're available Monday through Sunday, 7:00 AM to 8:00 PM. For questions about your facade or to discuss a project, call (718) 849-8999 or visit our Contact page.
Schedule Your Free On-Site Inspection
FAQ
Do I need a whole new facade if I have leaks?
Not necessarily. Often, targeted repointing and parapet or coping repairs resolve infiltration without rebuilding the wall. A thorough assessment identifies the specific entry points—typically failed joints, compromised coping, or inadequate through-wall flashing—and a well-executed repointing project addresses these issues at a fraction of the cost of facade replacement. Full rebuilds are required only when the brick or structural components have deteriorated beyond repair, which is uncommon if problems are caught relatively early.
Should I waterproof before or after repointing?
After. Coatings over failing joints can trap moisture and accelerate deterioration. The mortar joints are the primary weather seal, and they must be sound before any supplementary waterproofing is applied. Once repointing is complete and the mortar has cured, breathable sealers or coatings can be used to further reduce water absorption without compromising vapor permeability. Applying waterproofing before addressing joint failures produces short-term cosmetic improvements but guarantees long-term performance problems.
How long does repointing last?
With proper mortar matching and detailing, decades—especially once moisture paths are controlled. Historic buildings in New York City frequently have original mortar joints that have lasted eighty to one hundred years or more, demonstrating that well-executed repointing using appropriate materials is a long-term investment. Modern lime-based repointing, when matched correctly to soft historic brick, can provide similar longevity. The primary threats to repointing durability are inappropriate mortar mixes (too hard), inadequate curing, and unaddressed moisture sources such as failed coping or flashing.
Next Steps
Get Your Free Photo Estimate
Upload photos of your facade to help us understand the scope and provide an initial assessment. Focus on areas with visible joint deterioration, interior staining, parapet conditions, and any previous repair work. Clear, well-lit photographs of problem areas allow our team to provide preliminary guidance and determine whether an on-site inspection is warranted.
Book Your On-Site Inspection
Schedule a site visit with our team to evaluate conditions in detail, discuss scope options, and develop a project plan. During the inspection, we document existing conditions, perform basic diagnostic tests (such as joint hardness checks), and identify contributing factors like coping failures or inadequate drainage. The inspection provides the foundation for a detailed proposal with clear sequencing, material specifications, and cost estimates.
What to Prepare for Your Visit
Gather any available documentation about previous repairs, including contractor invoices, product specifications, or photographs. If the building is landmarked or within a historic district, note this so we can discuss the approval process. Provide access to interior spaces adjacent to problem areas so we can assess the extent of water infiltration. If you have specific concerns—such as upcoming facade work that you want to coordinate with repointing—share those priorities so we can address them during the consultation.
For additional guidance on recognizing when repointing is needed, see our article on signs your historic brick home needs professional repointing. To understand the most frequent errors that compromise repointing durability, review our post on common brick pointing mistakes that can harm your historic home. And for a deeper look at selecting the correct mortar for period buildings, consult our guide to understanding different mortar types for period homes.
Disclaimer
This article provides general information about brick pointing and facade maintenance in NYC. It is not legal, code, or permit advice. For landmarked properties, consult the NYC Landmarks Preservation Commission and a qualified professional.
Our Editorial Process
Every article is planned from a documented brief, fact-checked against authoritative sources (codes, preservation briefs, manufacturer data), and reviewed by a subject-matter specialist before publication. We update guides when standards or best practices change.
By City Suburb Editorial Team — City Suburb, Inc. serves Queens, Brooklyn, Bronx, Manhattan, and Long Island with masonry and exterior services. For questions about this guide or to discuss your project, call (718) 849-8999 or visit our Contact page.


Protecting Tenants and Pedestrians: A Framework for Scaffolding and Site Safety During Facade Repair