What to Expect During Brick Repointing in NYC: Dust, Noise & Access—A Neighbor-Friendly Plan
📌 Key Takeaways:
NYC brick repointing involves real disruption—dust, noise, scaffolding—but the chaos becomes manageable when you understand the regulatory framework, communicate proactively with neighbors, and hire contractors who treat compliance as baseline professionalism rather than an inconvenience.
• Repointing Is Surgery, Not Cosmetics: Proper mortar must be softer than the brick it protects—hard portland cement mortars concentrate freeze-thaw stress and cause brick faces to spall, turning a repair into long-term damage.
• Dust and Noise Controls Are Legally Mandated, Not Optional: OSHA's silica standard (29 CFR 1926.1153) requires wet methods and HEPA filtration, while NYC's Construction Noise Mitigation Plan creates neighbor accountability through posted contact information and enforceable complaint mechanisms.
• Neighbor Communication Is Project Infrastructure: Pre-work notices, dedicated hotlines, and transparent scheduling for loud phases convert potential adversaries into tolerant partners—goodwill on dense blocks functions as a tangible asset that prevents 311 calls and access disputes.
• FISP Cycles and Landmark Review Add Months, Not Days: Buildings over six stories face compliance deadlines that eliminate scheduling flexibility, while LPC-regulated properties require lab mortar analysis and approved mock-ups that can stretch front-end timelines by 6-12 weeks.
• The Right Contractor Handles Paperwork Like They Handle Trowels: Professional operations file CNMPs and dust plans before mobilization, maintain insurance documentation on-site, and assign a single project lead with decision-making authority—not a receptionist—as the neighbor contact.
For NYC homeowners, co-op boards, and property managers facing façade repairs, these principles turn regulatory complexity and neighbor anxiety into a documented process with predictable outcomes.
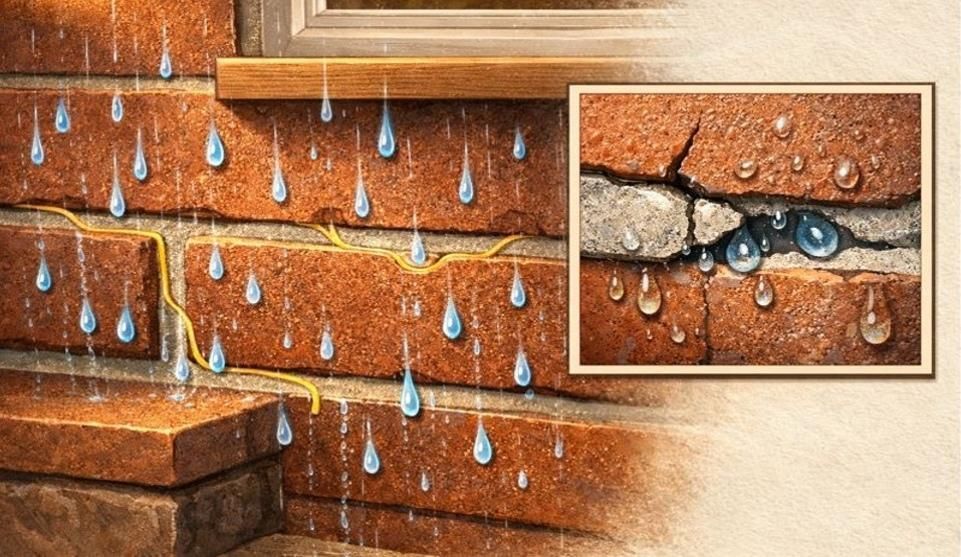
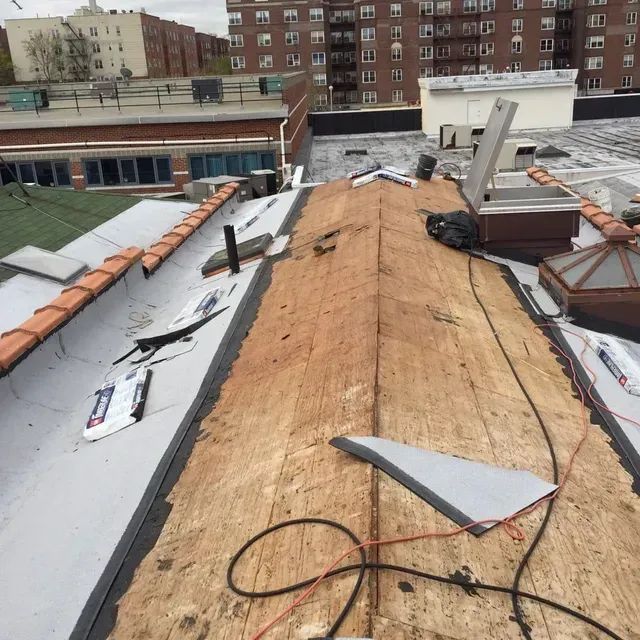
Your brick façade needs work. You've noticed crumbling mortar, maybe some water stains after the last storm. A contractor mentioned repointing, and now you're wondering: will this turn my block into a construction zone?
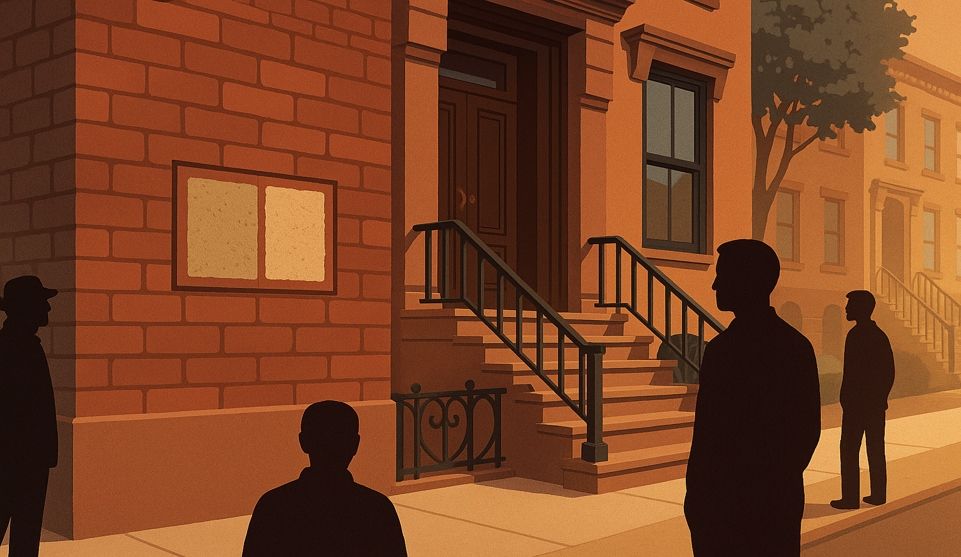
Picture a typical Brooklyn brownstone owner who finally schedules the repointing project they've been postponing. The morning work begins, a neighbor texts asking about the scaffolding that appeared overnight. Another calls concerned about dust drifting toward their windows. The building super wants to know if tenants need to relocate. Within hours, what seemed like a straightforward repair becomes a coordination challenge involving permits, access agreements, and daily explanations to concerned neighbors.
This anxiety is common, but it's also manageable. Brick repointing in NYC does involve dust, noise, and temporary disruptions—but with proper planning, clear communication, and compliance with city regulations, the process can proceed smoothly for everyone involved. The key is knowing what to expect before hammers start chipping away old mortar.
Before we go further, let's clarify a common confusion: brick pointing (often called repointing) is the careful removal of deteriorated mortar from brick joints and replacement with new, compatible material. Tuckpointing is a related decorative technique using two contrasting mortars to create the illusion of finer joints. Most NYC maintenance work is repointing, not decorative tuckpointing—and that's what this guide addresses.
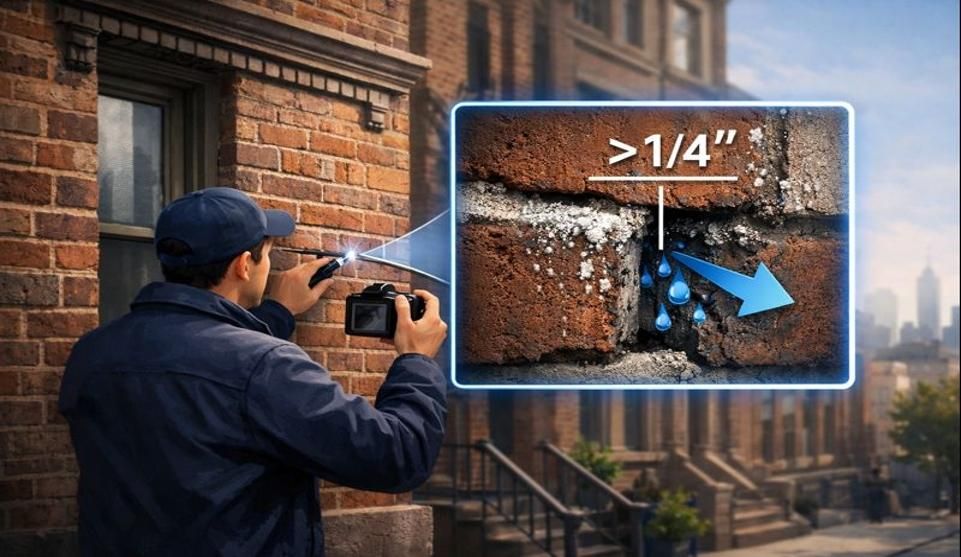
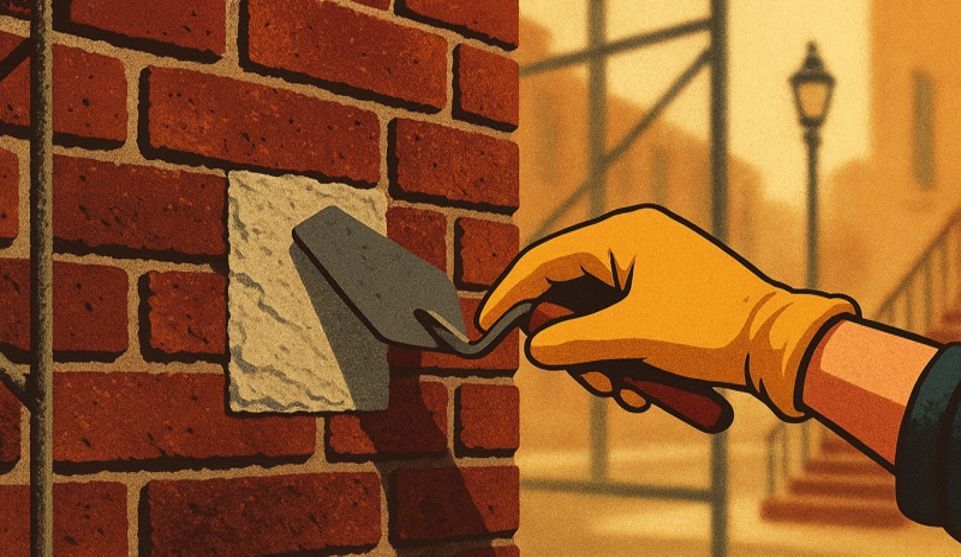
Think of repointing like dental work for your building. You're removing the failing filling and installing new material that will last decades. For a brownstone owner, this might look like a crew working section by section up your façade, carefully raking out old mortar to a specific depth—typically about two to two-and-a-half times the joint width, often three-quarters of an inch minimum—then packing in new material that matches your original in composition and color. The mortar isn't glue; it's a sacrificial, breathable buffer between masonry units that must be slightly weaker than the brick itself to prevent stress concentration during freeze-thaw cycles. When done correctly, repointing restores structural integrity, stops water infiltration, and preserves the historic character of masonry buildings across NYC's five boroughs.
The 30-Second Plan: What You and Neighbors Should Expect
A well-managed repointing project in NYC follows a predictable sequence that minimizes surprises. Work happens during standard weekday hours unless special permits are obtained.
Dust control measures are mandatory, not optional. The building gets wrapped or protected based on height and scope. Neighbors receive advance notice, and there's a single point of contact for questions or concerns throughout the project.
Here's the framework that keeps disruption manageable:
7-Point Calm Disruption Checklist
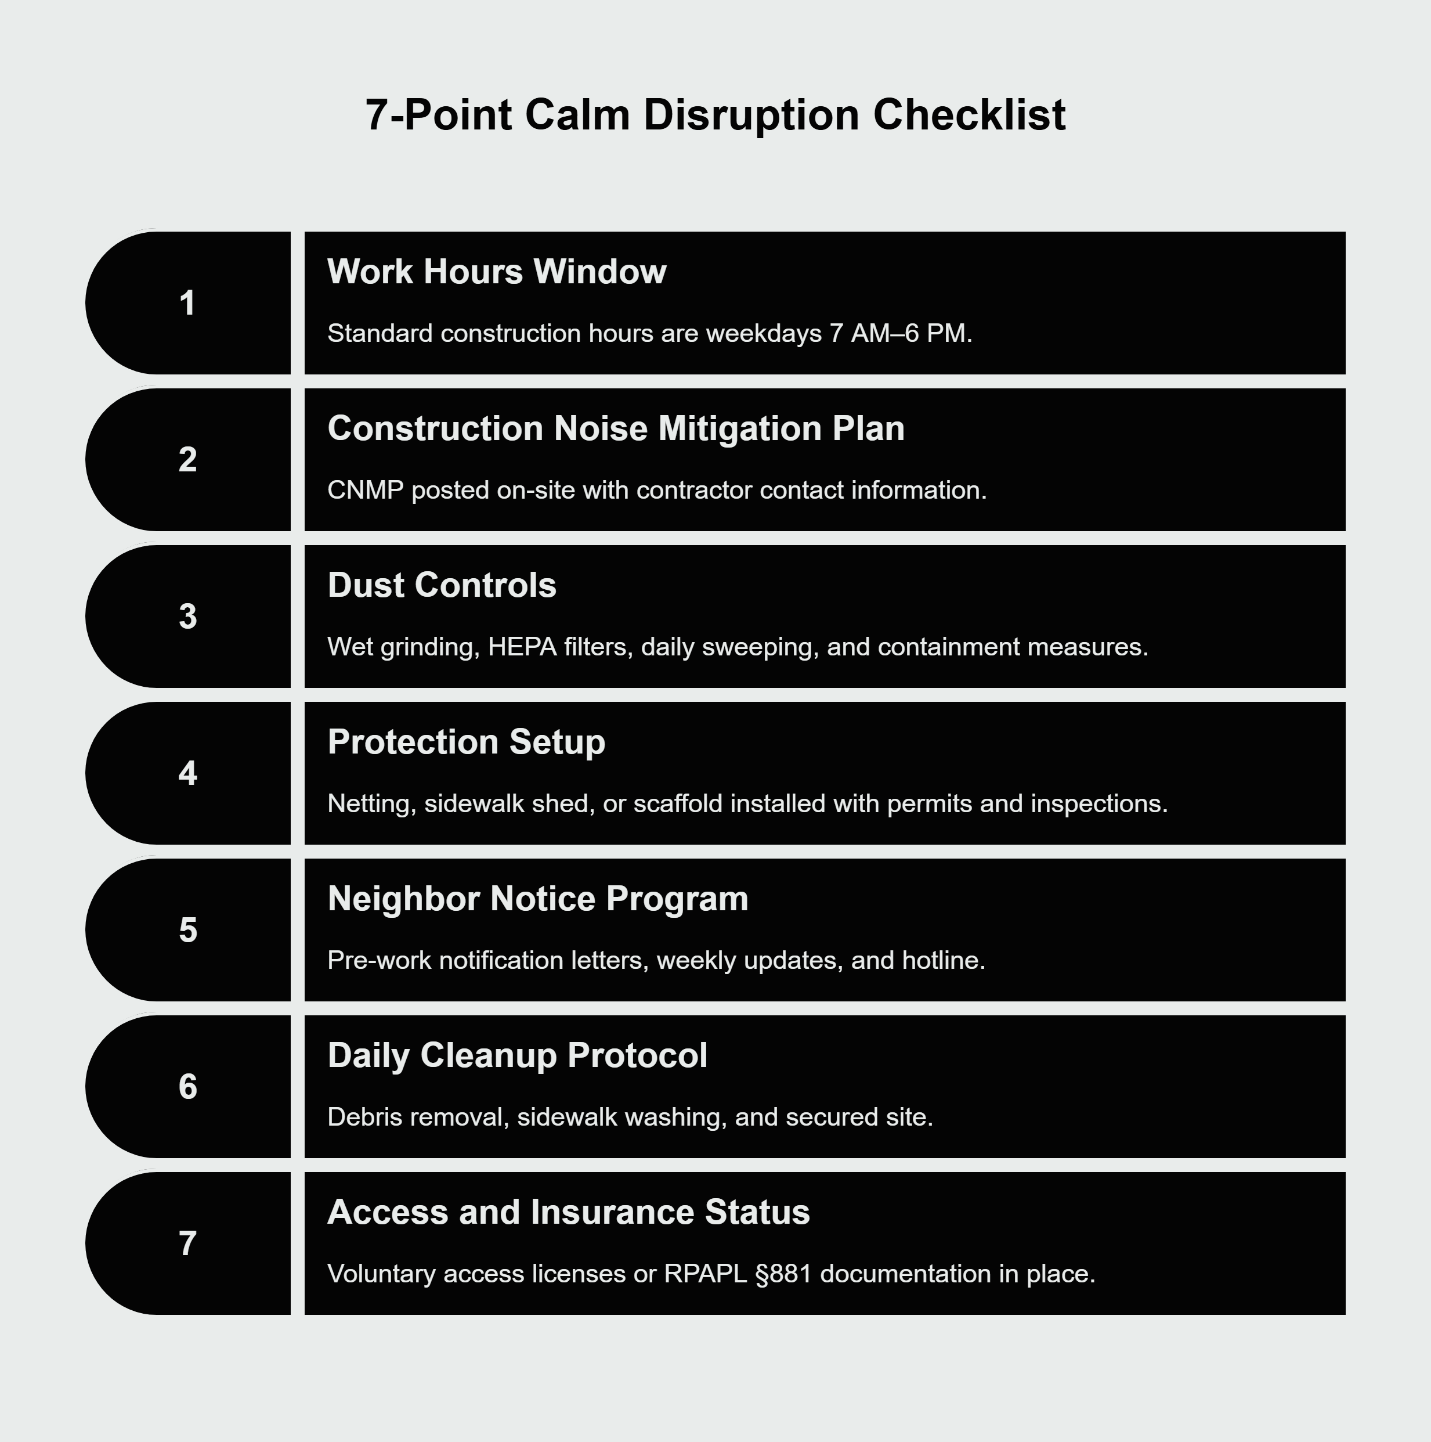
- Work Hours Window: Standard NYC construction hours are weekdays 7 AM–6 PM. Weekend or after-hours work requires a separate variance and is rarely approved for routine repointing.
2. Construction Noise Mitigation Plan (CNMP): Posted on-site with contractor contact information. Required for projects expected to exceed 85 decibels or last more than 14 days.
3. Dust Controls: Wet grinding methods, HEPA-filtered barriers at work zones, daily sweeping, and containment measures per OSHA's silica standard (29 CFR 1926.1153) and NYC DEP regulations.
4. Protection Setup: Netting, sidewalk shed, or supported scaffold installed with dates for setup and removal. Permits filed and inspections scheduled.
5. Neighbor Notice Program: Pre-work notification letters, weekly updates during noisy phases, and a dedicated project hotline for immediate concerns.
6. Daily Cleanup Protocol: Debris removal, sidewalk washing, and secured site at day's end. Chutes or hoppers for safe mortar disposal.
7. Access and Insurance Status: Voluntary access licenses or RPAPL §881 documentation in place; certificate of insurance shared with adjacent owners when relevant.
This checklist serves as both a planning tool before work begins and a verification system during the project. Property managers can use it to brief tenants. Co-op boards can share it with residents. Homeowners can hand it to nervous neighbors as proof that professional standards will be maintained.
Before Work Starts: Permits, Notices and Setup
Every compliant repointing project in NYC begins with paperwork, not power tools. The regulatory landscape involves multiple city agencies, each with specific requirements that protect workers, occupants, and the public.
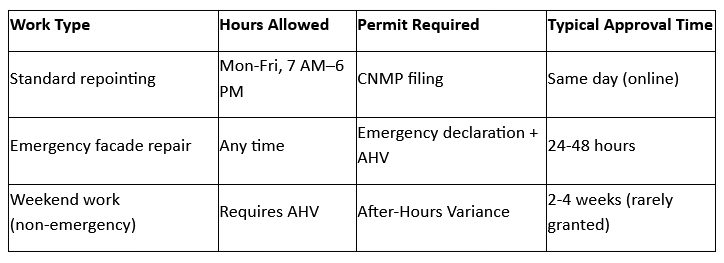
Noise and Schedule: Typical Weekday Windows
The NYC Department of Environmental Protection governs construction noise through clear rules. Standard work hours are Monday through Friday, 7 AM to 6 PM. These hours exist because they balance project efficiency with residential quality of life. Contractors can make progress during daylight while neighbors aren't awakened at dawn or kept up at night.
When a project requires after-hours or weekend work, an After-Hours Variance (AHV) is necessary. These variances are difficult to obtain for routine repointing. The city grants them primarily for emergency repairs, utility work, or situations where daytime construction would create greater public hazards. A Construction Noise Mitigation Plan must be posted at the job site, listing the contractor's name, contact information, and expected noise levels. This plan becomes the neighbor's reference if concerns arise.
Dust Control: More Than Wetting Down the Work
Dust from masonry work isn't just a nuisance—it's regulated by NYC's strict air quality rules and federal OSHA standards. The Department of Environmental Protection requires dust mitigation plans for any project involving grinding, cutting, or demolition of masonry materials. These rules appear in 15 RCNY Chapter 13. Additionally, contractors must comply with OSHA's respirable crystalline silica standard, which mandates wet methods, HEPA vacuums, and respirators to protect workers from silica exposure during cutting and grinding operations.
Wet methods form the foundation of dust control. Rather than dry-grinding deteriorated mortar, contractors use water to suppress dust at its source. Grinders have water feeds that keep the cutting surface damp. Hand tools get wetted down before raking begins. The resulting slurry is messy but containable, unlike dry dust that drifts across property lines.
Barriers and containment take this further. HEPA-filtered negative air machines can be deployed at work zones on larger projects. Plastic sheeting creates temporary enclosures around active work areas. These measures become more elaborate as building height increases and as proximity to occupied spaces requires stricter controls.
A Dust Mitigation Plan must be kept on site, documenting the specific control measures in use. Inspectors can request this documentation, and neighbors can verify that required controls are actually implemented rather than just promised.
Sidewalk Sheds, Netting and Scaffolds: When Protection Is Required
Not every repointing project needs a sidewalk shed, but many do. The NYC Department of Buildings requires overhead protection whenever construction work poses a falling debris risk to pedestrians below. The trigger is typically work occurring above 40 feet or when the scope involves extensive mortar removal that could result in loose material falling.
Three protection systems are common:
Protection Options Comparison
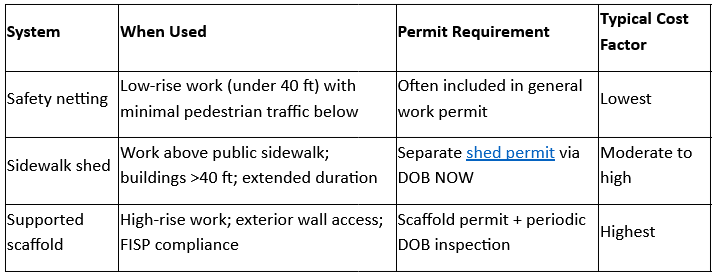
Sidewalk sheds are the wooden tunnel structures that become so familiar in NYC. They're designed to catch falling debris while keeping pedestrians moving safely below. A shed permit involves structural plans, DOB review, and periodic inspections. Lighting must be installed and maintained so the sidewalk remains usable after dark.
Netting represents a lighter-touch solution for lower buildings where pedestrian risk is minimal. The building façade gets wrapped in debris netting that catches loose material during repointing. This approach works well for residential side yards or rear facades with limited foot traffic.
Supported scaffolds—the metal frame systems with wooden platforms—are necessary when height, complexity, or duration demand it. These systems provide stable work platforms for crews and can remain in place for months on larger projects. They require engineered plans, licensed riggers for installation, and regular DOB inspections to verify structural integrity.
Tenant Protection Plan: When Notices Are Required
Buildings with rent-regulated tenants must follow Tenant Protection Plan (TPP) requirements when construction work could impact habitability. The TPP mandates describe how and when notices must be delivered, what accommodations are required if units become temporarily uninhabitable, and what recourse tenants have if protections aren't provided.
For repointing, TPP triggers typically occur when work affects building systems (water, heat, electricity) or when dust and noise reach levels that make units unusable during work hours. A written notice goes to each affected tenant at least five days before work begins, explaining the scope, duration, expected impacts, and contractor contact information. This notice isn't optional; it's a legal requirement that protects both tenants and property owners from disputes.
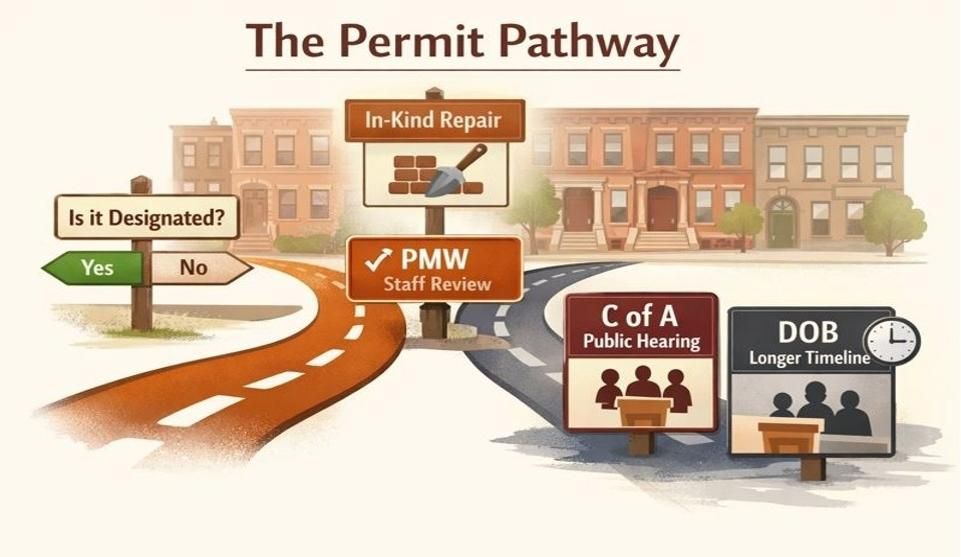
Landmark and FISP Flags: What Adds Extra Steps
Two NYC programs add layers of oversight to certain repointing projects: the Landmarks Preservation Commission (LPC) review and the Facade Inspection Safety Program (FISP, formerly known as Local Law 11).
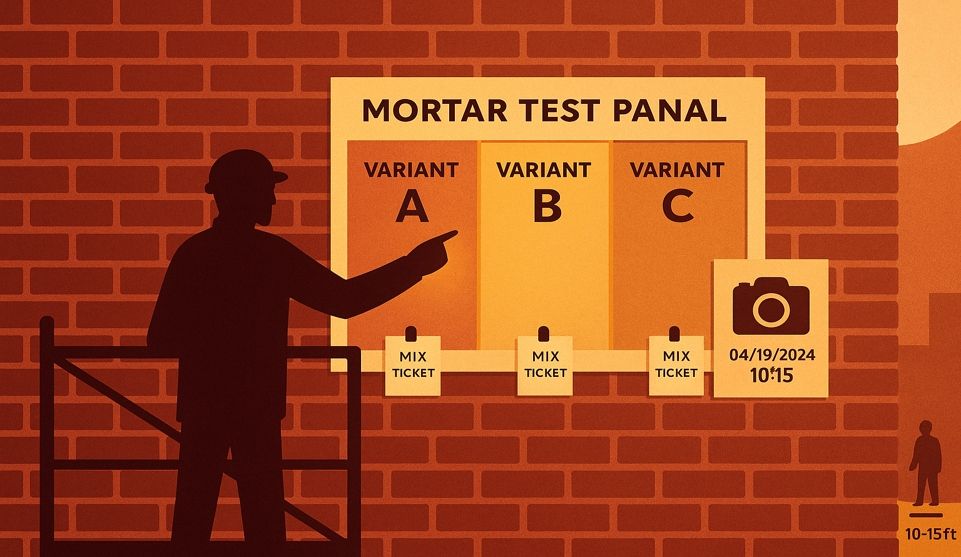
Buildings in historic districts or individually landmarked structures need LPC approval before exterior work begins. The commission reviews mortar specifications, repointing methodology, and material sourcing to ensure that repairs match the building's historic character. This process requires a mock-up panel—a small test section of repointed brick that demonstrates the proposed technique and mortar color. The LPC must approve this mock-up before full-scale work proceeds. Expect this review to add 4-8 weeks to project timelines, and understand that the commission may require mortar adjustments or technique changes to meet preservation standards. For sensitive façades, a lab mortar analysis is a prudent step to identify the original mortar's composition and ensure proper matching.
FISP applies to buildings over six stories tall. These structures must undergo critical facade examinations every five years, conducted by licensed engineers or architects. When these examinations identify unsafe conditions—known as Safe With Repair Required (SWRR) or Unsafe (UNS) ratings—the DOB requires repairs within specific timeframes. Repointing often forms part of these mandated repairs. If your building is in a FISP cycle and facade work is required by the engineer's report, this creates a compliance deadline that eliminates flexibility in scheduling. The work must be completed, inspected, and filed within the prescribed window or penalties accumulate.
The Neighbor-Friendly Communication Plan
Good communication turns a construction project from a neighborhood disruption into a manageable shared experience. The goal is simple: let people know what to expect before it happens, then follow through on promises.
Who to Inform and When
Adjacent property owners should receive notice 10-14 days before work begins. This includes buildings that share party walls, rear neighbors who might experience noise or dust, and any properties where temporary access may be needed for equipment setup or protection installation.
The initial notice should be written and specific. Include the project address, expected start date, estimated duration, typical work hours, and contact information for the project manager. Describe the scope in plain terms—not "comprehensive facade rehabilitation" but "repointing brick joints on the front and south side." Explain what neighbors will see (scaffolding, covered façade, equipment), hear (grinding, hammering during mid-day hours), and smell (damp mortar, minimal if any dust).
For multi-unit buildings, the building super or property manager becomes a critical communication hub. Give them extra notice—at least three weeks—so they can prepare residents and schedule around the work if needed. Supers often know which tenants work night shifts and sleep during the day, which units house young children sensitive to noise, and which residents are most likely to call 311 if caught off guard.
Noisy phases deserve additional heads-up. The loudest part of repointing is mortar removal, particularly when power grinders are used. If two days of heavy grinding are scheduled, send a reminder notice the day before. A simple door hanger or group text to neighbors acknowledging "tomorrow will be louder than usual" goes a long way toward maintaining goodwill.
Neighbor Notice Template: A Practical Starting Point
A one-page notice should cover these elements:
Project Overview: Brief scope description (repointing front façade; estimated 3 weeks)
Schedule: Work days and hours (Monday-Friday, 7:30 AM–5:30 PM)
Dust and Noise Controls: Specific measures in use (wet methods, HEPA barriers, CNMP on file)
Access Needs: Whether temporary access to adjacent property is necessary
Contact Information: Project manager name, phone number, and email—not just the general contractor office but a specific person empowered to respond to concerns
Hotline or Text Line: A dedicated number for immediate issues like excessive dust, work outside approved hours, or blocked access
This notice should be delivered by hand or taped to neighbor's doors, not just emailed. Email follow-up is fine for reference, but physical delivery ensures people actually see the information. For elderly neighbors or those with language barriers, consider a quick doorbell ring to walk through the notice verbally.
If Access Is Needed: Voluntary Agreements and Legal Remedies
Sometimes repointing requires temporary access to a neighbor's property. This might be necessary to install protective netting that extends beyond the property line, to stage equipment on an adjacent driveway, or to place scaffold supports that need solid ground on neighboring land.
The preferred approach is a voluntary access license—a written agreement where the neighbor grants permission for specific, limited use. This agreement should specify exactly what access is needed, for what duration, and what protections will be provided. It should include proof of insurance naming the neighbor as an additional insured, and it should commit to restoring any disturbed areas to original condition.
When neighbors refuse access and the work genuinely cannot proceed safely without it, RPAPL §881 provides a legal mechanism. This statute allows property owners to obtain court-ordered access for necessary repairs to their buildings. The court will consider whether the access is truly necessary, whether the requesting party has made good-faith efforts to reach agreement, and what conditions should protect the neighbor's property rights during the work.
This legal process is time-consuming and can strain neighbor relations. It's used as a last resort after multiple attempts at voluntary agreement have failed. When access disputes arise, experienced masonry contractors in NYC can often suggest alternative approaches—adjusting scaffold configuration, using different equipment, or phasing the work to minimize the access footprint.
During Repointing: Dust, Noise and Cleanliness Controls
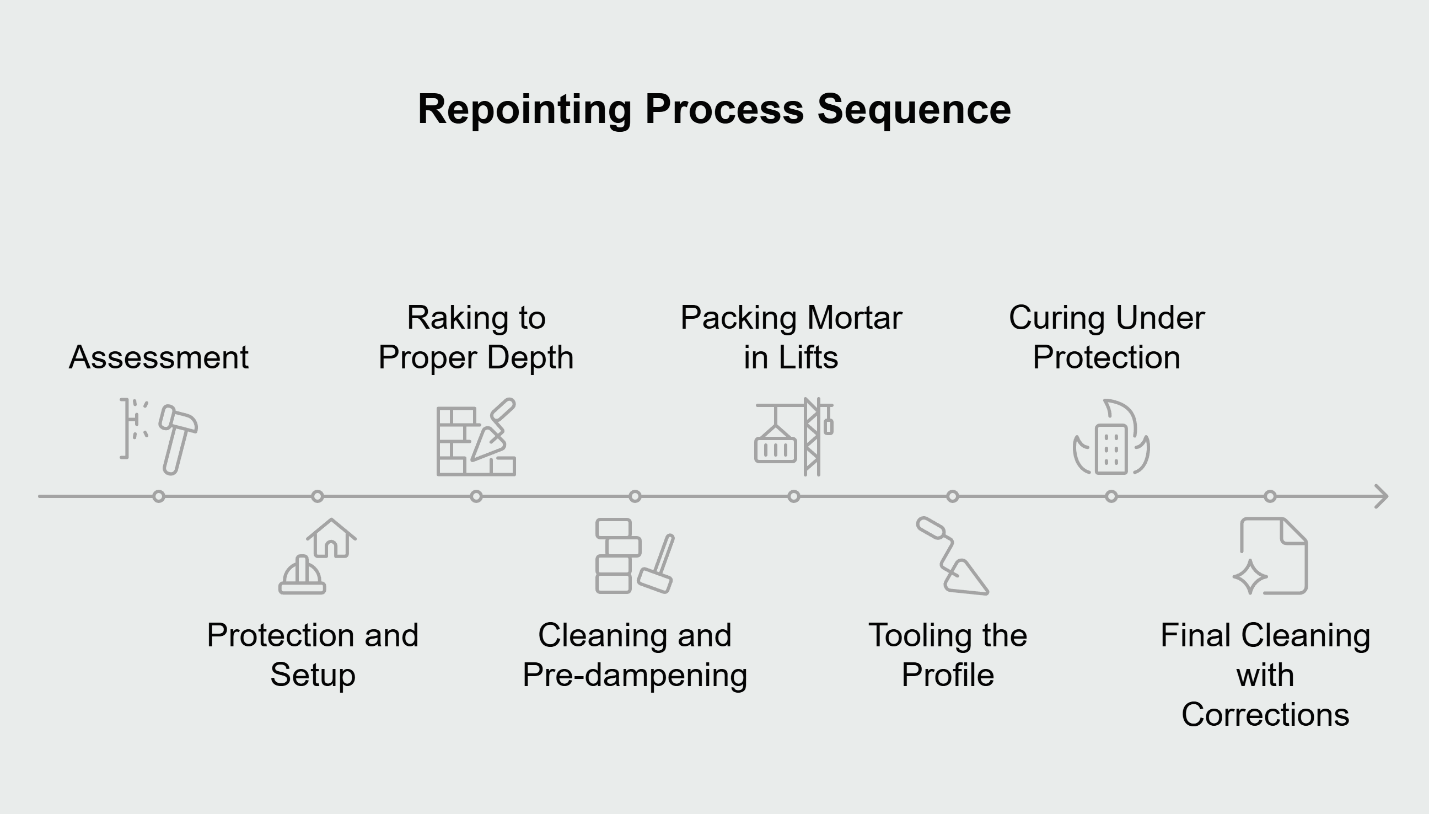
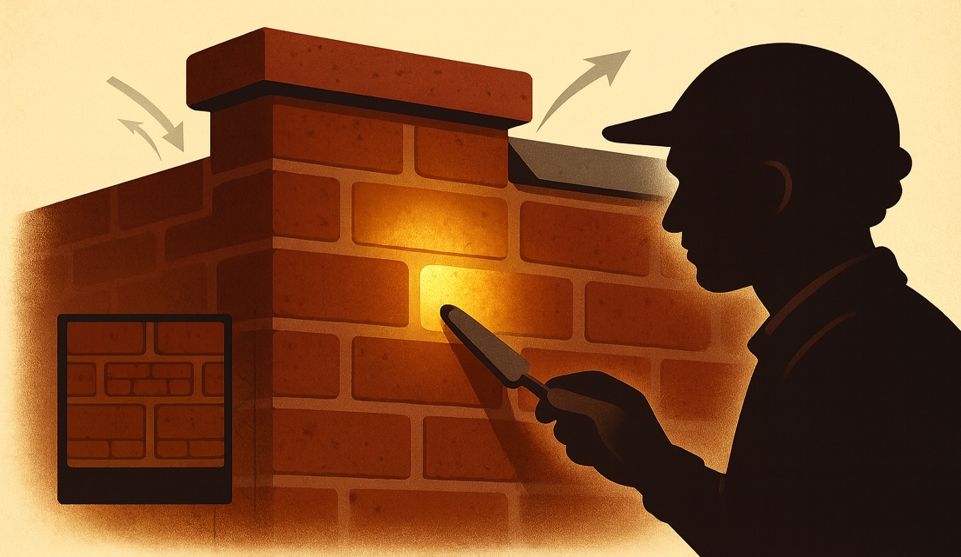
The repointing process follows a methodical eight-step sequence that professional contractors use to ensure quality and minimize disruption: assessment, protection and setup, raking to proper depth, cleaning and pre-dampening, packing mortar in lifts, tooling the profile, curing under protection, and final cleaning with punch-list corrections. Understanding this sequence helps you verify quality on site and anticipate what happens next.
The Technical Process in Practice
After the site is properly protected and dust controls are active, crews begin removing deteriorated mortar. They rake joints to approximately two to two-and-a-half times the joint width—often three-quarters of an inch minimum—without damaging the brick edges. Hand tools are safer for old, soft brick; power tools require skill and careful depth control to avoid shaving brick arrises.
Once joints are properly cleared, crews brush or blow out debris and then lightly dampen the cleaned joints. This pre-dampening step is critical: it prevents the dry brick from sucking moisture out of fresh mortar too quickly, which would cause "flash drying" and weaken both the bond and the cure. Think of it like priming a surface before painting—the preparation determines how well the new material adheres and performs.
Fresh mortar goes in using thin lifts rather than one thick application. Each lift gets compacted fully to the back of the joint, eliminating voids that could trap water or create weak spots. When the mortar reaches "thumbprint hard"—firm enough to hold a thumbprint but not yet fully set—crews tool it to the specified profile. A concave joint profile is common because it sheds water effectively and matches most historic NYC brickwork.
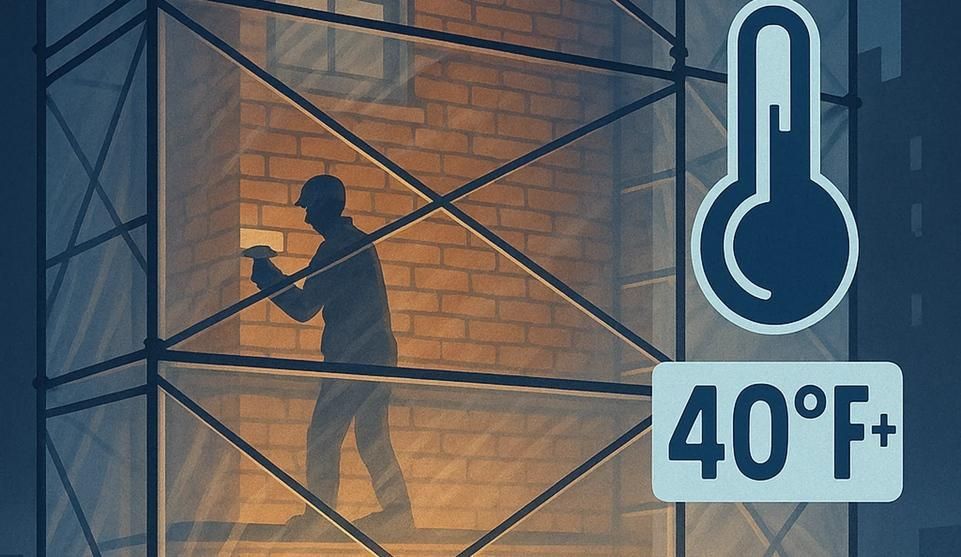
Curing protection matters more than most people realize. Fresh mortar needs time to gain strength, and it's vulnerable to direct sun, high wind, driving rain, and freezing temperatures during the first 72 hours. Shoulder seasons—spring and fall—demand extra vigilance because temperature swings between warm days and cold nights can compromise the cure. Professional contractors shield work zones with tarps or temporary enclosures, mist surfaces to maintain moisture, and monitor weather forecasts to avoid pointing during conditions that risk damage.
Dust Management in Practice
Wet raking forms the core of dust suppression. As crews rake out old mortar joints, they continuously mist the work area. The water binds with mortar dust, creating a slurry that drops to the ground rather than becoming airborne. Collection pans, drop cloths, and temporary barriers catch this material before it reaches sidewalks or adjacent properties.
Localized containment uses plastic sheeting to create work zones. On a typical brownstone project, crews might wrap one section—perhaps 15-20 feet of façade—at a time. They work within this contained area for several days, then move the containment system to the next section. This approach balances worker access with dust control.
Daily cleanup isn't a nicety; it's a requirement. At the end of each work day, sidewalks get swept and washed. Debris is bagged and staged for proper disposal. Equipment is secured and work areas are left orderly. For occupied buildings, common areas like lobbies and hallways that might have accumulated construction dust get cleaned before residents return from work.
Debris removal follows specific protocols. Mortar waste cannot simply be dumped into trash bins. It must be collected in debris chutes, loaded into dumpsters or trucks, and hauled to approved disposal facilities. The loading process should be controlled—no indiscriminate tossing that creates dust clouds or noise. Professional operations use chutes that extend from work platform to collection container, minimizing both mess and sound.
Noise Control: Realistic Expectations
Repointing will never be silent. Chipping out old mortar creates percussive sounds. Power tools generate mechanical noise. Crews communicate by calling to each other across the work platform. The goal isn't absolute quiet but controlled, predictable noise that stays within regulatory limits and happens only during approved hours.
Quieter methods exist and get used where appropriate. Hand tools—chisels and raking irons—are significantly quieter than grinders, though slower. On smaller projects or in sensitive locations, crews might default to hand methods even when power tools would be faster. The trade-off is longer project duration for reduced neighborhood impact.
Scheduling loud tasks strategically helps. The noisiest work—initial mortar removal—can be clustered into mid-day hours (10 AM–3 PM) when most people are out of their homes or offices. Final pointing work, which involves troweling new mortar into joints, is much quieter and can happen early or late in the work day.
CNMP compliance means monitoring actual noise levels and adjusting as needed. If a neighbor complains and a measurement confirms levels above 85 decibels at the property line, the contractor must modify techniques, add barriers, or shift to quieter tools. The posted CNMP creates accountability—neighbors can call the listed contact, and the contractor has a legal obligation to respond.
Site Protection Systems: Netting, Sheds and Scaffolds
The protection system in place determines what neighbors see and experience during the project. Netting creates a semi-transparent cocoon around the building. Pedestrians can still see through it, but loose material stays contained. This system works well for shorter buildings and creates minimal visual impact from the street.
Sidewalk sheds transform the streetscape more dramatically. The wooden tunnel protects pedestrians but blocks storefronts and changes how people navigate the block. Shed maintenance matters—lights must stay functional, the deck must remain clear of debris, and supports must stay plumb and secure. Regular inspections verify structural integrity throughout the project.
Supported scaffolding provides the most robust access and protection, particularly on taller buildings. The metal frame and wood planks create stable work platforms at each floor level. This system allows multiple crews to work simultaneously at different heights, speeding project completion. Safety railings, toe boards, and tie-ins to the building structure prevent falls and ensure that the scaffold itself doesn't become a hazard.
Lighting for after-hours visibility becomes legally required once a protection system is installed. Even though work happens only during daylight, the sidewalk shed or scaffold remains in place overnight. Pedestrians must be able to navigate safely after dark. Properly maintained lighting—not just a single bulb but adequate illumination along the full length of the shed—reduces trip hazards and improves security.
Inspection cadence for these systems varies by type. Sheds require DOB inspection after initial installation and then periodically based on duration. Scaffolds require more frequent oversight—licensed riggers verify structural connections, and DOB inspectors check compliance with safety standards. Owners receive notices when inspections are due, and failure to maintain compliance can result in stop-work orders or fines.
Safe removal matters as much as proper installation. When work completes, the shed or scaffold comes down in a controlled fashion. Dismantling happens during regular work hours, not at night or on weekends. Debris from the structure gets loaded directly into trucks rather than dropped to the street. The sidewalk gets cleaned, and the streetscape returns to normal—a visible milestone that signals project completion.
Understanding Mortar: Why the Right Mix Matters
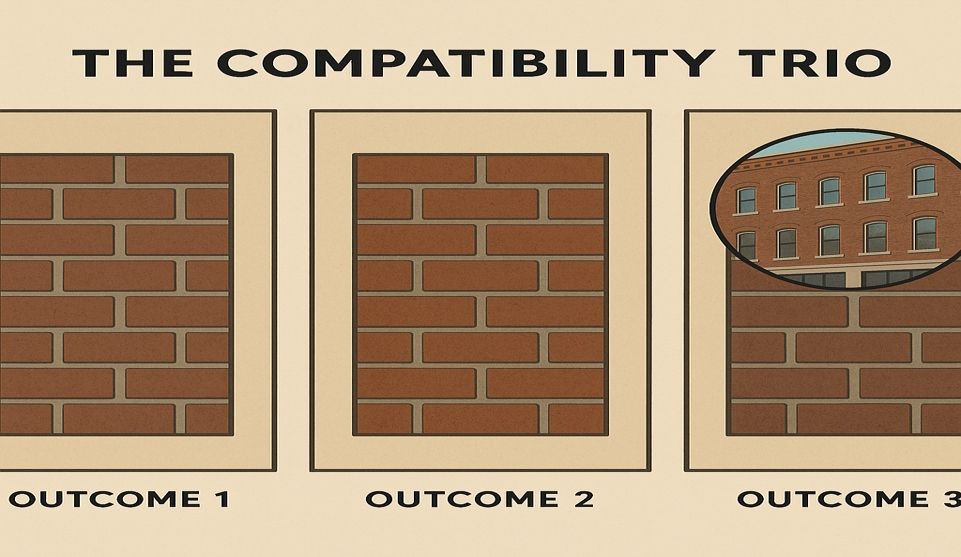
Mortar selection deserves special attention because choosing the wrong type causes long-term problems that only become visible years after the project is complete. The right mortar isn't simply a matter of matching color—it's about matching physical properties to ensure compatibility with the brick.
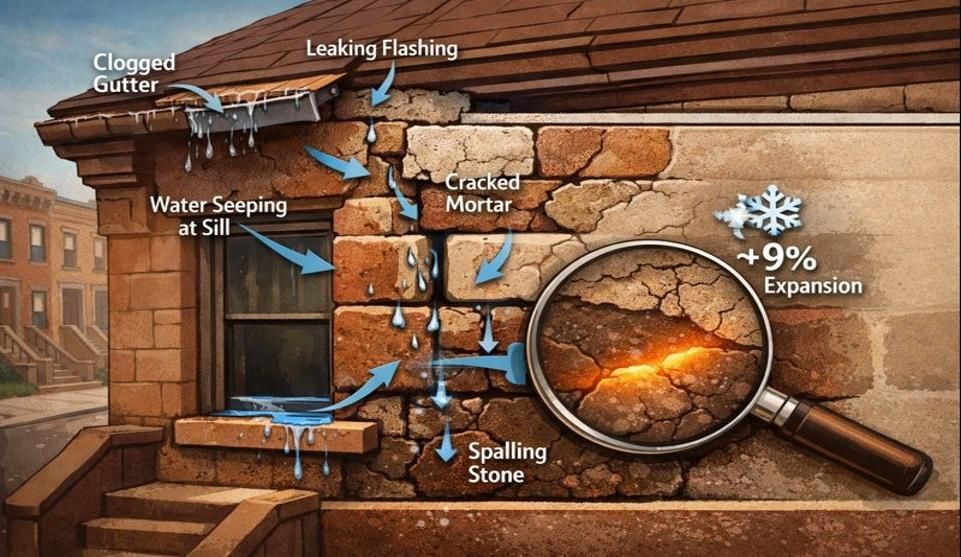
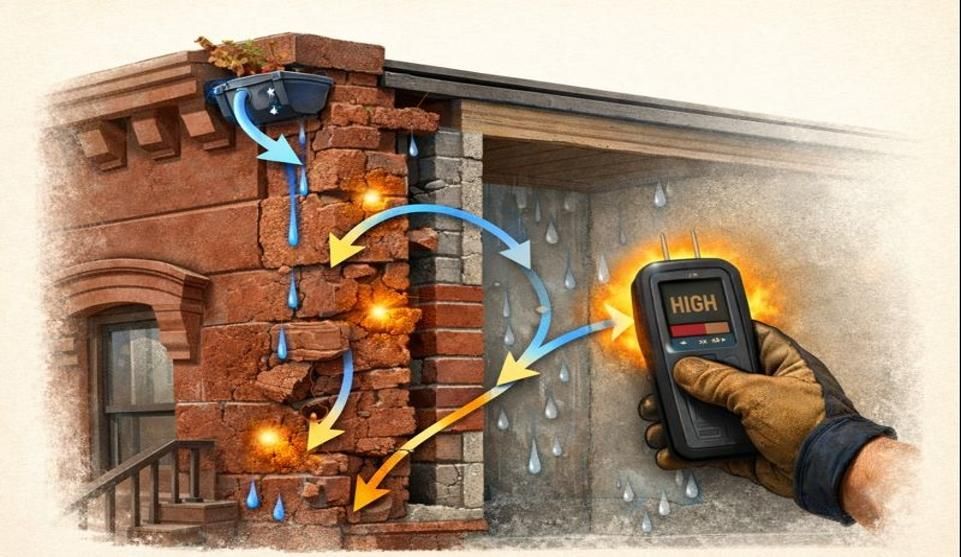
Two principles guide proper mortar selection. First, new mortar should match or be slightly weaker than the brick. Hard, high-cement mortars can concentrate stress during thermal expansion and freeze-thaw cycles, causing brick faces to pop off in a process called spalling. When water enters the wall, freezes, and expands, something has to give. If the mortar is harder than the brick, the brick fails. This is why historic buildings originally built with soft, lime-rich mortars need replacement mortar with similar properties—not modern, hard portland cement mixes.
Second, mortar must replicate both the appearance and behavior of the original. Color and sand gradation affect visual character, which matters for historic preservation. But breathability, permeability, and compressive strength affect performance. A proper specification considers all these factors together.
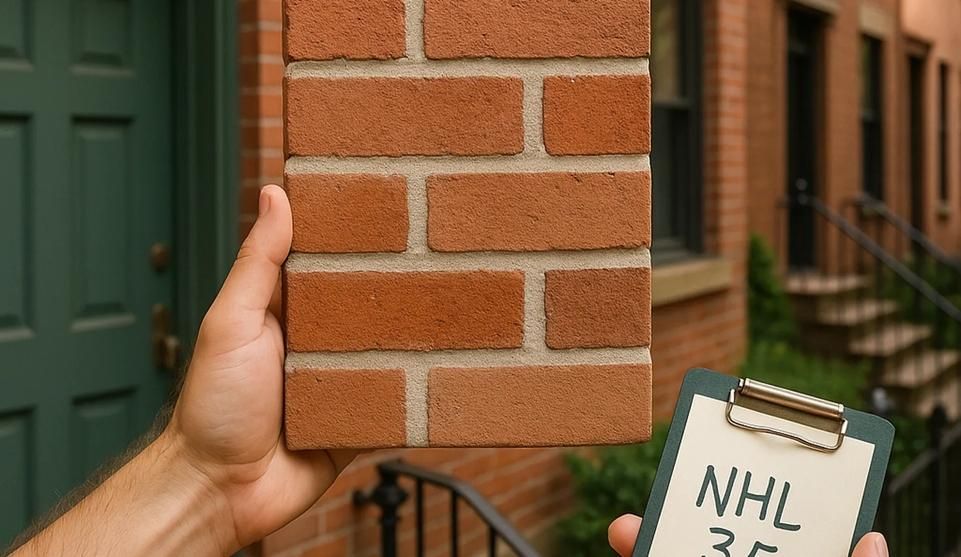
ASTM C270 provides the widely used classification system for mortar types and proportions. This standard defines mortar types by strength and composition, helping contractors and architects specify appropriate mixes for different applications. For traditional NYC masonry, lime-rich mixes are often appropriate. For newer brickwork from the mid-20th century onward, moderate-strength cement-lime mortars may fit. The key is analysis and matching, not guessing.
On sensitive or landmarked façades, lab mortar analysis removes guesswork. A sample of original mortar goes to a materials lab, where technicians determine the ratio of lime to sand, the presence of natural cement or other binders, and the aggregate type and gradation. This analysis creates a specification for new mortar that will perform like the original—not just look similar but actually behave compatibly with the existing masonry for decades to come.
Special Cases Most Owners Miss
Three situations complicate standard repointing projects and require specialized knowledge: after-hours work requests, high-rise buildings in FISP cycles, and historic structures under LPC oversight. Each adds layers of process that affect timeline, cost, and coordination.
After-Hours and Weekend Work: Why Variances Are Rare
Property owners occasionally request evening or weekend repointing to minimize disruption to weekday business operations or to accommodate tenant schedules. The immediate response should be skepticism—NYC rarely grants after-hours variances for routine repointing.
The city's after-hours variance process exists primarily for utility emergencies, life-safety repairs, and situations where daytime work creates greater public hazard than night work. Routine facade maintenance doesn't meet this threshold. When owners apply for weekend or evening permissions, they must demonstrate that standard weekday hours are genuinely impossible, not just inconvenient.
The application process itself acts as a deterrent. It requires detailed justification, neighbor notification, proof of extraordinary circumstances, and a review period measured in weeks. Even then, approval is uncertain. Denials are common. The practical implication is that project schedules should assume weekday-only work from the outset rather than counting on an after-hours variance to compress timelines.
High-Rise Buildings and FISP: Coordination and Timelines
Buildings over six stories operate under different rules when repointing is required by FISP engineer findings. The five-year FISP cycle creates compliance deadlines that override normal scheduling flexibility. When an engineer files a report identifying unsafe facade conditions and recommending repointing, the building owner faces legally mandated repair deadlines.
For SWRR conditions (Safe With Repair Required), the deadline is typically one year from the engineer's filing. For UNS conditions (Unsafe), the deadline compresses to 90 days, and immediate interim protections—sidewalk sheds or barriers—must be installed within 24 hours of the finding. These compressed timelines eliminate the luxury of waiting for ideal weather, negotiating at leisure with contractors, or phasing work around tenant preference.
QEWI (Qualified Exterior Wall Inspector) coordination becomes essential. The engineer who performed the initial inspection often provides the scope of required work. That same engineer or another licensed QEWI must inspect the completed repairs and file a closeout report with DOB. This creates a quality control loop where the engineer who identified problems verifies that solutions meet professional standards.
Public protection requirements escalate with building height. Sidewalk sheds become mandatory, not optional. The sheds must remain until final inspection approves removal. On a 12-story building, this might mean a full summer with scaffolding and sheds in place while crews methodically work from top to bottom. The visibility and duration make communication with commercial tenants and neighbors especially important.
Historic Buildings: Mortar Matching, Mock-Ups and Submittals
The Landmarks Preservation Commission takes mortar seriously. For buildings in historic districts or with individual landmark status, the LPC review process adds substantial front-end time and requires technical expertise beyond standard repointing knowledge.
Mortar analysis forms the foundation. Before any repointing occurs, mortar samples from the existing building go to a lab for analysis. The lab identifies the original mortar's composition—the ratio of lime to sand, the presence of natural cement or other binders, the aggregate type and gradation. This analysis informs the specification for new mortar that will match original properties.
Matching isn't just about color. It's about physical properties: compressive strength, permeability, thermal expansion. Historic masonry typically used softer, lime-based mortars. Modern portland cement mortars are harder and can damage softer brick when used in repointing. The LPC requires mortar specifications that are compatible with the original materials—often meaning custom formulations rather than off-the-shelf products.
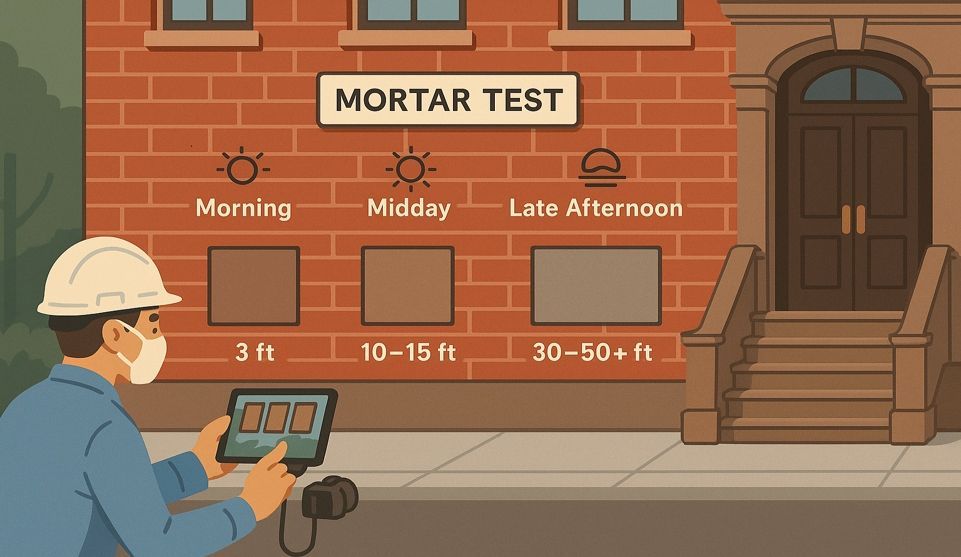
Mock-up panels demonstrate the proposed work before full-scale repointing begins. The contractor selects a small section of façade—typically 3 feet by 3 feet—and repoints it using the specified materials and techniques. This panel shows the finished appearance: mortar color when wet and when cured, joint profile, tooling finish. LPC staff inspect the mock-up and either approve it or require adjustments.
This approval process can take 6-12 weeks from submittal to authorization. Project schedules must account for this lead time. There's no way to accelerate it by starting work before approval—doing so risks stop-work orders and requirements to remove unapproved work. The front-end patience pays off in a finished project that maintains historic integrity while meeting modern performance standards. The National Park Service's Preservation Brief 2 provides respected technical guidance on repointing historic masonry and is often referenced in LPC reviews.
Timeline and What "Normal" Looks Like
Repointing timelines vary widely based on building size, scope, protection requirements, and weather. A realistic timeline helps set expectations and enables coordination with other activities.
For a typical three-story Brooklyn brownstone with front and one side façade requiring repointing, here's a representative schedule:
Pre-Construction: 2-4 weeks for permits, neighbor notices, protection setup
Mortar Removal: 3-5 days of active removal work (loudest phase)
New Mortar Installation: 5-7 days of pointing work (quieter, more methodical)
Curing and Cleanup: 2-3 days allowing mortar to set, followed by final site cleanup
Protection Removal: 1-2 days to dismantle netting or shed and restore the streetscape
Total Duration: 3-4 weeks from first setup to final cleanup
This timeline assumes favorable weather. Rain delays mortar work because fresh installations need protection from moisture during the initial cure. Extreme heat or cold also pause work—mortar can't be installed when temperatures drop below 40°F or climb above 90°F without special additives and cold-weather protections that slow the cure and add complexity.
Taller buildings or larger projects scale up proportionally. A six-story building might require 8-12 weeks of active work. A full-perimeter repointing of a mid-rise building could span an entire construction season. These extended timelines make phasing important—working section by section rather than wrapping the entire building at once.
Permit and setup lead times add to the front end. DOB permit review might take 2-3 weeks. Sidewalk shed permits require structural plans and engineering review, adding another 3-4 weeks. LPC review for landmark buildings can add 6-8 weeks or more. Smart scheduling accounts for these administrative timelines by starting the permit process early, well before field work needs to begin.
The City Suburb Way: How We Keep It Smooth
Professional repointing contractors in NYC distinguish themselves not just by technical skill but by how they manage the human side of construction. Clear communication, tidy sites, proper paperwork, and responsive problem-solving turn a potentially chaotic project into a manageable process.
Our approach starts with a single point of contact. Building owners, property managers, and neighbors get a name and direct number for the project lead—not a receptionist, not a rotating crew, but one person responsible for that project. Questions about schedule changes, dust complaints, access coordination—all flow to one decision-maker who has both authority and accountability.
Site discipline shows up in daily practices. Drop cloths go down before work starts, not after someone notices a mess. Tools get staged systematically, not scattered. Debris goes into proper containers immediately, not left for end-of-day cleanup. These habits reduce mess, improve safety, and signal professionalism to everyone watching the project unfold.
Paperwork isn't an afterthought. Construction Noise Mitigation Plans, Dust Control Plans, insurance certificates, permits—these documents get prepared properly, filed on time, and kept accessible at the job site. When an inspector arrives or a neighbor asks to verify insurance coverage, the response is immediate production of proper documentation, not scrambling to locate paperwork.
Neighbor relations receive active management. Pre-work meetings with adjacent property owners establish rapport before the first truck arrives. Weekly check-ins during loud phases keep communication flowing. Problems get acknowledged and addressed rather than ignored or dismissed. This attentiveness builds the goodwill that makes short-term disruptions tolerable and maintains relationships for the long term.
The commitment extends to specialized capabilities. For Masonry Contractor work in Brooklyn, Manhattan, Bronx, and Long Island, local knowledge matters. Understanding neighborhood character, working relationships with local DOB and DEP inspectors, and familiarity with common building types enable smoother projects. Similarly, complex projects like parapet wall repairs or foundation repair often coincide with repointing work, and coordinating these trades reduces total disruption time.
Frequently Asked Questions
Will the entire building be wrapped in plastic or netting?
Not always. The protection system depends on building height, work scope, and pedestrian traffic below. Low-rise buildings with work areas away from sidewalks might use minimal protection. Buildings over 40 feet or with work above public walkways typically require either netting or sidewalk sheds. The contractor should explain the specific protection plan during project setup.
Do tenants or owners need to leave during repointing?
Generally no. Repointing happens on the building's exterior. Interior spaces remain accessible and habitable throughout. Exceptions occur if scaffold installation requires temporary access through windows, if dust control requires sealing windows on work floors, or if FISP violations created unsafe conditions requiring temporary relocation. These situations are rare and get communicated well in advance.
How loud will it actually be?
The loudest phase is mortar removal, particularly when power grinders are used. This work can reach 85-95 decibels at the work face—comparable to a lawn mower or leaf blower. The sound diminishes with distance but remains noticeable to neighbors within 50-100 feet. Hand tool methods are significantly quieter but slower. The noise happens during approved daytime hours and typically lasts for only a portion of the total project duration.
Who handles all the permit applications and compliance paperwork?
Professional contractors handle permit applications, CNMP filings, and coordination with DOB, DEP, and DOT as part of their scope. Building owners shouldn't need to navigate these systems directly. The contractor should provide copies of filed permits and posted plans so the owner can verify compliance and respond to neighbor inquiries. For landmark buildings, the owner may need to engage directly with LPC early in the planning process.
How do I know the new mortar will match the original?
Proper mortar matching requires lab analysis of existing mortar, careful specification of replacement materials, and—for landmark buildings—LPC-approved mock-ups. The new mortar should match in color when cured, but more importantly it should match in physical properties: permeability, strength, and thermal behavior. Ask contractors about their mortar sourcing and whether they conduct lab analysis or rely on visual matching alone. Visual matching is insufficient for quality work.
What happens if work needs to stop mid-project due to weather or other delays?
Professional contractors secure work areas before stopping. Open joints get temporarily sealed, protection systems remain in place, and the site gets made safe. Extended delays—a week or more—might trigger neighbor notifications explaining the pause and expected restart date. Weather delays are common in spring and fall. Mid-project pauses are disruptive but manageable if the contractor maintains site security and communicates proactively.
Can brick pointing be done in winter?
Yes, with proper cold-weather protection and curing measures. Freezing conditions without protection risk weak joints and surface damage. Contractors should adjust schedules and protection to avoid freezing during cure, following standard cold-weather masonry practices. This typically means additional enclosures, heating, and extended cure times that add cost and complexity.
Will pointing fix active leaks?
It often helps by sealing joints, but leaks from failed flashings, roof intersections, or window perimeters persist without targeted repairs. A thorough assessment distinguishes joint failure from detailing issues. Sometimes what appears to be a mortar problem is actually a flashing or sill issue that repointing alone won't solve.
Ready to Start Your Repointing Project?
Understanding what to expect during brick repointing transforms anxiety into informed planning. Dust and noise are real but manageable with proper controls. Protection systems serve clear purposes. Communication turns neighbors into partners rather than adversaries. Compliance with NYC's regulatory framework isn't optional, but it creates a structure that protects everyone involved.
The brownstone owner we pictured at the start—the one fielding neighbor texts and super questions on Day One—doesn't need to navigate these complexities alone. Professional masonry contractors handle the permits, maintain the site, control the dust, and keep neighbors informed. The owner's role becomes oversight and coordination rather than daily crisis management.
Contact City Suburb for a free on-site assessment of your repointing needs. We'll evaluate your façade condition, explain protection and access requirements specific to your building, and provide a detailed timeline with clear expectations. Or call us at (718) 849-8999 to speak with a project manager who can answer questions about your specific situation. You can also explore our completed projects and read client experiences on our Reviews page.
Proper repointing protects your investment, stops water damage, and preserves architectural character for decades. The disruption is temporary. The benefits last.
Disclaimer
This guide is for informational purposes and does not replace professional advice. NYC construction regulations change periodically. Always verify current requirements with the Department of Buildings, Department of Environmental Protection, and—for landmark structures—the Landmarks Preservation Commission before beginning work.
Our Editorial Process
We fact-check service claims against official NYC sources, prioritize occupant and public safety requirements, and update guidance when regulations change. Our content is for informational purposes and should not replace professional advice.
About the City Suburb, Inc. Insights Team: The City Suburb, Inc. Insights Team is our dedicated engine for synthesizing complex building topics into plain-English guides for New Yorkers. We collaborate with field supervisors and project managers to ensure accuracy. This content is for informational purposes and should not replace professional advice.


Protecting Tenants and Pedestrians: A Framework for Scaffolding and Site Safety During Facade Repair