Can You Do Brick Pointing in Winter? Temperature Rules for Masonry Repair
📌 Key Takeaways
Winter brick pointing is possible in New York, but only when contractors maintain controlled conditions that protect both historic masonry and fresh mortar from freeze damage.
- 40°F Is Your Safety Line: Masonry work requires keeping the wall, mortar, and air at or above 40°F (4°C) during placement and the first 48-72 hours of curing—below this threshold, cement hydration stalls and freeze damage becomes likely.
- Historic Brick Demands Softer Mortar: Pre-war Brooklyn and Bronx brownstones need lime-based mortars that remain slightly softer and more permeable than the brick itself, ensuring mortar fails before the brick when freeze-thaw cycles occur.
- Professional Winter Work Requires Enclosures and Heat: Reliable cold-weather repointing uses shrink-wrap scaffolding, indirect heaters, insulated blankets, and 24-48 hour minimum protection periods—not just hoping for one mild afternoon.
- Triage Now, Restore in Spring Makes Sense: When full temperature control isn't feasible, seal critical leak paths temporarily in winter and schedule comprehensive color-matched restoration for spring when consistent conditions support quality craftsmanship.
- Winter Shortcuts Create Expensive Spring Failures: Smearing hard mortar over frozen brick, skipping cure protection, or working on ice-contaminated surfaces guarantees failed joints that need redoing within months.
Control the temperature or wait for spring—there's no middle ground in winter masonry. Historic home owners in Brooklyn, the Bronx, and Long Island will find practical guidance here, preparing them for the detailed temperature rules and professional methods explained in the article that follows.
Quick Answer: Yes—brick pointing can be done in winter if you control temperature. Professionals keep the wall, mortar, and work area at or above 40°F (4°C) during placement and early cure using enclosures, safe heating, and extended protection. If you can't guarantee that, triage the leak now and schedule full restoration for spring.
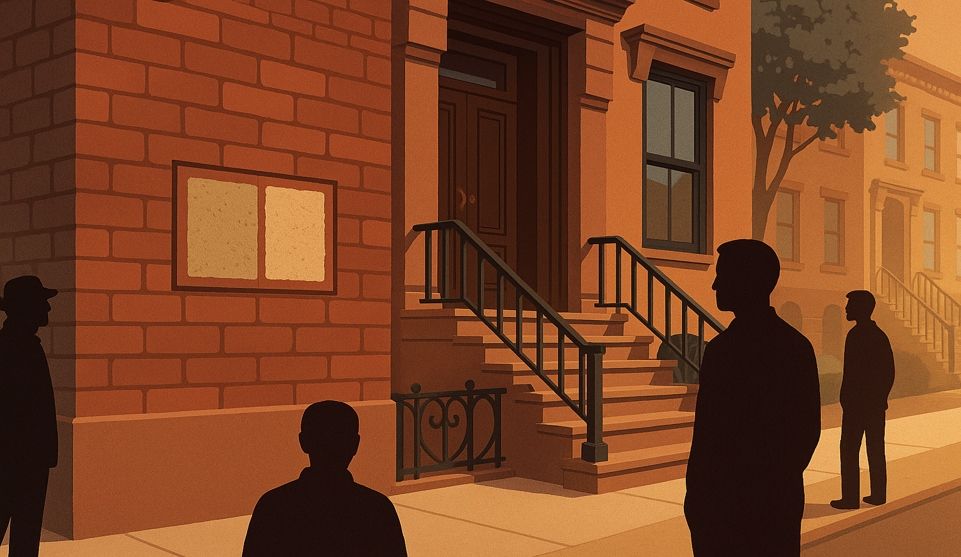
You discover water stains spreading across your brownstone's interior wall in mid-January. Efflorescence creeps along the brick joints outside. The leak is real, winter is here, and you're caught between two fears: waiting until spring while damage worsens, or paying for work that won't "take" in freezing conditions.
The answer is more nuanced than a simple yes or no, but it starts with understanding one critical threshold.
Quick Answer: Yes—But Only If You Control the Temperature
Winter brick pointing is possible in New York's climate, but success depends entirely on maintaining safe curing conditions throughout the repair process.
The Rule of Thumb Homeowners Can Remember
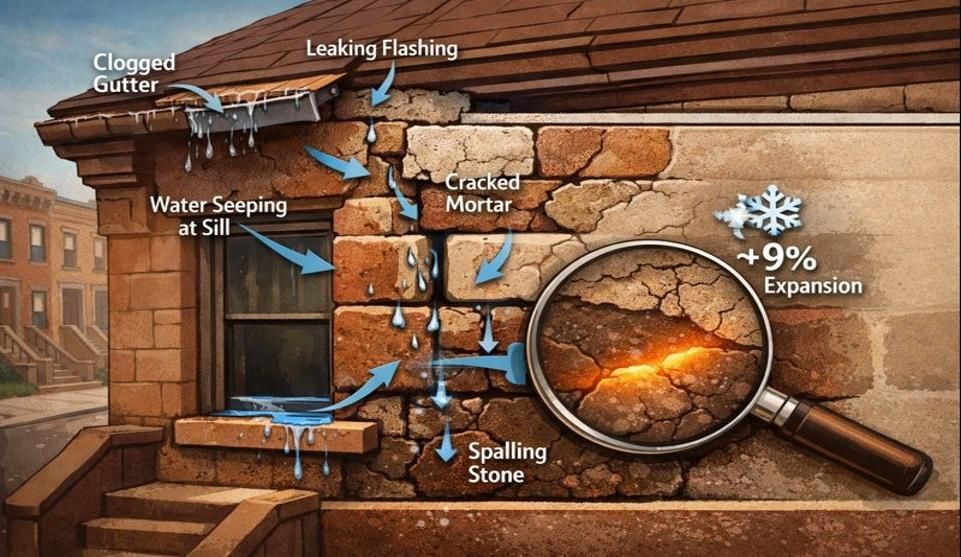
Keep the masonry substrate, fresh mortar, and surrounding air at or above 40°F (4.4°C) during placement and for at least 48-72 hours afterward. According to cold-weather masonry guidance, cement hydration slows sharply below this temperature and essentially pauses once mortar drops below 40°F—leaving joints vulnerable to permanent damage.
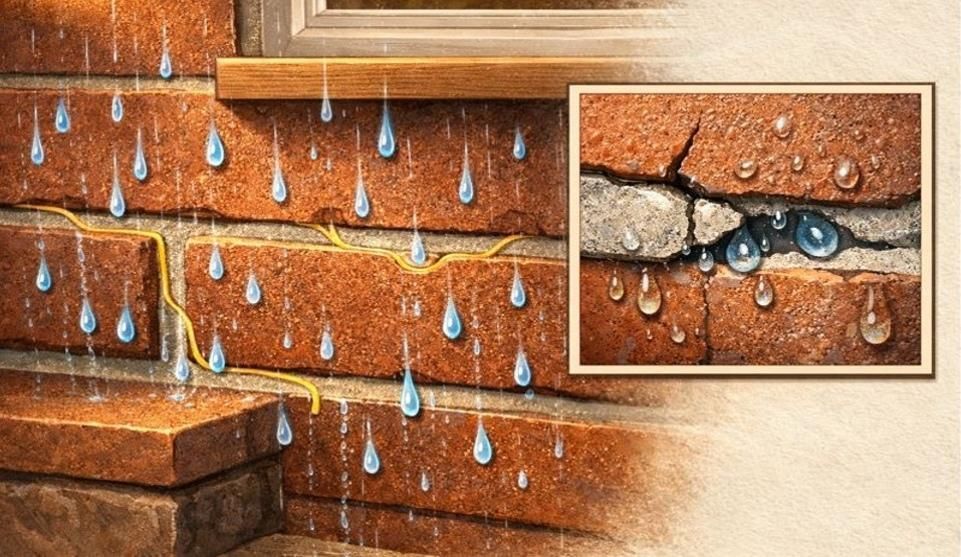
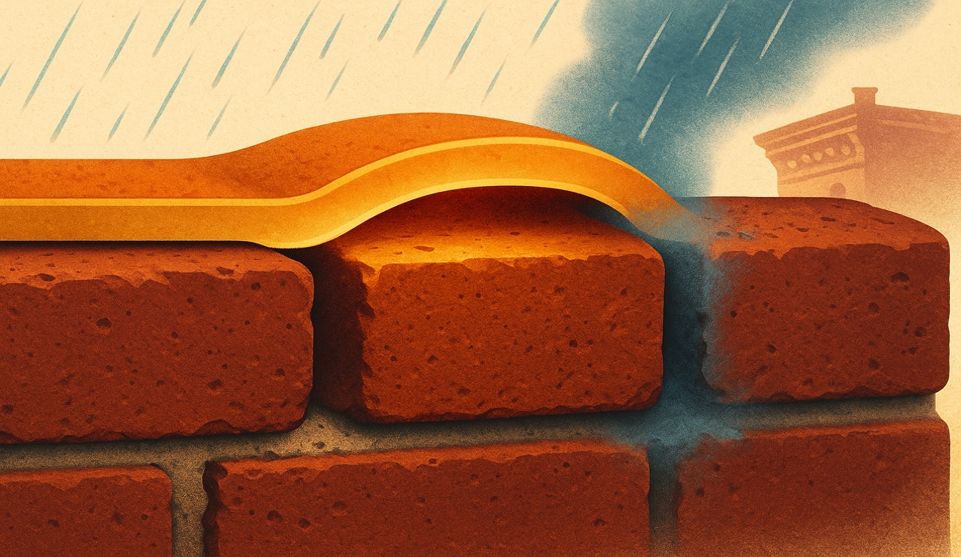
When water in mortar freezes before the chemical cure establishes sufficient bond strength, ice crystals expand within the joint. This expansion disrupts the bond between mortar and brick, creating weak points that lead to premature failure. You'll see the consequences in spring: crumbling joints, spalling brick faces, and the need to redo work you already paid for.
Professional contractors use temperature-controlled enclosures, indirect heating, and insulated curing blankets to maintain these conditions even when ambient temperatures drop below freezing. The 40°F threshold isn't arbitrary—it represents the point where Portland cement-based mortars can cure properly while lime-based formulations remain workable without risk of freeze damage.
Why Temperature Matters for Historic Brick

Historic brick from pre-war Brooklyn, Bronx, and Long Island buildings presents unique vulnerabilities during cold-weather repair. These older, softer bricks were typically fired at lower temperatures than modern units, making them more porous and susceptible to moisture-related damage.
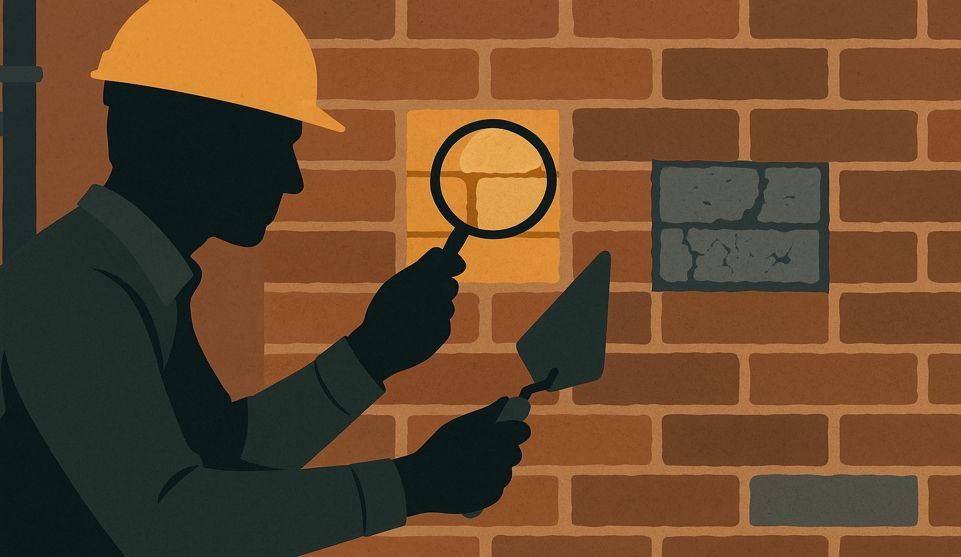
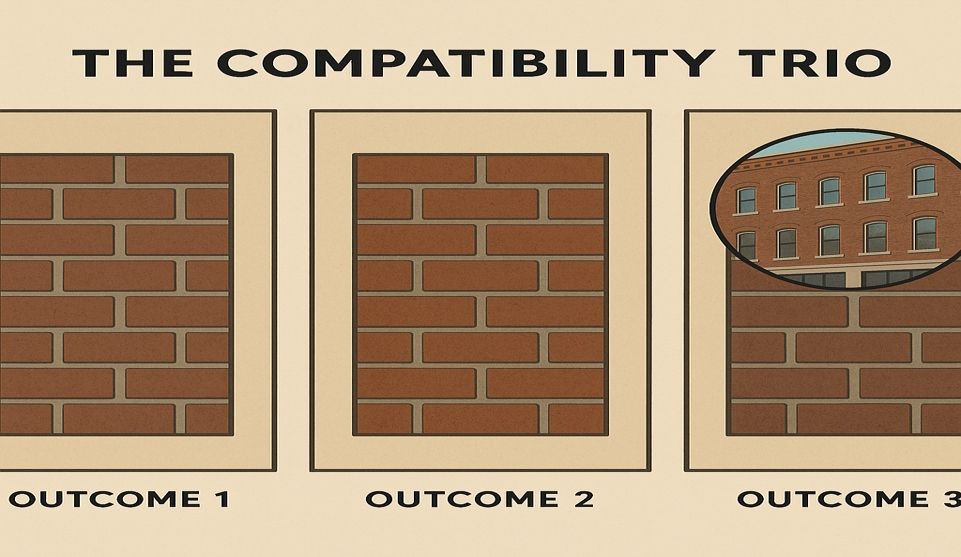
Brick pointing services protect these buildings through compatible mortar formulations—mixes that remain slightly softer and more permeable than the brick itself. This compatibility principle becomes critical in winter because frozen mortar doesn't just fail mechanically; it traps moisture within the wall assembly.
When water freezes inside mortar joints, it expands by roughly 9%. In a properly cured joint with compatible mortar, seasonal freeze-thaw cycles cause manageable stress. But in winter-damaged joints where the bond never fully developed, this expansion can literally pop the face off historic bricks. The softer the brick, the more catastrophic this spalling becomes.
Preservation standards emphasize that mortar should fail before the brick, not the other way around. The mortar-first framework that guides quality restoration work emphasizes breathability—allowing water vapor to escape through joints rather than accumulating within the masonry. Winter repointing done incorrectly with overly hard mortars or improper curing creates the opposite effect: moisture barriers that accelerate deterioration from within.
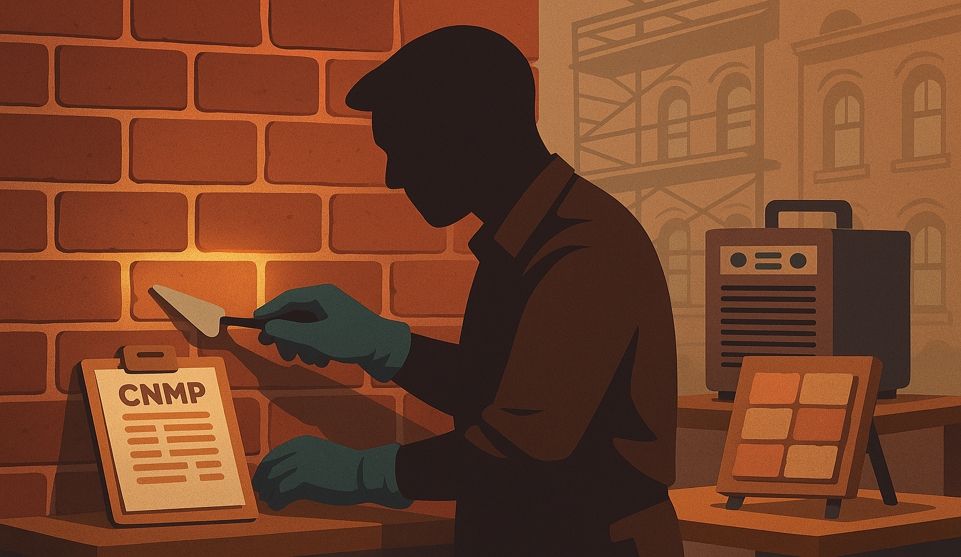
The Winter Playbook: How Pros Make Repointing Work in the Cold
Experienced masonry contractors don't simply wait for 40-degree days and hope for the best. They engineer controlled conditions that allow quality work even when natural weather won't cooperate.
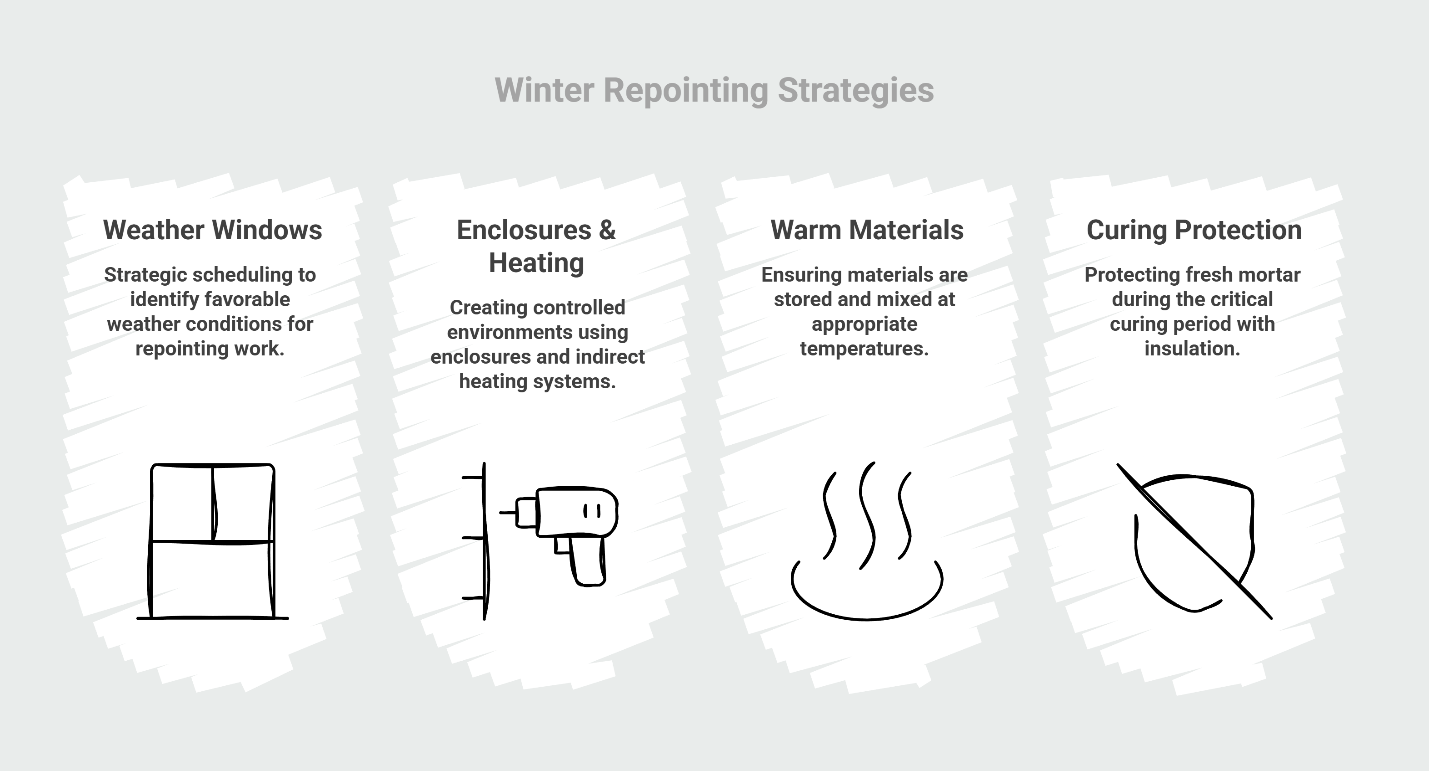
Weather Windows: Strategic Timing
The most straightforward cold-weather approach involves careful scheduling. Professionals monitor extended forecasts to identify multi-day windows where daytime temperatures remain above 40°F and nighttime lows don't drop drastically. Work typically begins late morning after frost clears and stops by mid-afternoon before evening temperatures fall.
Wind chill factors into these calculations significantly. A 45°F day with 20 mph winds pulls heat from fresh mortar faster than a 40°F calm day. Contractors position themselves to work on the building's leeward side when possible, or schedule work during periods of lighter wind.
These natural windows work well for smaller projects—repointing a chimney, addressing a few damaged areas, or handling emergency repairs. Larger facade projects require more robust protection systems.
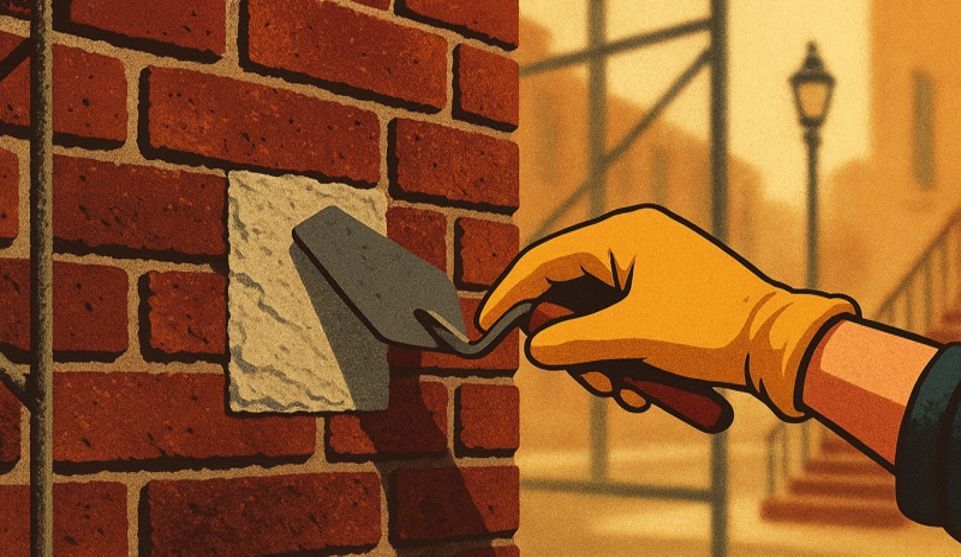
Enclosures & Heating: Creating Controlled Environments
Full-scale winter repointing often demands temporary enclosures. Contractors construct shrink-wrap or tarped scaffolding systems that create greenhouse-like chambers around the work area. Inside these enclosures, indirect-fired heaters maintain consistent temperatures above freezing.
The heating approach matters enormously. Direct flame on fresh mortar or masonry causes rapid, uneven drying that weakens the cure. Professional systems use indirect heat—warming the air within the enclosure while maintaining adequate ventilation to prevent excessive humidity and carbon monoxide accumulation from combustion heaters.
These enclosures add cost and complexity, but they enable reliable winter work by removing dependence on unpredictable weather. The investment makes sense when emergency repairs can't wait or when project schedules demand winter completion.
Warm Materials: Starting Right
Cold materials compromise mortar from the moment of mixing. Sand stored in freezing conditions, water at 35°F, and mortar bags kept in unheated trucks all contribute to a mix that starts below ideal temperature.
Contractors prevent this through simple but essential practices. Sand and dry materials stay stored in heated areas or insulated containers. Mixing water gets warmed to appropriate temperatures within safe limits recommended by manufacturers. The goal is placing mortar that already sits comfortably above 40°F, giving it thermal mass to resist brief cold exposure during application.
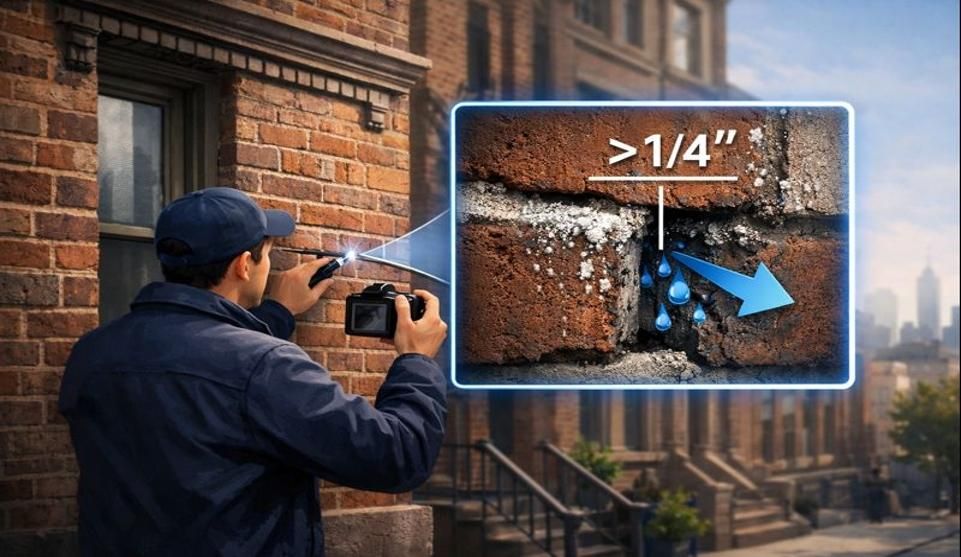
Equally critical: never apply mortar to frozen or frost-covered masonry. The substrate must be warmed and dry. Ice on brick surfaces prevents proper bond, and frozen masonry pulls heat from fresh mortar too rapidly for reliable cure.
Curing Protection: The Critical 48-72 Hours
The first two to three days after placement determine whether repointing succeeds or fails. During this period, the chemical reactions that create mortar strength require both adequate temperature and controlled moisture levels.
Insulated blankets draped over fresh work retain the heat generated during mortar cure—the hydration reaction is mildly exothermic. Combined with enclosure heating, these blankets maintain the 40°F+ threshold through cold nights. Professional guidance recommends protecting walls for 24-48 hours or longer in winter conditions, compared to shorter protection periods during mild weather.
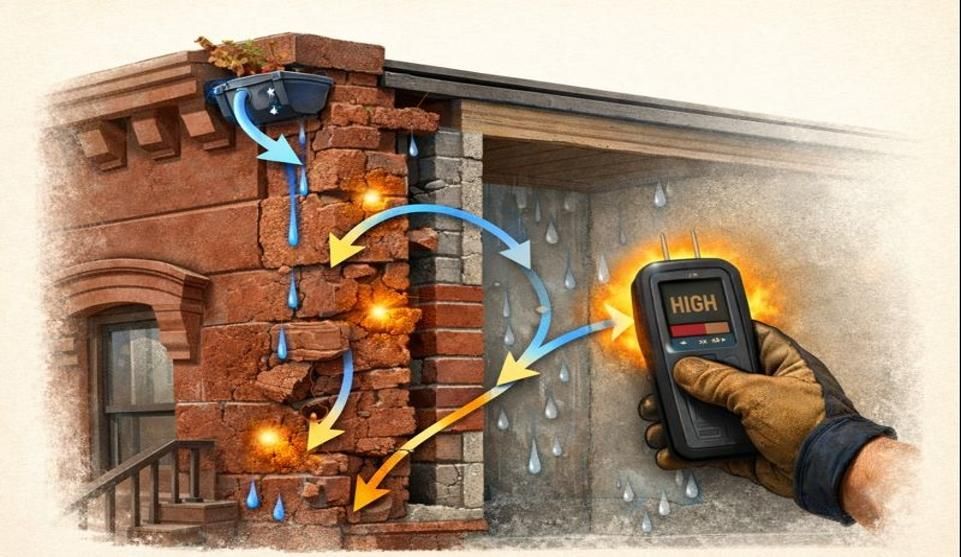
Moisture management during cold-weather cure presents a delicate balance. Mortar needs moisture to cure properly, but winter's low humidity and heating systems can cause rapid surface drying. Contractors must prevent both extremes: flash drying that weakens the surface, and excess moisture that can freeze.
The cure period extends in cold weather. Mortar that achieves workable strength in 3-4 days during warm months may need 5-7 days in winter conditions. Removing protection too early invites failure.
Material Notes for Historic Work
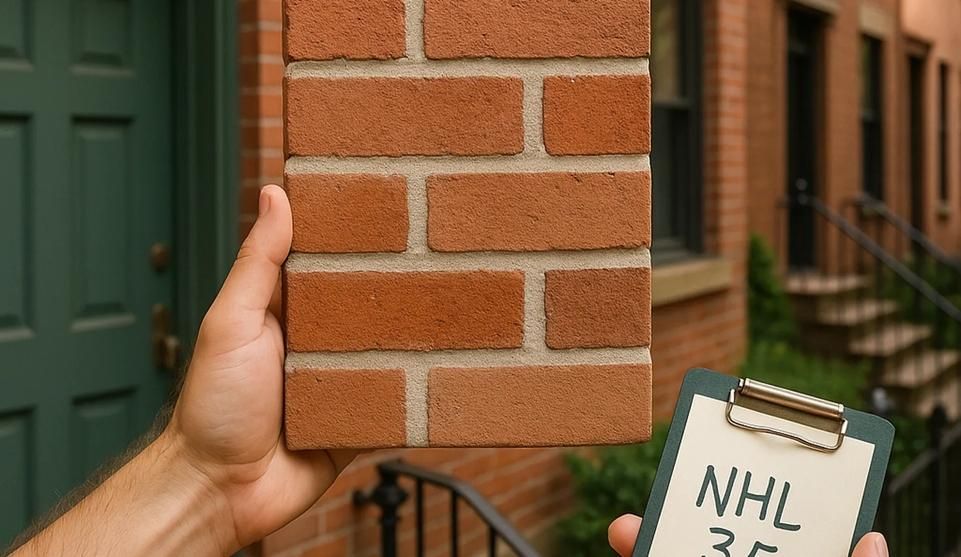
Winter conditions make mortar compatibility even more important. The lime-based or lime-enriched mortars appropriate for soft historic brick already cure more slowly than straight Portland cement mixes. Cold weather compounds this, requiring contractors to resist the temptation to "hot" the mix with extra cement for faster set.
Over-hard mortars trap moisture and create rigid bonds that stress softer brick. In winter, these incompatible joints may initially appear fine but fail during the first spring freeze-thaw cycle. The Before the Makeover guidance emphasizes getting the substrate and joints right before any protective coatings—a principle that becomes even more critical when winter conditions already stress the system.
Proper historic repointing matches the strength and permeability of original mortars. Winter work demands particular attention to these specifications because cold-weather curing failures often manifest as joints that appear sound but lack the breathability historic masonry requires.
When You Should Wait Until Spring
Despite available cold-weather techniques, some situations favor patience over immediate action.
If weather forecasts show sustained sub-freezing stretches without adequate warm windows, and full enclosure systems aren't feasible for your project scope, spring scheduling becomes the practical choice. Small emergency repairs might proceed with localized protection, but comprehensive facade repointing demands consistent conditions that late winter or early spring provide more reliably.
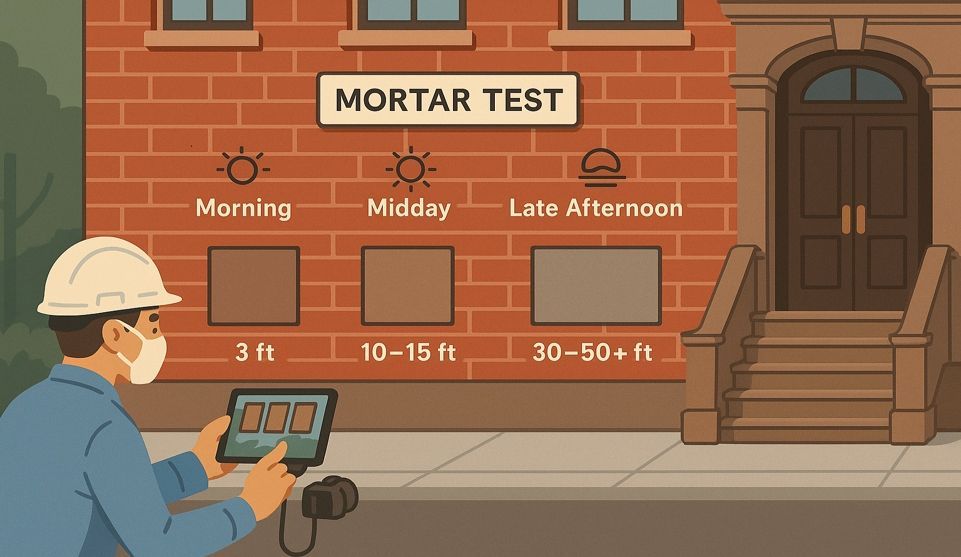
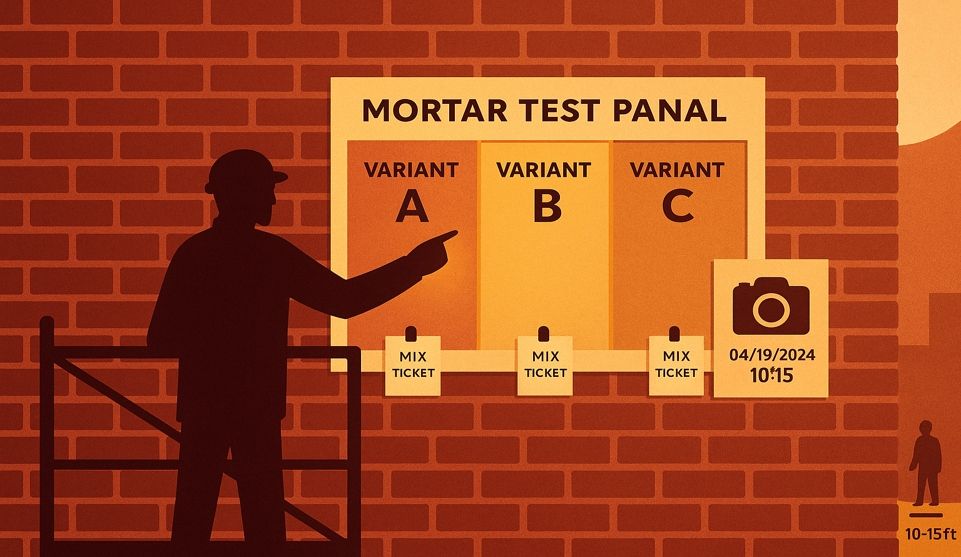
Large-scale projects where color matching and aesthetic approval matter introduce another consideration. Test panels require natural daylight evaluation at multiple times of day to verify mortar color, texture, and joint profile blend seamlessly with original work. Winter's short days and inconsistent light make this evaluation unreliable. You don't want to approve mortar appearance in February's weak light only to discover poor color match when strong May sun illuminates your facade.
The season-by-season guide to brick joint maintenance recommends spring and fall as optimal repointing seasons for precisely these reasons—consistent temperatures, moderate humidity, and reliable working conditions that support quality craftsmanship without expensive environmental controls.
Smart Compromises: Winter Triage Now, Restoration Next Season
When water actively enters your building, waiting until April isn't always practical. A strategic middle path addresses immediate threats while reserving full restoration for better conditions.
Winter triage focuses on critical interventions: sealing active leak paths with temporary weatherproof materials, addressing joints where damage creates immediate structural risk, and implementing stopgap measures that stabilize conditions without attempting comprehensive color-matched restoration.
This approach acknowledges reality—you need the leak stopped, but you also want the final restoration done properly. Schedule your full repointing scope for spring when contractors can execute the color-matched, approval-ready work that historic buildings deserve. The temporary winter repairs buy time without compromising the quality of permanent restoration.
For buildings requiring extensive work, this phased strategy often proves both more economical and more effective than attempting everything during marginal winter conditions.
NYC-Specific Considerations (What to Expect)
Working in Brooklyn, the Bronx, and Long Island's dense neighborhoods adds logistical dimensions to winter repointing projects.
Scaffolding and enclosure systems require permits and proper engineering. Winter installations demand extra attention to snow load calculations and wind bracing. Your contractor should handle these requirements, but expect longer setup periods than summer projects require.
Neighbor considerations matter more in winter. Enclosed, heated work areas generate noise from heaters and air handling equipment. The What to Expect During Brick Repointing guide covers these logistics in detail—work windows typically run 7 AM to 6 PM, dust control becomes more challenging in enclosed spaces, and communication with adjacent property owners prevents conflicts.
Winter timelines extend. What might take 3-4 days in July could require 5-7 days in January due to slower cure rates and weather delays. Material delivery and disposal become more complicated when snow and ice restrict access.
These realities don't make winter work impossible, but they require contractors with experience navigating urban winter conditions and the resources to handle complications when weather doesn't cooperate.
What Not to Do (Common Winter Mistakes)
Certain approaches to cold-weather repointing consistently fail, yet desperate homeowners and inexperienced contractors repeat them every winter.
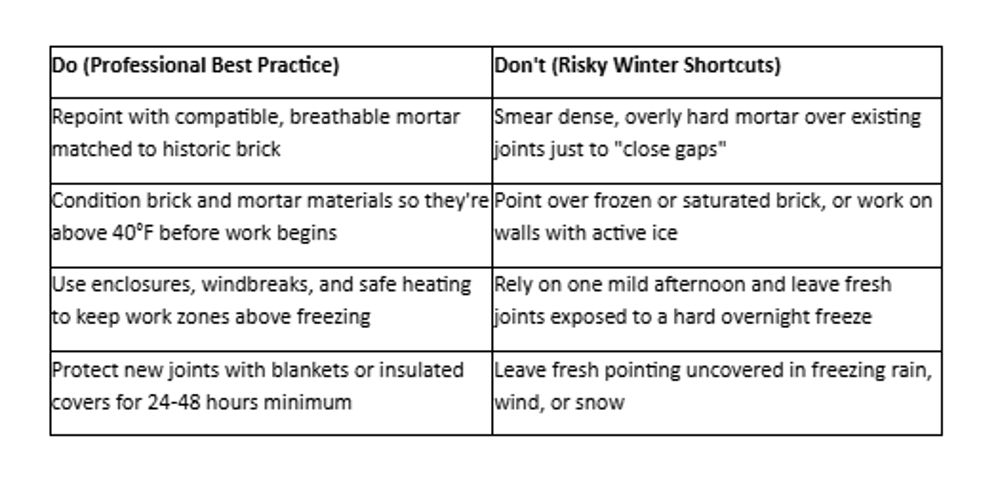
Across all of these, one principle runs through: mortar must be softer and more forgiving than the historic brick, and both materials must be protected from freeze-thaw during early curing. These mistakes all stem from trying to shortcut the fundamental requirements that quality repointing demands. Winter work requires more patience and protection, not less.
Next Steps (Local Help in Brooklyn, Bronx, Long Island)
Understanding winter repointing possibilities represents the first step. The second is getting your specific situation professionally evaluated.
Start with photos. Text clear images of your damaged areas, water stains, and brick condition to (718) 849-8999 for a same-day winter assessment. This FREE photo estimate service lets experienced contractors evaluate your urgency, determine whether winter intervention makes sense for your scope, and outline the protection measures your project requires.
For properties where immediate action seems necessary, schedule a free on-site inspection. An experienced eye can identify whether you're facing emergency conditions requiring immediate triage or whether managed spring restoration serves your building better.
The evaluation should result in a clear plan: photo estimate → on-site inspection → scope determination and seasonal timing recommendation. You'll understand your options, costs, and the specific approach recommended for your building's conditions.
City Suburb serves Brooklyn, the Bronx, and Long Island with brick pointing services that prioritize historic compatibility and proper technique regardless of season. Our approach emphasizes temperature-safe methods, lime-leaning mortar formulations matched to your brick, and proper curing protocols—not quick patches that trap moisture or crack during freeze-thaw.
Winter emergencies happen. When they do, work with contractors who understand both the possibilities and limitations of cold-weather masonry repair. The right approach protects your building while acknowledging that some aspects of comprehensive restoration simply perform better in spring's consistent conditions. Contact City Suburb for guidance specific to your situation, timeline, and building conditions.
Frequently Asked Questions
Can I repoint if it's below freezing tonight?
If temperatures will drop below 32°F within 72 hours of placement, you need either heated enclosures with adequate protection or should wait for better conditions. The initial cure period is critical—even brief freezing during the first three days can permanently compromise joint strength.
How long does winter curing take vs. spring?
Winter curing typically requires 5-7 days before mortar reaches adequate strength, compared to 3-4 days during warm weather. Cold temperatures slow the chemical reactions that create mortar strength, demanding extended protection periods and patience. Industry guidance notes that hydration slows markedly as temperatures drop and may pause if materials fall below 40°F.
Is tenting noisy/unsightly for neighbors?
Enclosed work areas do generate noise from heaters and equipment, typically during standard work hours (7 AM-6 PM). Visual impact lasts for the project duration—usually one to two weeks for moderate scopes. Professional contractors communicate with neighbors beforehand and maintain clean, organized sites.
Will winter work cost more than spring work?
Winter projects typically involve additional expenses for enclosures, heating, extended labor hours, and longer cure protection. The specific cost difference varies based on project scope, protection requirements, and weather conditions during the work period. Emergency repairs may justify these incremental costs, while planned restoration projects often benefit from spring scheduling.
Can I do a small emergency area now and the rest later?
Yes—this phased approach often makes excellent sense. Address critical leak points or structurally compromised sections immediately, then schedule comprehensive color-matched restoration for spring when consistent conditions support quality workmanship. Temporary repairs should focus on function over appearance, with the understanding that full aesthetic restoration follows later.
Our Editorial Process
Our expert team uses AI tools to help organize and structure our initial drafts. Every piece is then extensively rewritten, fact-checked, and enriched with first-hand insights and experiences by expert humans on our Insights Team to ensure accuracy and clarity.
About the City Suburb Insights Team
The City Suburb Insights Team is our dedicated engine for synthesizing complex topics into clear, helpful guides. While our content is thoroughly reviewed for clarity and accuracy, it is for informational purposes and should not replace professional advice.


Protecting Tenants and Pedestrians: A Framework for Scaffolding and Site Safety During Facade Repair