Restoring the Stoop: A Guide to Brownstone Façade Repair for Entryways
📌 Key Takeaways
Stoop deterioration signals active water damage that accelerates without intervention, making early assessment critical for safety and cost control.
- Check Nine Safety Triggers Now: Loose treads, crumbling front edges, uneven step heights, widening cracks, persistent dampness, wobbly railings, pooling water, peeling layers, or separating patches each warrant immediate professional inspection.
- Damage Type Dictates Repair Method: Surface wear may need patching, edge failures require profile rebuilding, and structural movement demands full step replacement—attempting the wrong fix wastes money and shortens lifespan.
- Water Management Outranks Surface Repair: Fixing visible damage without addressing roof drainage, failed mortar joints, or pooling issues guarantees repeated failures regardless of material quality.
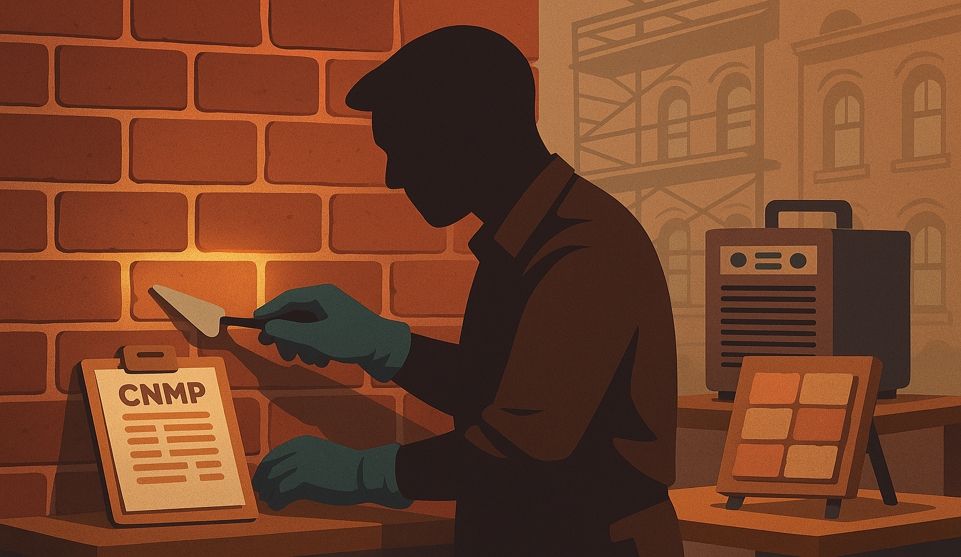
- Historic Districts Require LPC Authorization: Properties in NYC landmark areas need Landmarks Preservation Commission permits for nearly all exterior masonry work, including minor patching, though expedited reviews exist for routine repairs.
- CMA Protects Better Than Standard De-Icers: Calcium Magnesium Acetate avoids the moisture-retention problems of calcium chloride, which keeps porous brownstone saturated and worsens freeze-thaw damage.
Controlled moisture equals decades of stable use.
Brooklyn and Bronx homeowners facing stoop deterioration will gain immediate risk clarity and repair direction here, preparing them for the detailed restoration process that follows.
You're sweeping the stoop. Again. The same sandy pile that wasn't there yesterday collects at the edge. You crouch down to look closer—the corner is flaking, and when you press the front edge with your palm, it feels uneven, almost hollow. You're not trying to renovate. You just want your entryway to feel solid and look right.
The stoop is the handshake of your home. When it starts to fail, it's more than cosmetic—it's a safety concern, a water problem, and often a warning sign that needs attention before small issues become expensive emergencies. In historic neighborhoods across the NYC metro area, that slow change is a familiar pattern—especially after seasons of rain, snow, and freeze-thaw cycles. This guide will help you assess the risk, understand your repair options, and know what to expect from a professional restoration that actually lasts.
Why Stoops Break Down First (and Why It's Not Your Fault)
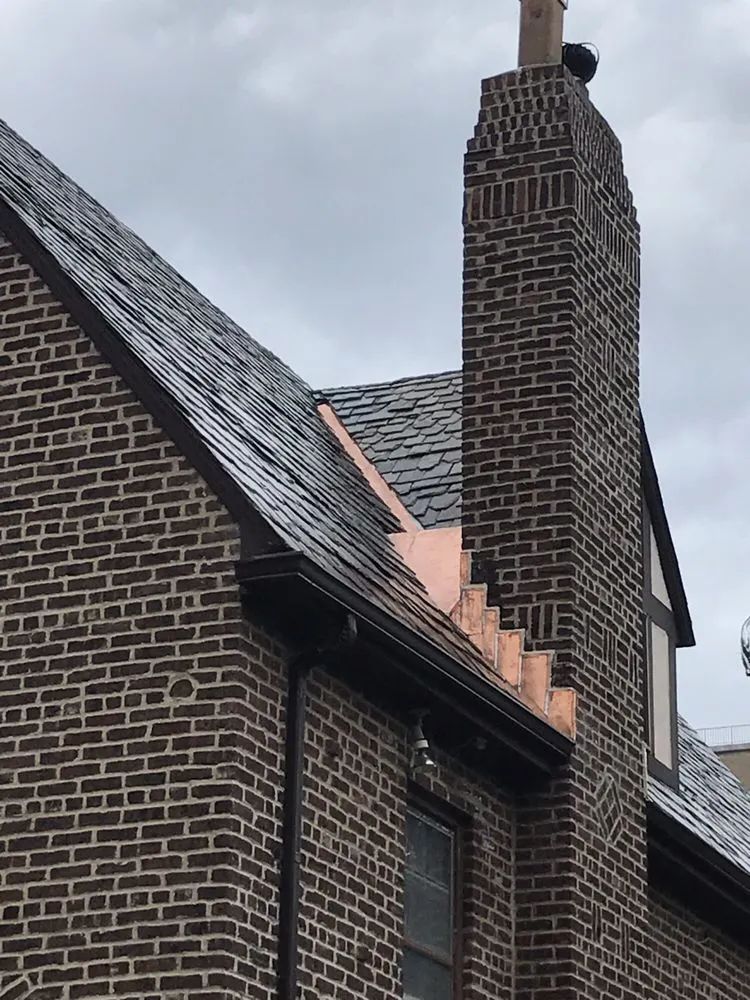
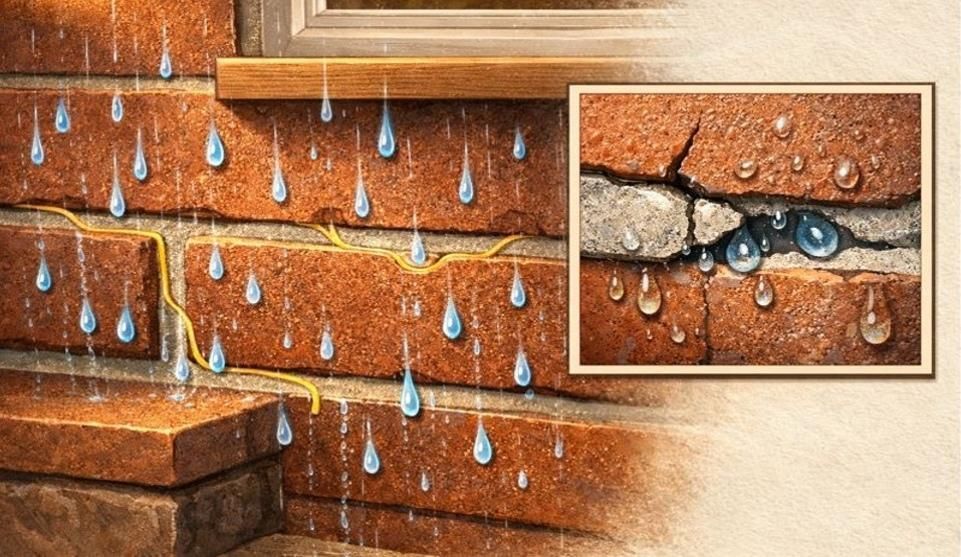
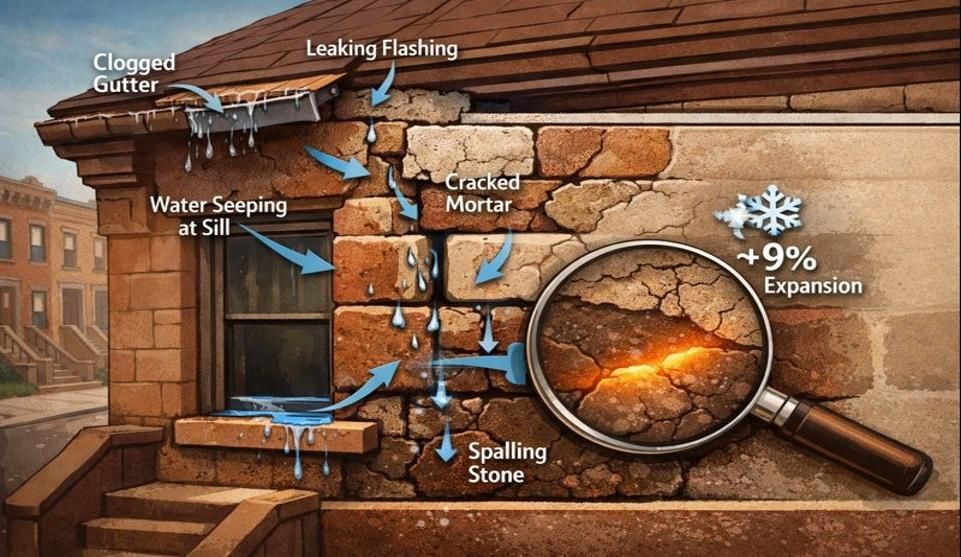
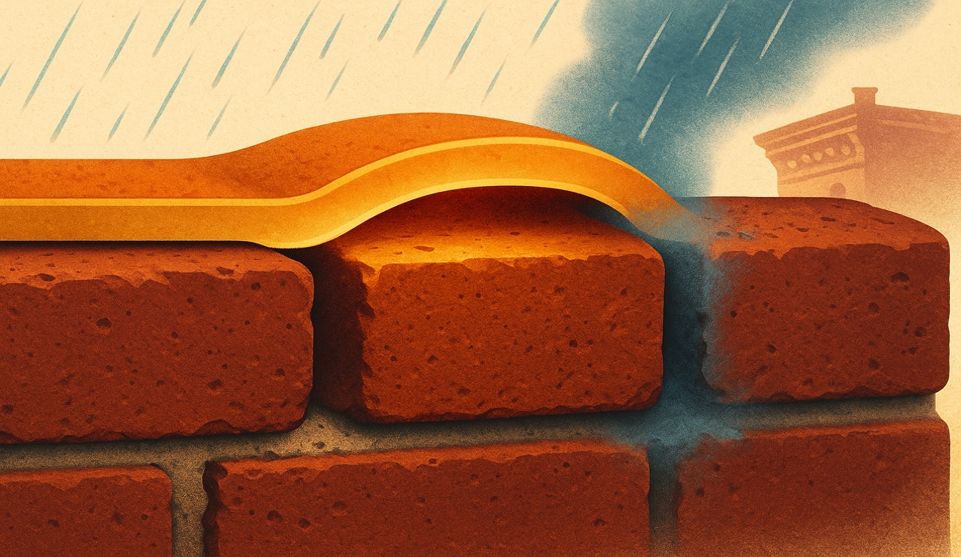
Your stoop takes a beating that no other part of your brownstone endures. Constant foot traffic, pooling water at the edges, and the relentless freeze-thaw cycles all work together to break down even well-built masonry. Add in de-icing salts, and you've created the perfect environment for deterioration.
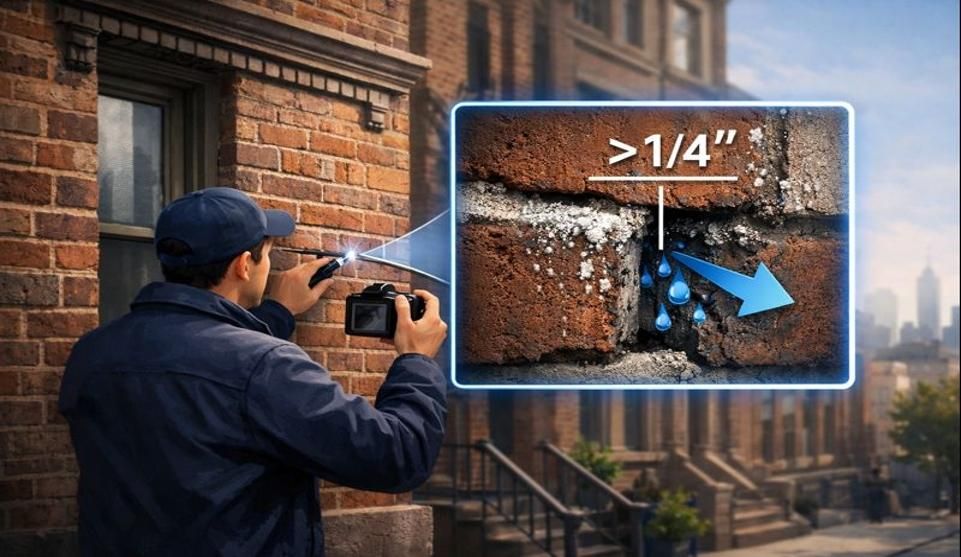
Here's what happens beneath the surface: Water seeps into tiny cracks or gaps in the mortar joints. When temperatures drop, that water freezes and expands, pushing the stone's layers apart from the inside. When it thaws, the surface is a little weaker. Repeat this cycle a few dozen times each winter, and you get spalling—the peeling, flaking layers you're seeing now.
Past "patch jobs" often make things worse. If a previous repair used modern, hard cement that doesn't flex with the historic brownstone, it can trap moisture underneath and accelerate the damage. That's why you might see an old patch delaminating—pulling away from the stone—even though it looked fine when it was first applied.
If you're seeing grit or flakes, that's your stoop telling you water is winning.
The Stoop Safety Checklist (Check This Today)
Use this checklist to assess your stoop's condition right now. If any of these conditions are present, treat it as a safety issue and schedule a professional assessment:
☐ Loose or rocking tread – Press down on each step. If it moves or sounds hollow, the structural bond may be compromised.
☐ Crumbling nosing (front edge) – The front edge of each step should be solid. Missing chunks or soft, sandy material here create serious trip hazards.
☐ Uneven riser heights – Measure the vertical height of each step. If one is noticeably taller or shorter than the others, it's a tripping risk, especially in low light.
☐ Cracks that widen seasonally – Mark the ends of any cracks with tape and check them monthly. If they're growing, the damage is active.
☐ Slippery surfaces or persistent dampness – Algae, moss, or areas that stay wet long after rain suggest drainage problems that will accelerate deterioration.
☐ Loose handrail posts or wobbling railing – Test the railing by applying firm pressure. If the posts move, the anchoring system may be compromised.
☐ Pooling water at the landing – Water should drain away from the stoop, not collect on it. Persistent puddles mean the problem is feeding itself.
☐ Spalling (peeling/flaking layers) – Even small areas of spalling expose softer substrate underneath, creating a cascade effect as more moisture penetrates.
☐ Exposed substrate or delaminating patches – If you can see layers separating or previous repairs pulling away, the existing work has failed and needs professional intervention.
If any of these conditions are true, don't wait for the next season. A Brooklyn masonry contractor can provide a free inspection to determine the scope and urgency of the repair.
What Kind of Stoop Damage Do You Have?
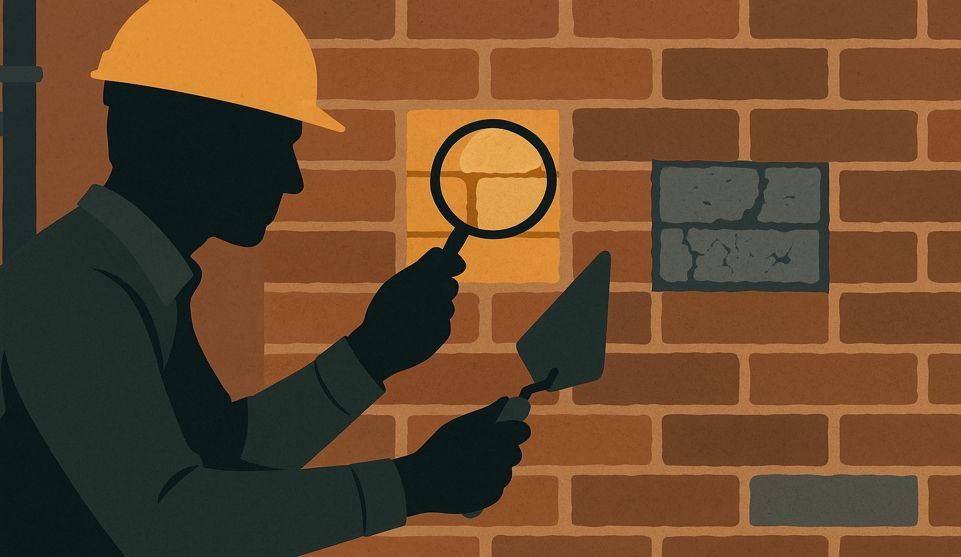
Not all stoop problems require the same fix. Understanding which category your damage falls into will help you have more informed conversations with contractors and set realistic expectations.
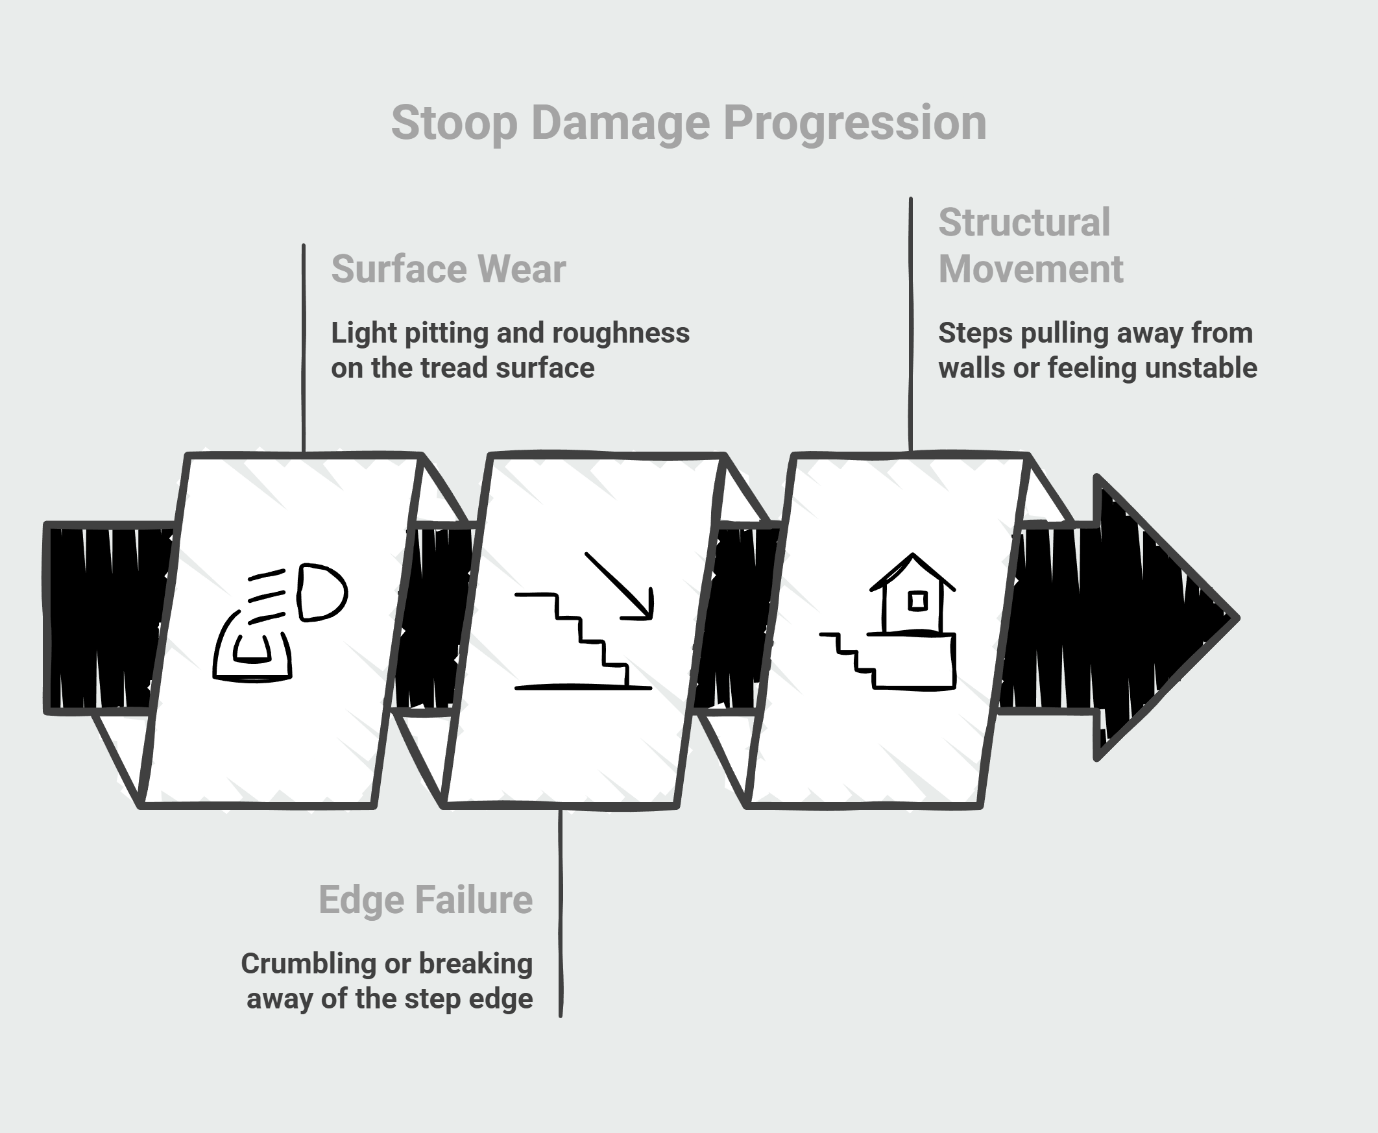
Surface wear (cosmetic but can escalate): This is the earliest stage. You'll see light pitting, minor roughness, or small flakes on the tread surface. The edges are still solid, and the steps don't move. While this might seem purely cosmetic, surface wear accelerates once it starts—the rougher the surface, the more water and debris it holds.
Edge or nosing failure (high trip risk): When the front edge of a step starts to crumble or break away, you've entered a safety-critical zone. Even a small missing chunk at the nosing creates an uneven surface that catches toes, especially in dim light or bad weather. This level of damage often requires rebuilding the profiles—essentially sculpting new edges onto the existing steps using compatible materials.
Structural movement (major intervention required): If you notice steps pulling away from the cheek walls (the vertical walls on either side of the stoop), major diagonal cracks, or entire sections that feel unstable, this is a structural issue. It could be settlement of the foundation, failure of the underlying support, or long-term water damage that has compromised the assembly. This level of damage usually requires step replacement, not patching.
Patching vs. Resurfacing vs. Step Replacement (How to Choose)
A qualified mason evaluates several factors before recommending a repair approach: the extent of damage, the condition of the substrate, the geometry of the existing steps, and the history of previous repairs. Here's how professionals typically categorize the options:
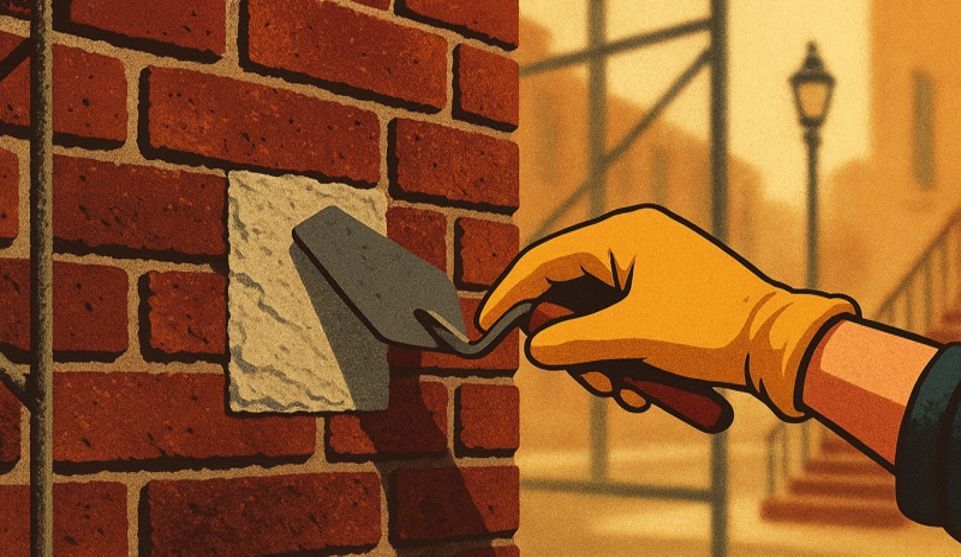
Localized patching works when you have small, isolated areas of spalling and the underlying stone is still sound. The damaged material is carefully removed, the area is prepared for proper bonding, and a compatible repair mortar is applied and shaped to match the surrounding surface. Patching is cost-effective for early-stage damage, but it's not a universal solution. As explained in why a patch job can be the most expensive repair, attempting to patch structural problems or widespread deterioration often leads to repeated failures.
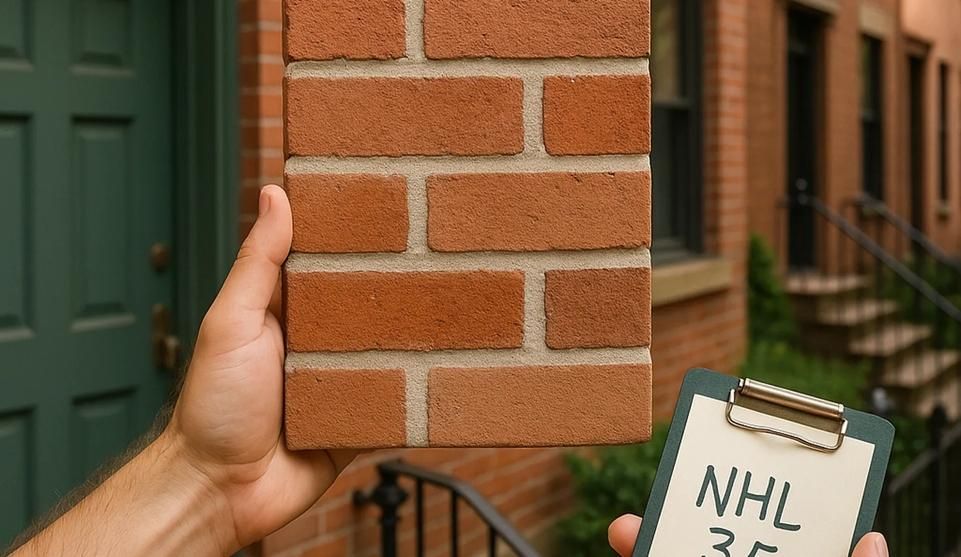
Resurfacing or build-up is appropriate when multiple treads are worn, edges are failing across several steps, or you need to restore a uniform finish. This involves building up the worn surfaces in layers, rebuilding the nosing profiles, and creating a cohesive appearance. The key is using materials that are compatible with historic brownstone—not too hard, not impermeable—so they move and breathe with the original material. The National Park Service recommends that repair mortars should be softer than the historic masonry they're protecting, allowing the mortar to act as a sacrificial layer.
Step replacement becomes necessary when the substrate itself is compromised, when repeated repairs have failed, or when the geometry of the steps is unsafe (uneven risers, inadequate depth). Replacement means removing the damaged treads and risers and installing new components that match the historic character while providing a stable, code-compliant structure. This is the most involved option, but it's often the most durable when damage has progressed beyond surface-level issues.
The decision isn't always clear-cut. A skilled masonry services provider will assess water sources (damaged gutters, improper grading, failed brick pointing in adjacent walls) before recommending the repair scope, because fixing the symptom without addressing the cause just resets the clock on failure.
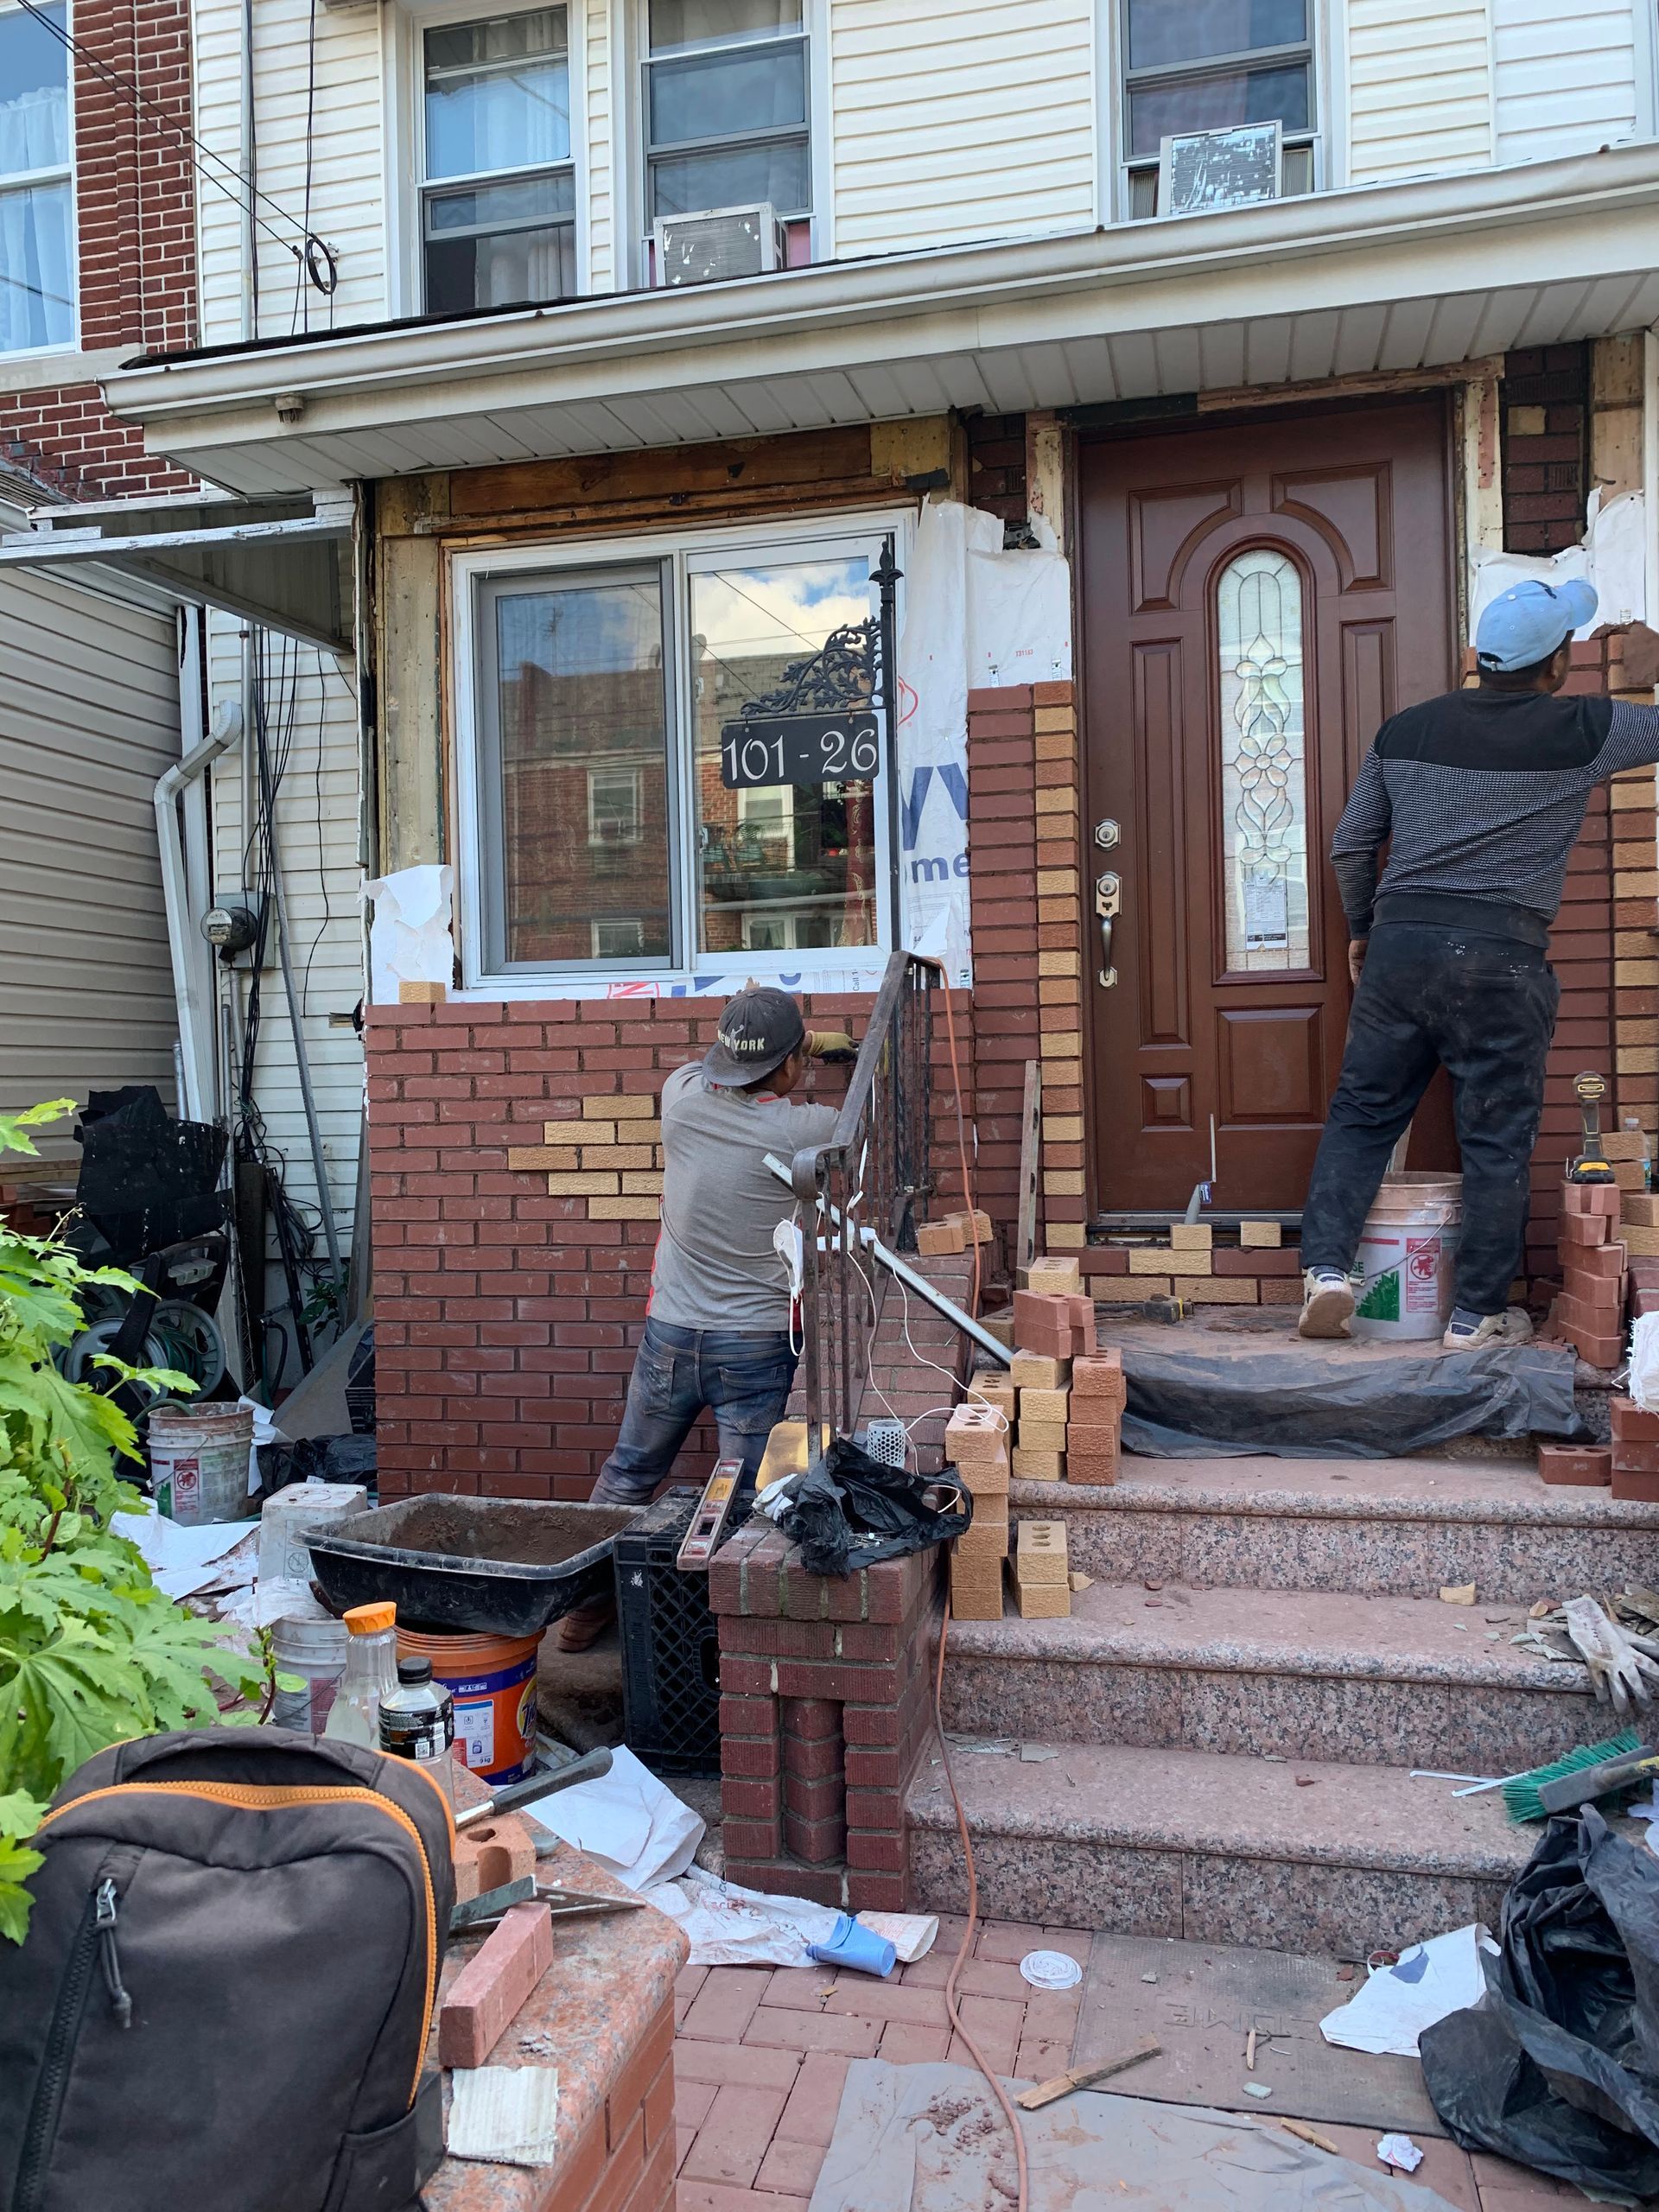
What Professional Stoop Restoration Typically Looks Like (Start to Finish)
Understanding the process helps set realistic expectations about timing, disruption, and results. Here's what a thorough stoop restoration typically involves:
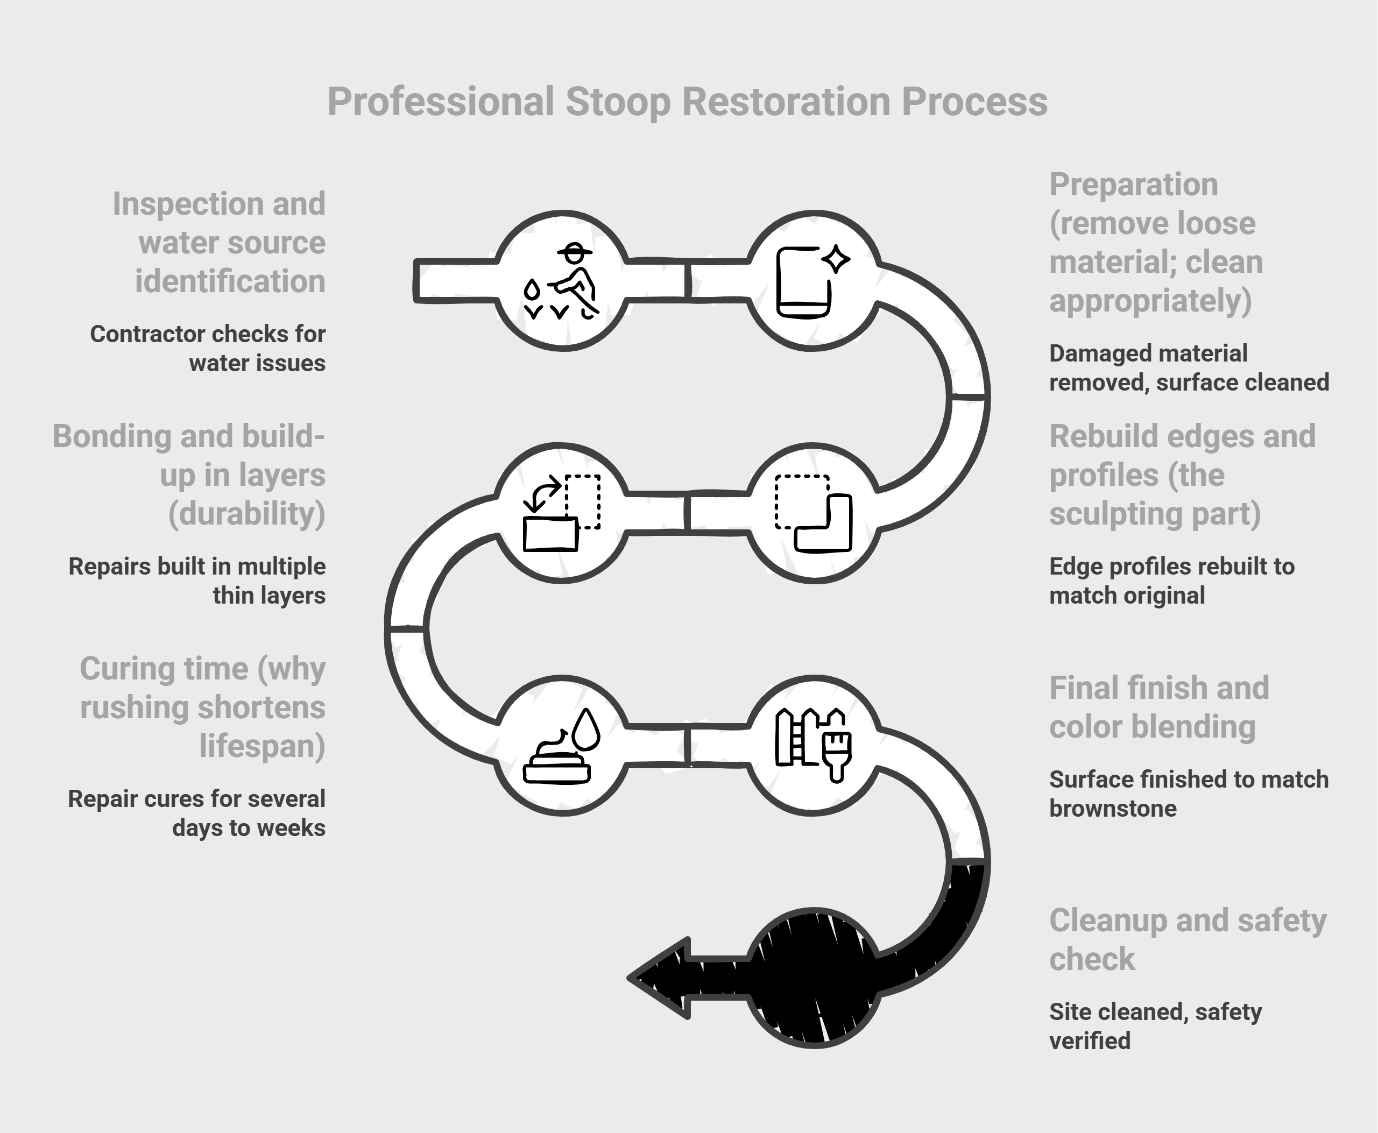
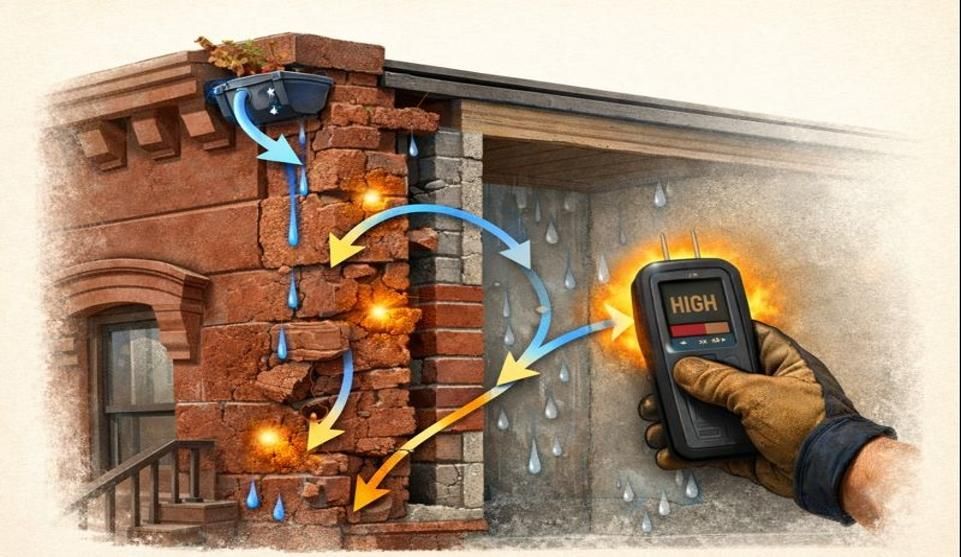
1. Inspection and water source identification: Before any repair work begins, a qualified contractor identifies where water is coming from. This might include checking roof drainage, examining the grading around the foundation, inspecting mortar joints in adjacent walls, and assessing whether failed brick pointing is allowing water intrusion. Fixing the stoop without addressing the water problem guarantees you'll be doing this again.
2. Preparation (remove loose material; clean appropriately): Damaged material is carefully removed without causing additional stress to the surrounding stone. The surface is cleaned to ensure proper bonding—but not with harsh methods. Aggressive techniques like certain pressure washing approaches can drive water deeper into the masonry or damage the historic surface.
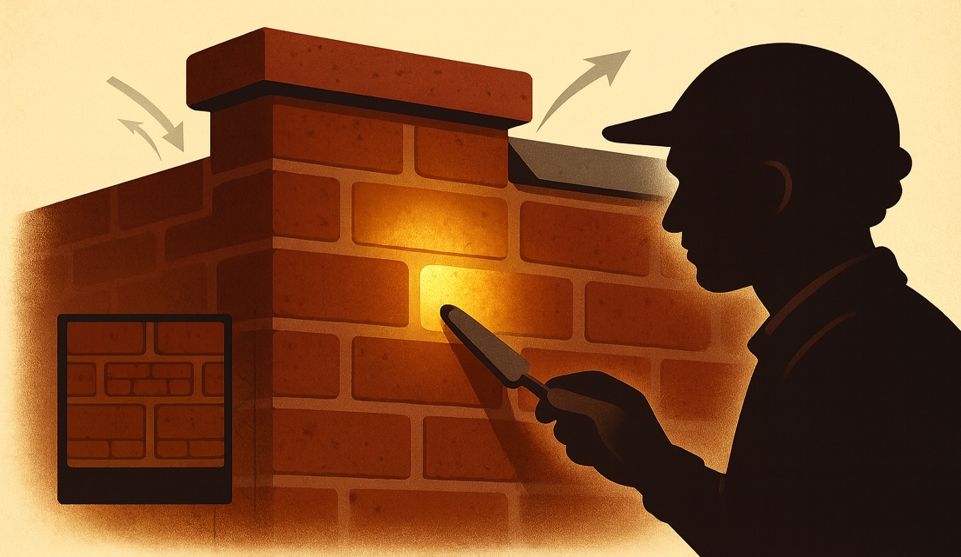
3. Rebuild edges and profiles (the sculpting part): For edge failures, the contractor rebuilds the nosing profiles using techniques that replicate the original geometry. This is where craftsmanship matters—the new edge needs to match the sight lines and proportions of the historic detail.
4. Bonding and build-up in layers (durability): Proper repairs are built up in multiple thin layers rather than one thick application. Each layer needs to cure before the next is applied. This approach creates better adhesion and allows the repair to move naturally with the original material as temperatures change.
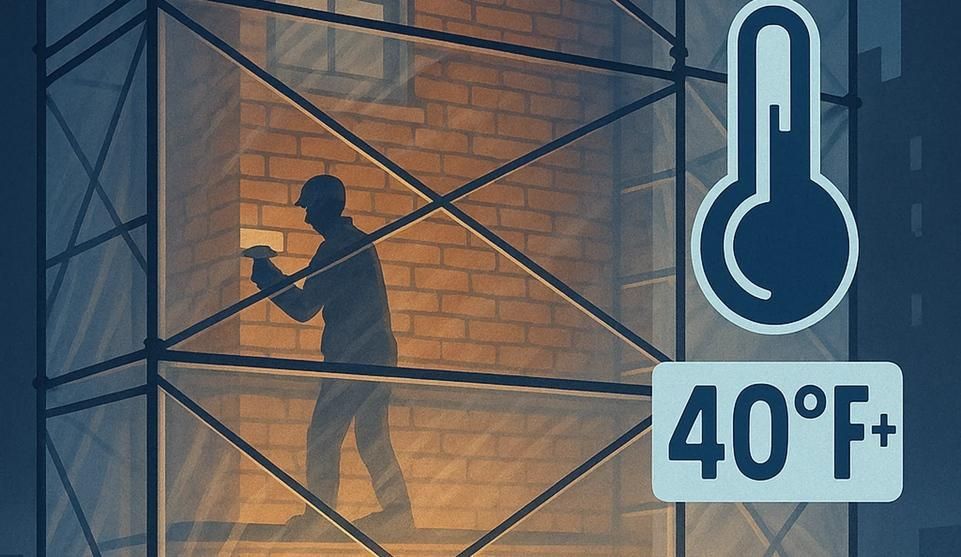
5. Curing time (why rushing shortens lifespan): This is the part that requires patience. Depending on the materials used and weather conditions, full cure times can range from several days to a few weeks. Rushing this by exposing the repair to foot traffic or moisture too soon compromises the bond and shortens the lifespan of the work.
6. Final finish and color blending: The final surface is finished to match the texture and appearance of the surrounding brownstone. Color matching is part art, part science—the goal is a repair that's durable but doesn't announce itself.
7. Cleanup and safety check: A professional crew leaves the site clean and verifies that all edges are smooth, railings are secure, and the work area is safe for immediate use (after appropriate curing).
For a sense of what this looks like in practice, you can explore completed projects in our project gallery.
How to Keep Your Stoop from Failing Again (Safe Maintenance for Brownstone)
Brownstone is sometimes compared to skin—when water gets under it, it peels. That simple image captures an important truth: moisture management drives longevity. Once the repair is complete, a few simple habits will extend its lifespan and protect your investment.
Keep roof drainage away from the façade and stoop. Gutters and downspouts should direct water away from the building, not pour it onto the stoop or adjacent masonry. This is often the single most important factor in preventing repeat failures.
Use gentle cleaning methods only. Brownstone is softer than many modern materials. Avoid harsh chemicals, stiff wire brushes, and aggressive pressure washing. A soft-bristle brush and water are usually sufficient for routine maintenance.
Be cautious with de-icing products. If you must use a de-icer, Calcium Magnesium Acetate (CMA) is widely considered the safest option for historic masonry. While calcium chloride is effective at lower temperatures than standard rock salt, it is highly hygroscopic—meaning it attracts and holds moisture. This can keep the stone damp and potentially increase freeze-thaw stress over time. Sand or clean kitty litter provide traction without chemical exposure, making them the preferred choice for routine winter conditions. Reserve chemical de-icers only for severe ice situations.
Perform seasonal visual checks. Walk your stoop every few months and look for the same warning signs from the safety checklist: new cracks, flaking surfaces, loose edges, or areas where water pools. Catching small problems early prevents major repairs later.
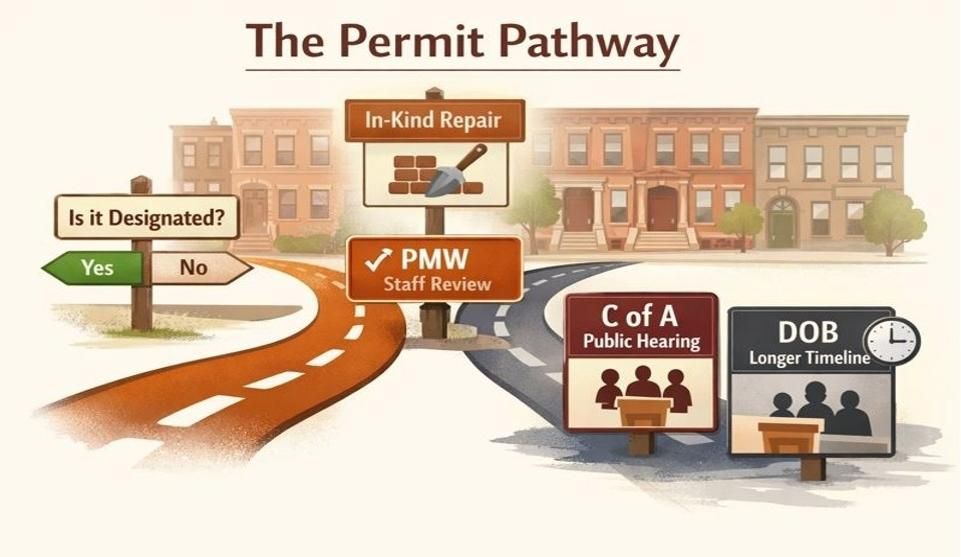
NYC Permits and Historic Districts
Permit requirements depend on the scope of work and whether your building is located in a designated historic district. While "ordinary repairs" often bypass full Department of Buildings (DOB) work permits, properties in designated historic districts operate under stricter rules. In these areas, almost all exterior masonry work—including patching and resurfacing—requires authorization from the NYC Landmarks Preservation Commission (LPC). Typically, this involves filing for a "Permit for Minor Work" or a "Certificate of No Effect," which are expedited reviews rather than full public hearings. However, for non-landmarked buildings, minor maintenance usually does not trigger a DOB permit requirement unless structural elements are being replaced.
This isn't as intimidating as it sounds. A qualified contractor experienced with historic masonry in the region will know the local requirements and can often handle the permitting process as part of the project. The goal of these regulations is preservation—ensuring repairs respect the building's character and are done correctly.
If you're unsure about your property's status, your contractor can verify whether you're in a historic district and what approvals, if any, are needed before work begins.
Next Step
Your stoop doesn't have to be a source of worry. With the right assessment, compatible materials, and patient craftsmanship, a professional restoration can give you decades of safe, solid use while preserving the historic character of your home.
"Front of the house brownstone repair… Happy with their services." — Bernetta W
If you'd like to see how this work comes together, explore our project gallery to view completed brownstone restorations across Brooklyn, the Bronx, and Long Island. When you're ready for a professional assessment, request a FREE photo estimate—you can submit photos of your stoop and receive an initial evaluation without an on-site visit. For a more detailed inspection, we also offer free on-site assessments to evaluate the full scope and provide a clear path forward.
Peace of mind starts with knowing exactly what you're dealing with—and having a plan that respects both your home's history and your family's safety.
Disclaimer: This guide is for informational purposes and should not replace professional advice. Stoop repair involves safety considerations and technical judgments that require in-person evaluation by a qualified masonry contractor.
Our Editorial Process: Our expert team uses AI tools to help synthesize complex topics and ensure our guides are comprehensive and easy to understand. All content is reviewed and refined by the City SuburbInc team to ensure accuracy, clarity, and practical value.
By: The City SuburbInc Insights Team


Protecting Tenants and Pedestrians: A Framework for Scaffolding and Site Safety During Facade Repair